

My dearest friends, it has been too long! I am ashamed to say that this seems to be a yearly affair that I update this blog. If you want to see my daily updates, please find me on Instagram: @amigurumei 🙂
Today’s post has been something I’ve wanted to do for the longest time! And I finally sat down, and I did it!
The FREE PATTERN for Mei-chan is now here for you to enjoy!
You may remember Mei-chan from when I first started this blog, almost 10 years ago! She was a fuzzy character I created, inspired by my love for Studio Ghibli and My Neighbour Totoro.
I redid her pattern from scratch and created a bigger Mei-chan, and I love her so much! She will be a permanent fixture on my craft space for sure!
I hope you’ll enjoy making her!
*Do note that as this pattern is free, I hope that you’ll not distribute it without permission or resell it on any sites. You can, of course, sell any doll you make from this pattern 🙂

Mei-chan the Amigurumei Mascot
Skill level: Intermediate
Measurements: 27.5cm tall x 17cm wide
Abbreviations
Ch: chain
Sc: single crochet
Inc: increase
Hdc: half double crochet
Inv dec: invisible decrease
Ss: slip stitch
BLO: back loops only
*This pattern is written in US crochet terms.
Materials
3mm, 4mm, 5.5mm, & 6mm hook
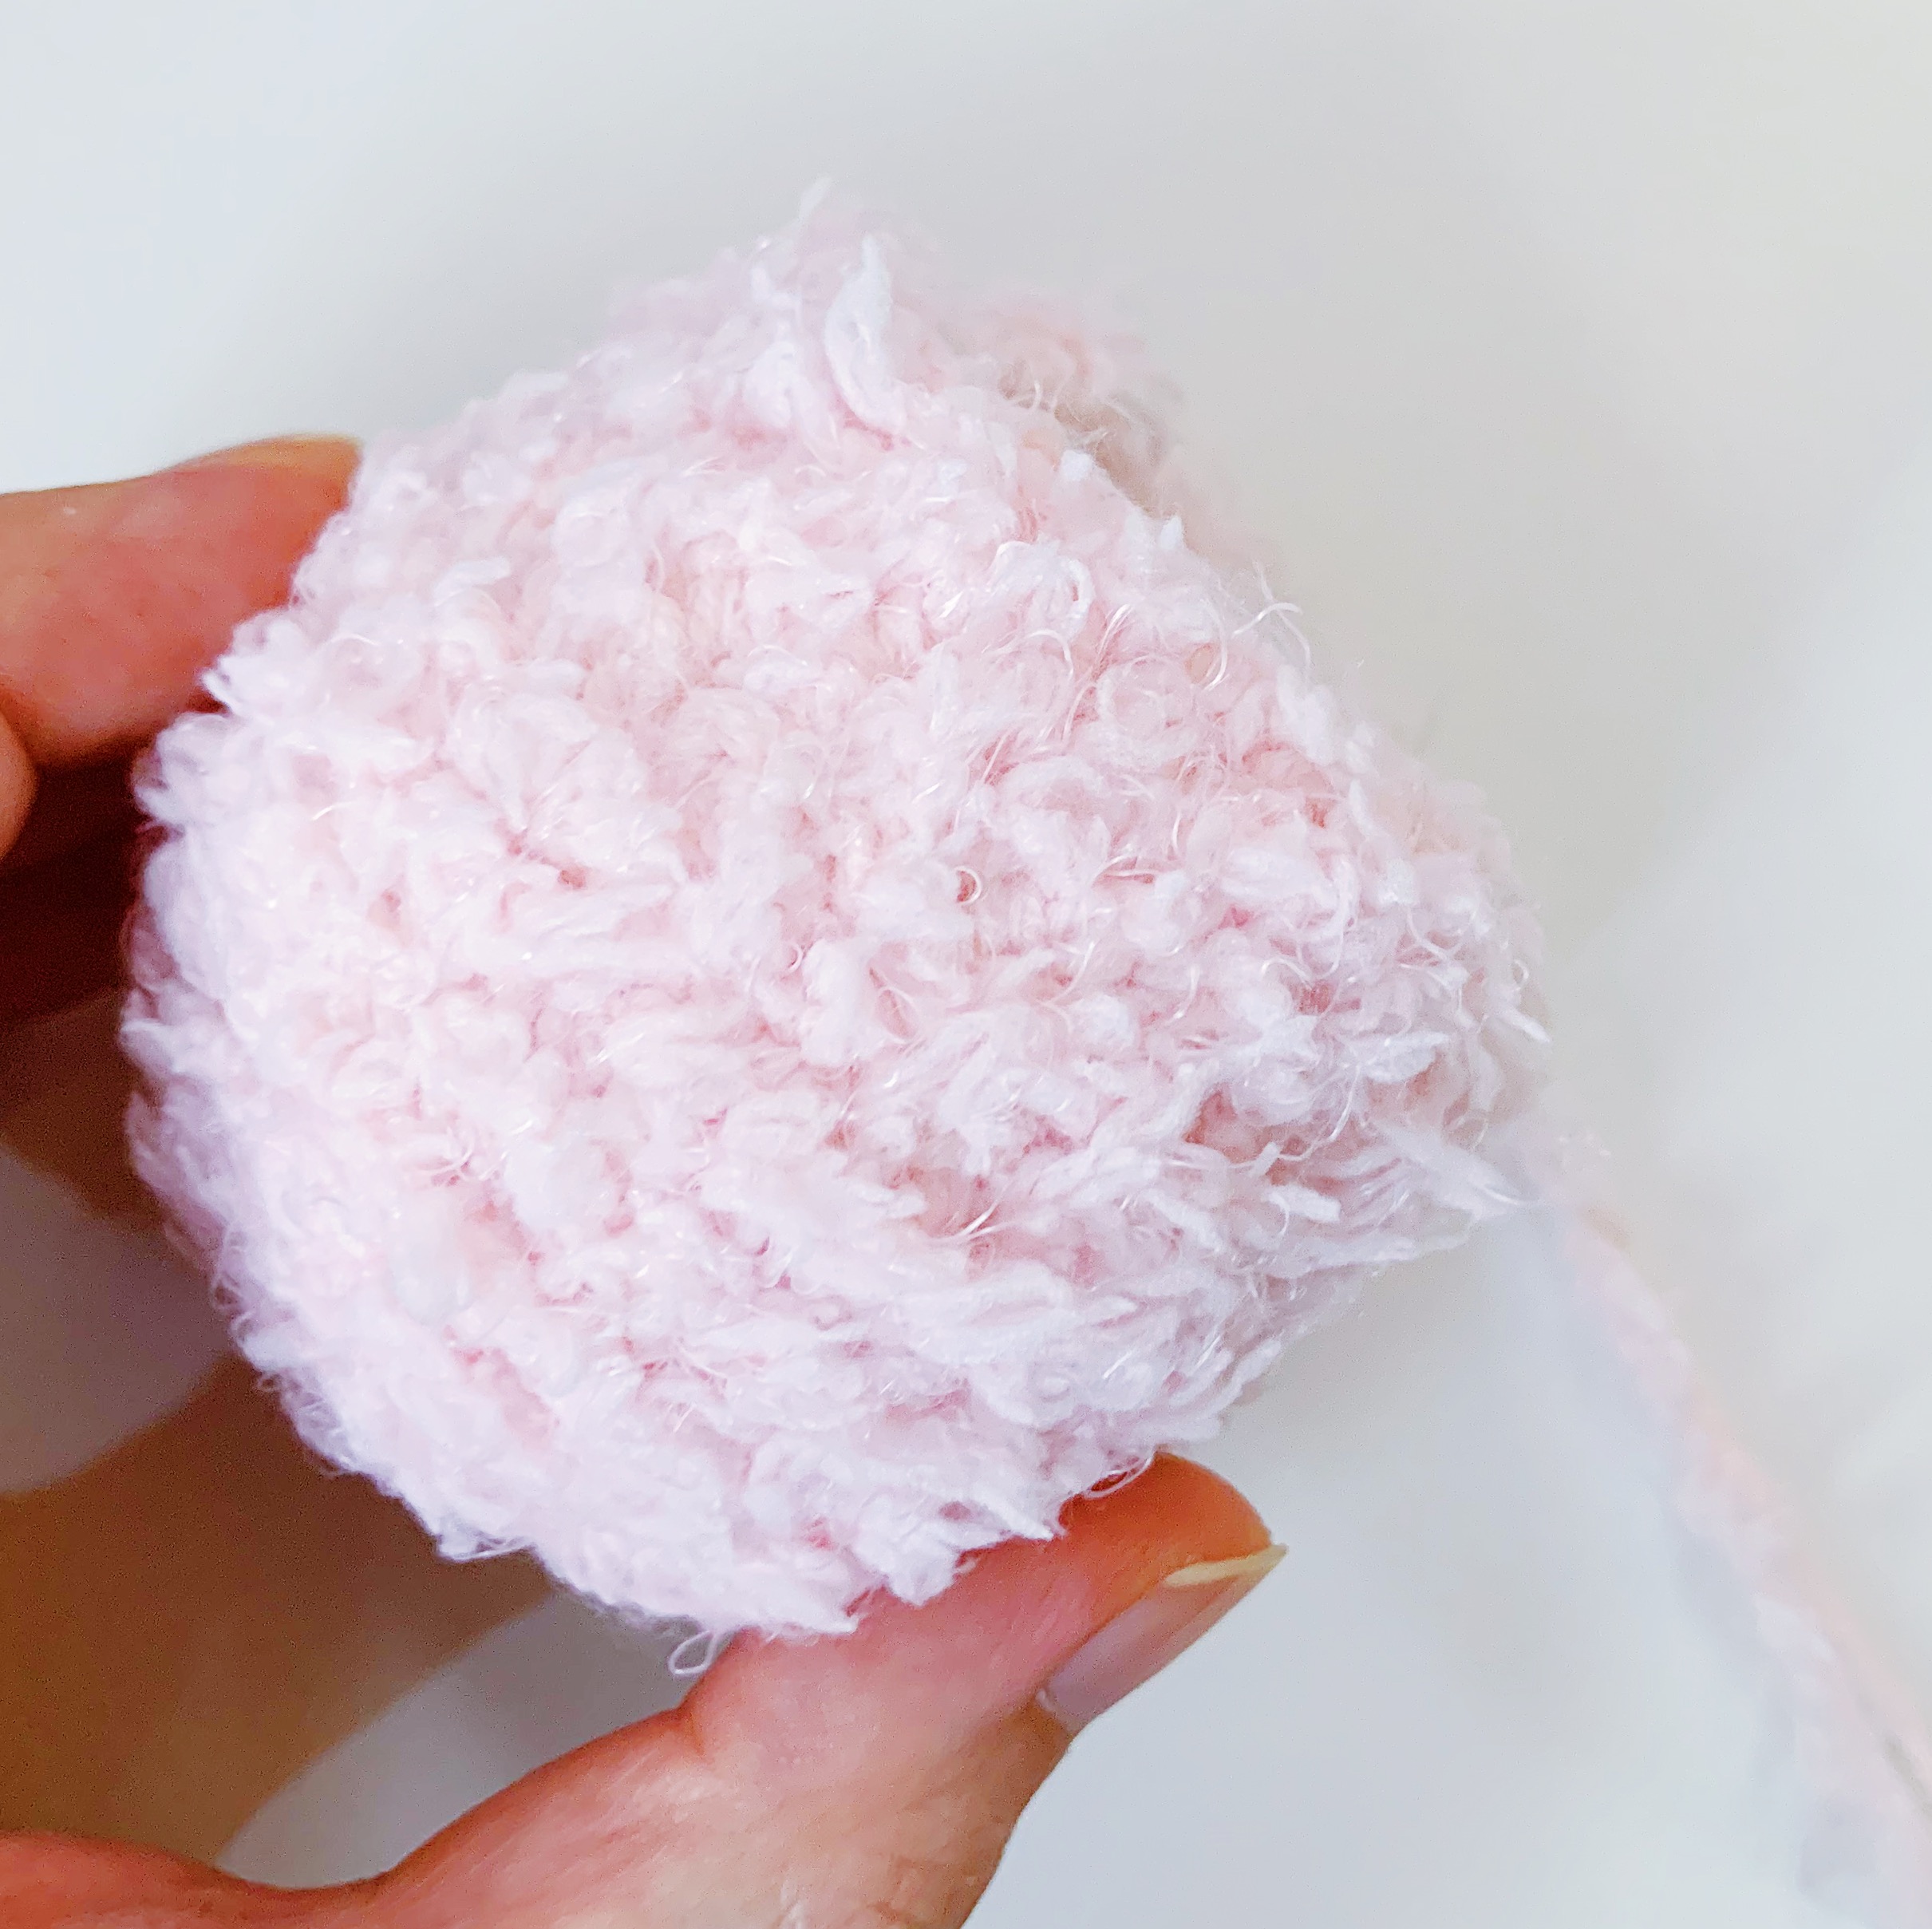
Fuzzy yarn:
- main body colour in pink
- muzzle in white
- hat in grey
- scarf in pastel green
DK-weight yarn:
- main body colour in pink
- muzzle in white + leg bottoms
- hat in grey
- scarf in pastel green
- whiskers in black
2 x 6mm black scrapbooking brads
1 oval bead
Black sewing thread
Darning needle
Sewing needle
Polyester fiberfill
Q tip
Blush
Craft glue

Head (5.5mm hook)
**To crochet with fuzzy yarn, it is easier to pair 1 fuzzy yarn with 1 normal yarn of the same colour so that you can see where the stitches are. The wrong side is usually fuzzier, so we use this as the outer side of the doll (the part that is visible).
IMPORTANT NOTE: Please remember that when you’re working with fuzzy yarn paired up with a normal yarn, all subsequent rounds are worked in BACK LOOPS ONLY.
With 1 pink fuzzy yarn + 1 pink normal yarn:
Round 1: Ch 2, Sc 6 in second ch from hook {6}.
Round 2: [Inc] around {12}.
Round 3: [Inc, sc 1] around {18}.
Round 4: [Inc, sc 2] around {24}.
Round 5: [Inc, sc 3] around {30}.
Round 6: [Inc, sc 4] around {36}.
Round 7: [Inc, sc 5] around {42}.
Round 8: [Inc, sc 6] around {48}.
Round 9: [Inc, sc 7] around {54}.
Round 10: [Inc, sc 8] around {60}.
Rounds 11-18 (8 rounds): Sc around {60}.
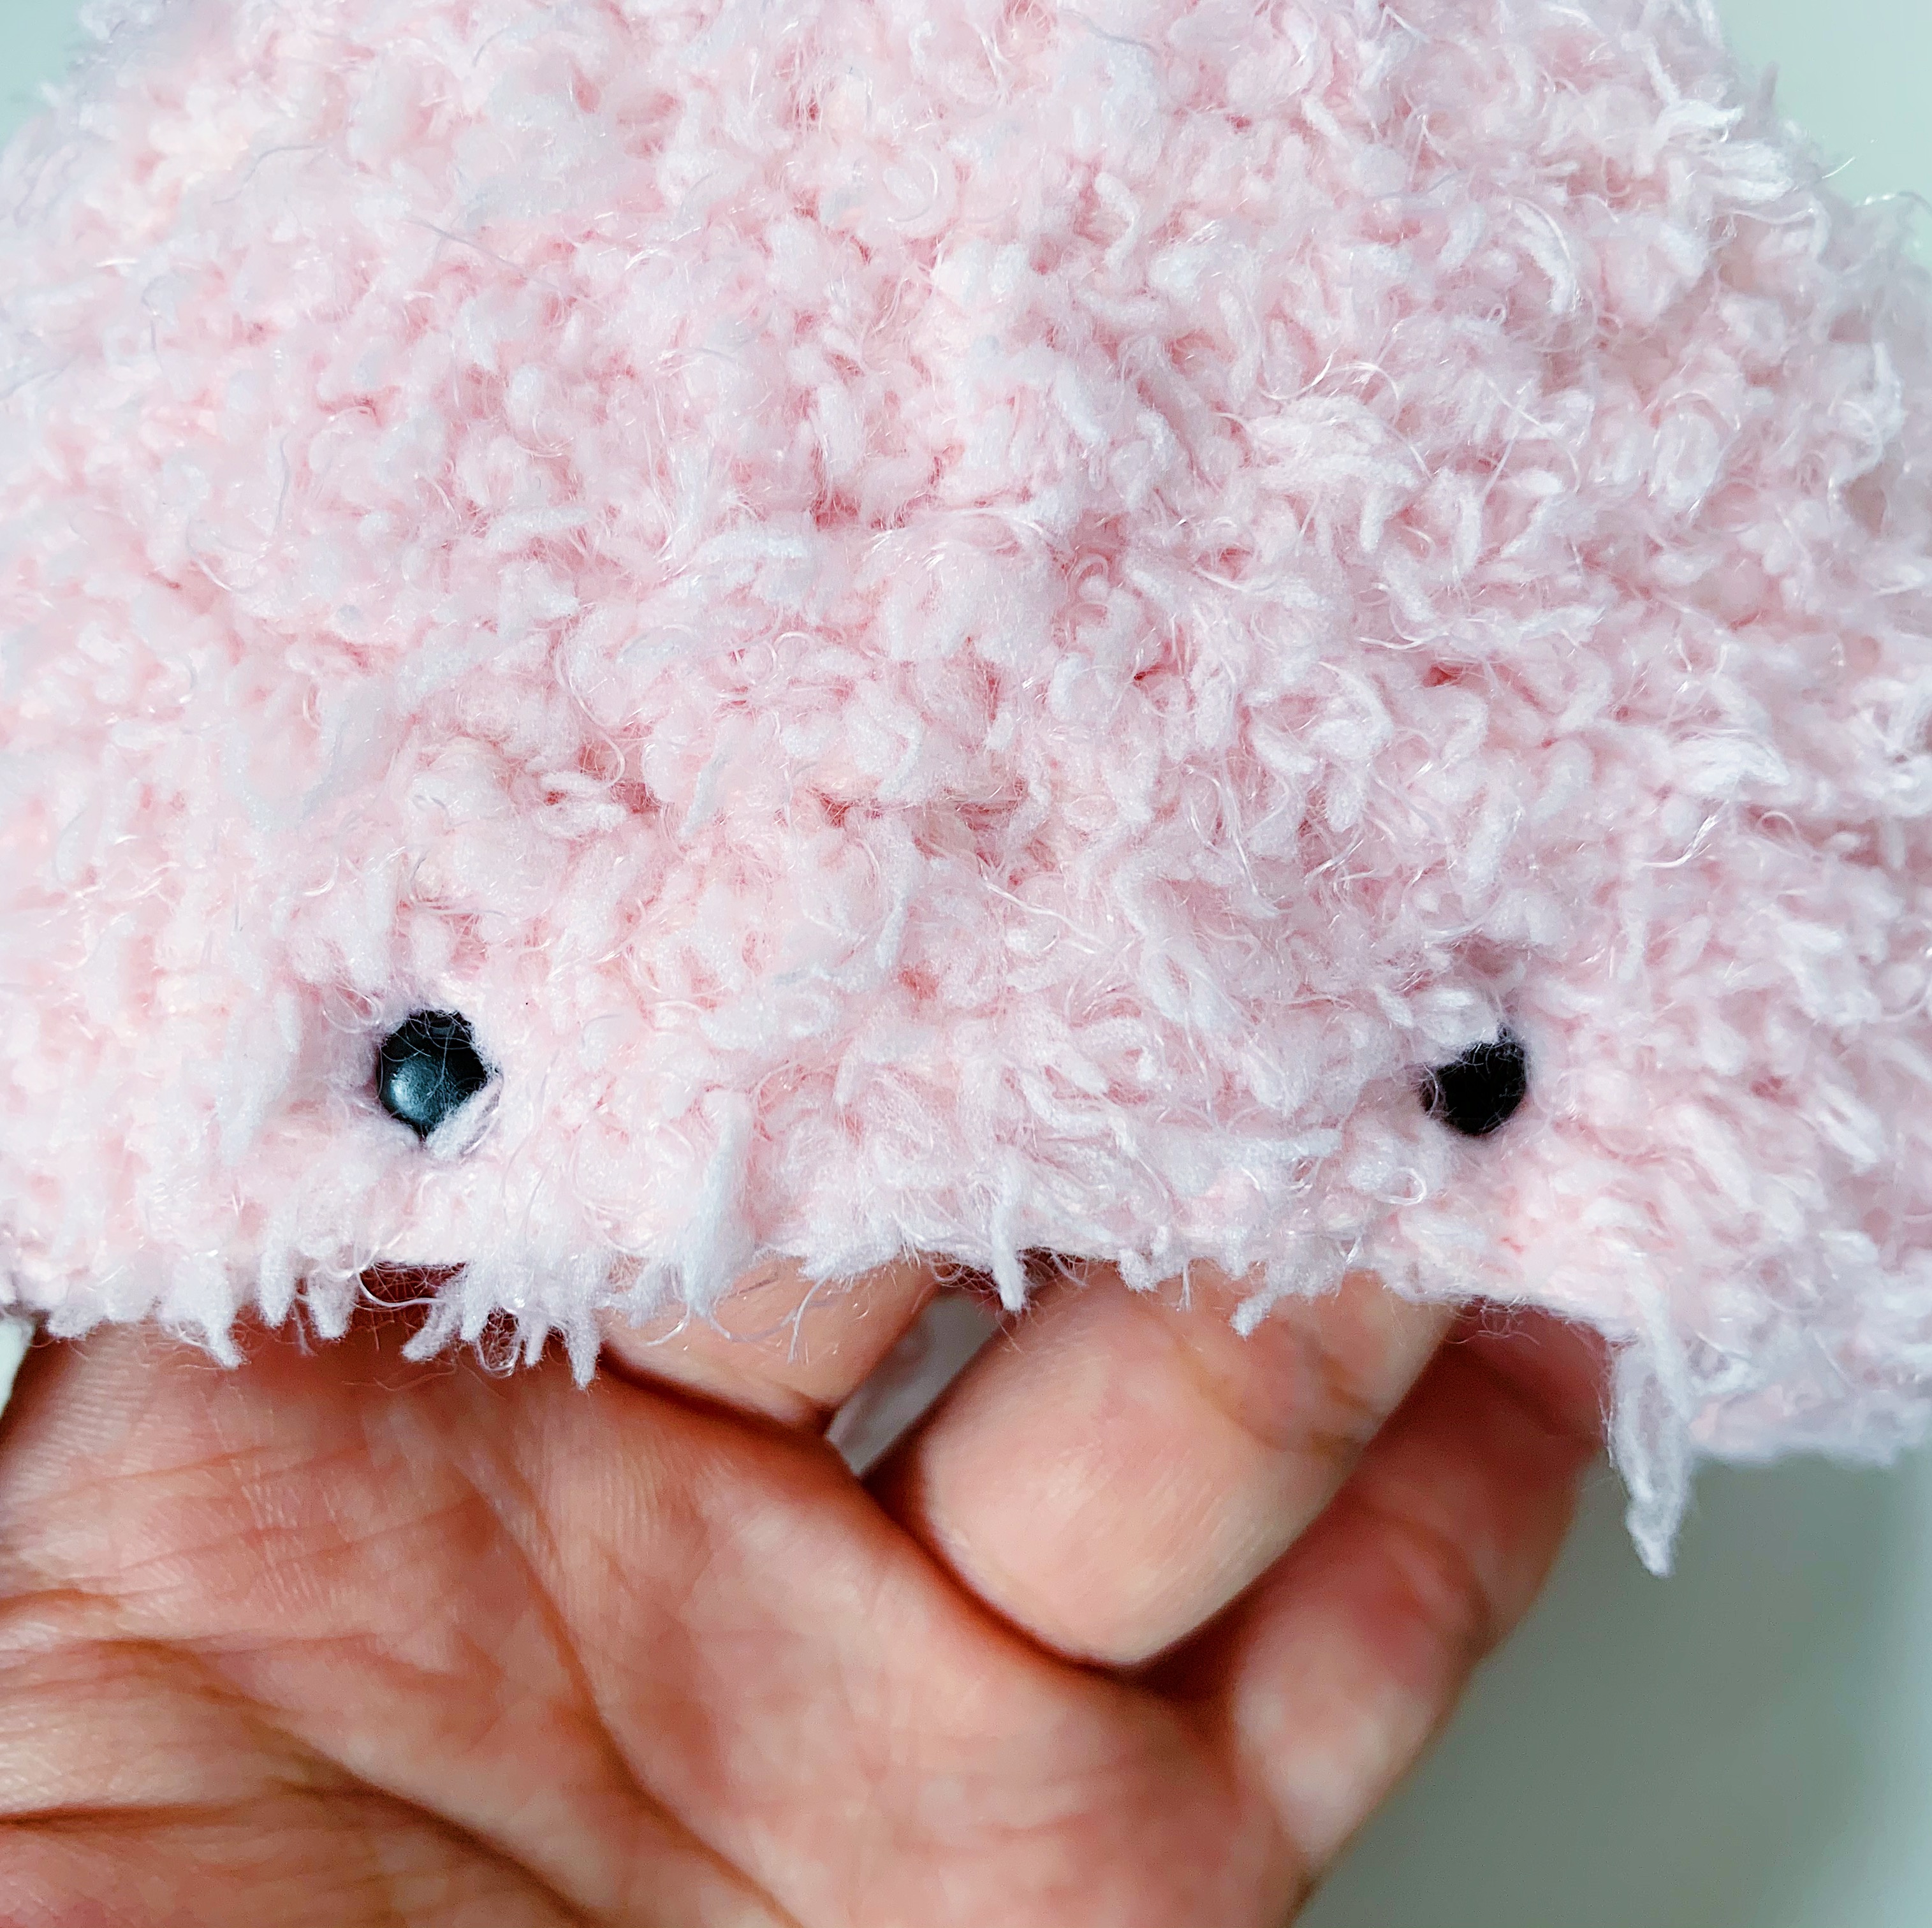
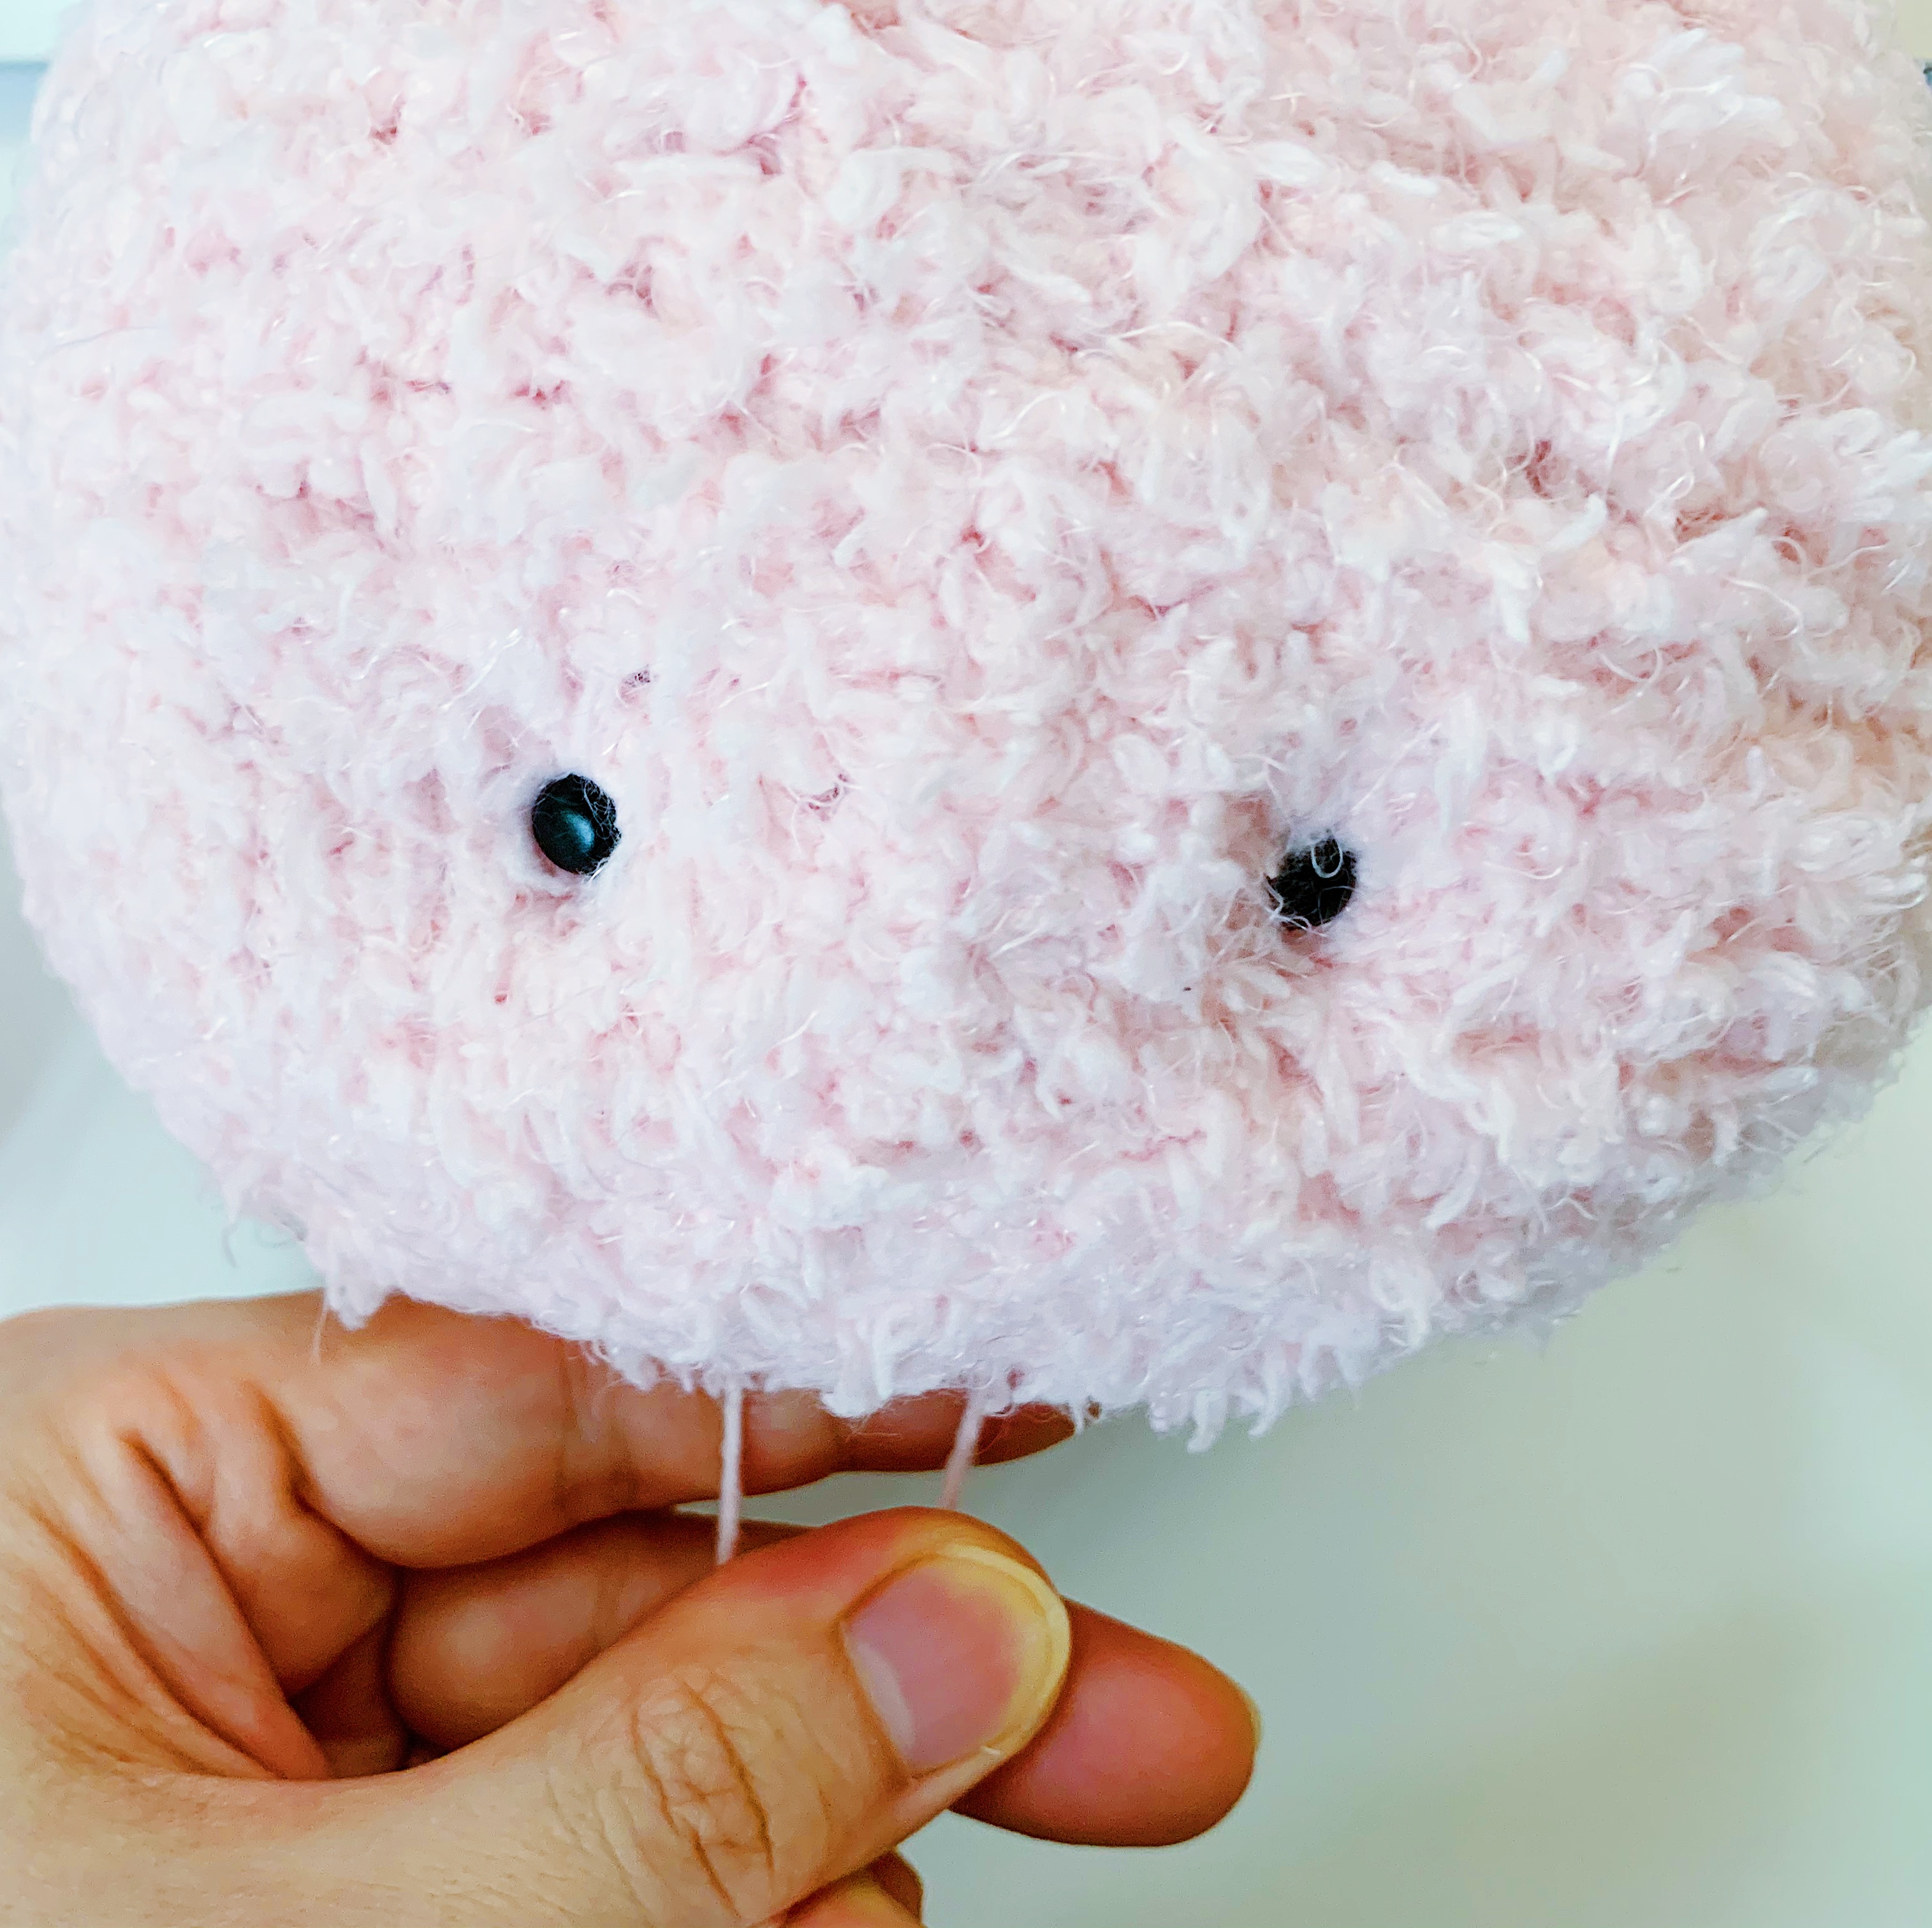
You can position and secure the scrapbooking brads for the eyes now. It should be placed in the center, about 10cm from the top of the head, with 5 cm in between each eye.
Round 19: [Inv dec, sc 8] around {54}.
Round 20: [Inv dec, sc 7] around {48}.
Round 21: [Inv dec, sc 6] around {42}.
Round 22: [Inv dec, sc 5] around {36}.
Round 23: [Inv dec, sc 4] around {30}.
Round 24: [Inv dec, sc 3] around {24}.
Round 25: [Inv dec, sc 2] around {18}.
Stuff head firmly.
Round 26: [Inv dec, sc 1] around {12}.
Round 27: [Inv dec] around {6}.
Fasten off and leave a long end for sewing eye indentations.

Eye indentations
- You only need a normal yarn for this. With a darning needle, bring the remaining yarn from the bottom of the head through to the left side of the head, near the left eye.
- Make one horizontal stitch and bring the thread back down to the bottom of the head. Gently tug on the yarn to create a slight indentation.
- Now repeat the above on the right side of the head, near the right eye. Knot the yarn end at the bottom of the head and trim off excess.
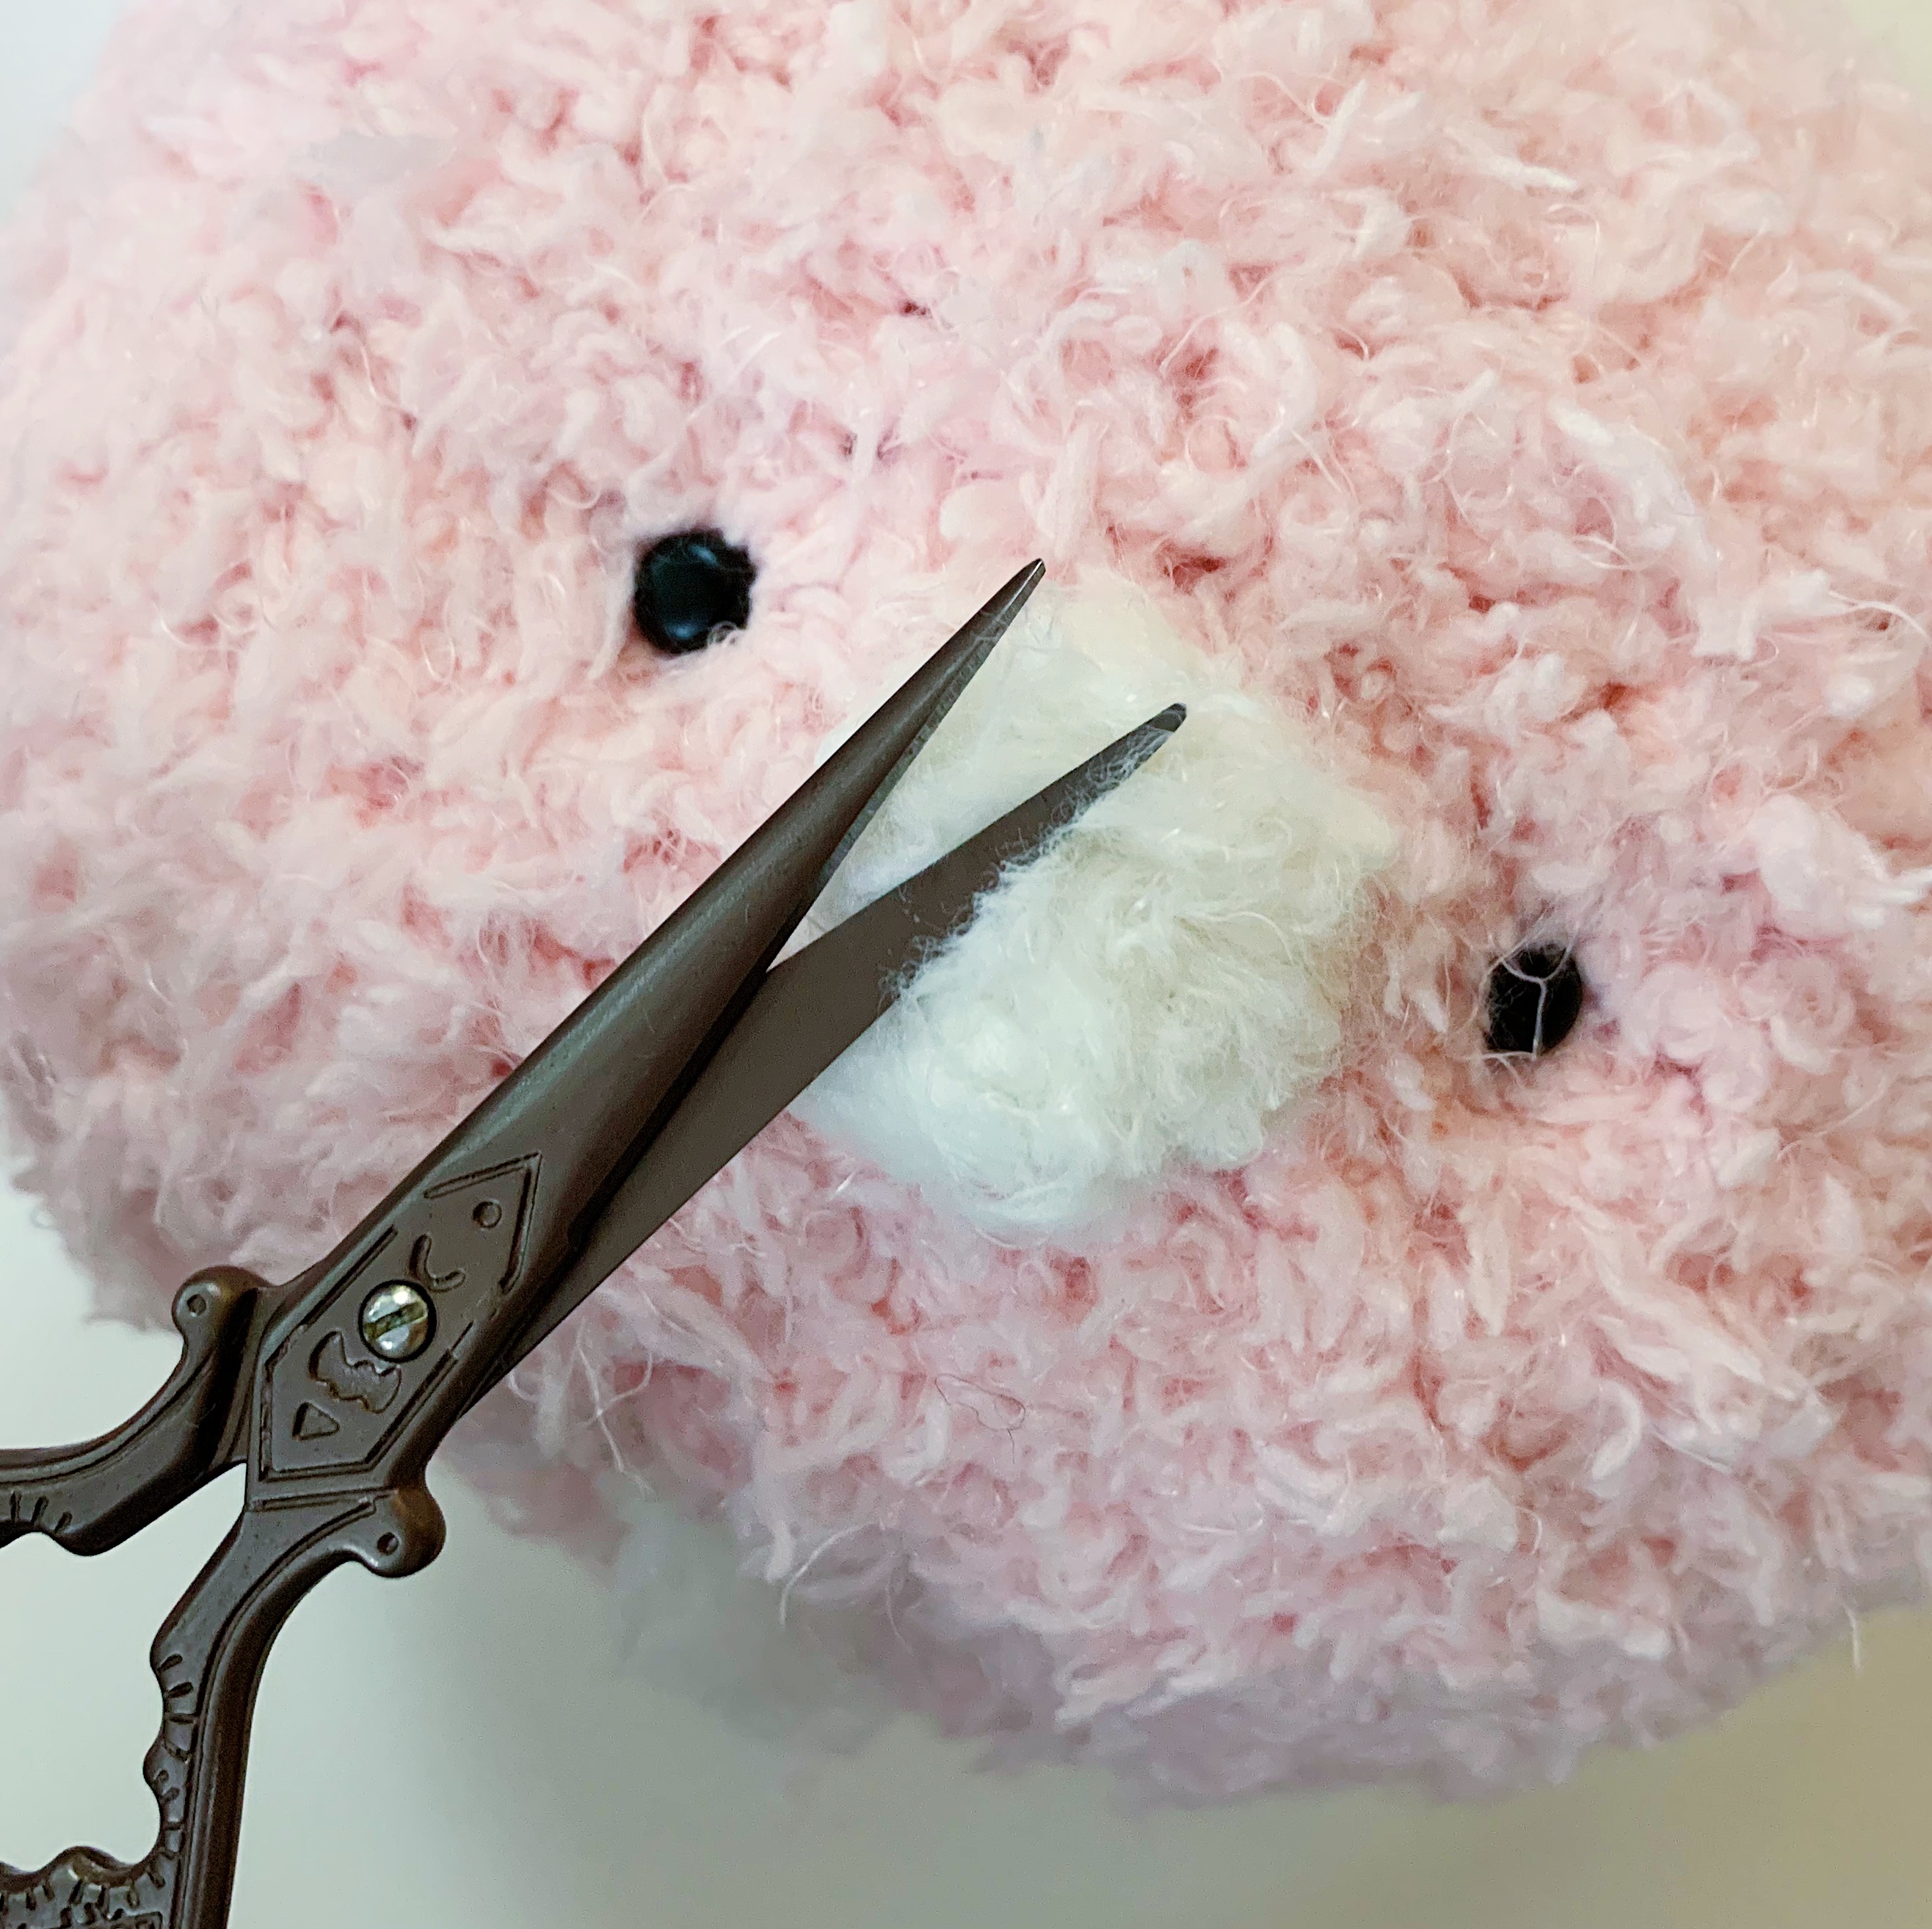
Muzzle (5.5mm hook)
With 1 white fuzzy yarn + 1 white normal yarn:
Round 1: Ch 2, Sc 10 in second ch from hook {10}.
Fasten off and leave a long end for sewing.
Sew muzzle on between the eyes with whipstitches.
**If it is too difficult to sew with the paired-up yarn, just hide the fuzzy yarn by pulling it through the doll, and use the remaining normal yarn for securing.
You may give the muzzle a little trim for a neater look.
Sew on the oval bead for the nose, on the top-center of the muzzle.
At this point, you may dab on some pink blush with Q tips 🙂

IN CASE YOU DIDN’T SEE THIS NOTE EARLIER: Please remember that when you’re working with fuzzy yarn paired up with a normal yarn, all subsequent rounds are worked in BACK LOOPS ONLY.
Body (5.5mm hook)
With 1 pink fuzzy yarn + 1 pink normal yarn:
Round 1: Ch 2, Sc 6 in second ch from hook {6}.
Round 2: [Inc] around {12}.
Round 3: [Inc, sc 1] around {18}.
Round 4: [Inc, sc 2] around {24}.
Round 5: [Inc, sc 3] around {30}.
Rounds 6-12 (7 rounds): Sc around {30}.
Round 13: [Inv dec, sc 3] around {24}.
Fasten off and leave a long end for sewing.
Stuff firmly.
Arms (3mm hook)
Make 2 with Dk-weight pink yarn:
Round 1: Sc 7 in magic ring {7}.
Round 2-10 (9 rounds): Sc around {7}.
Fasten off and leave a long end for sewing.
* No stuffing required.
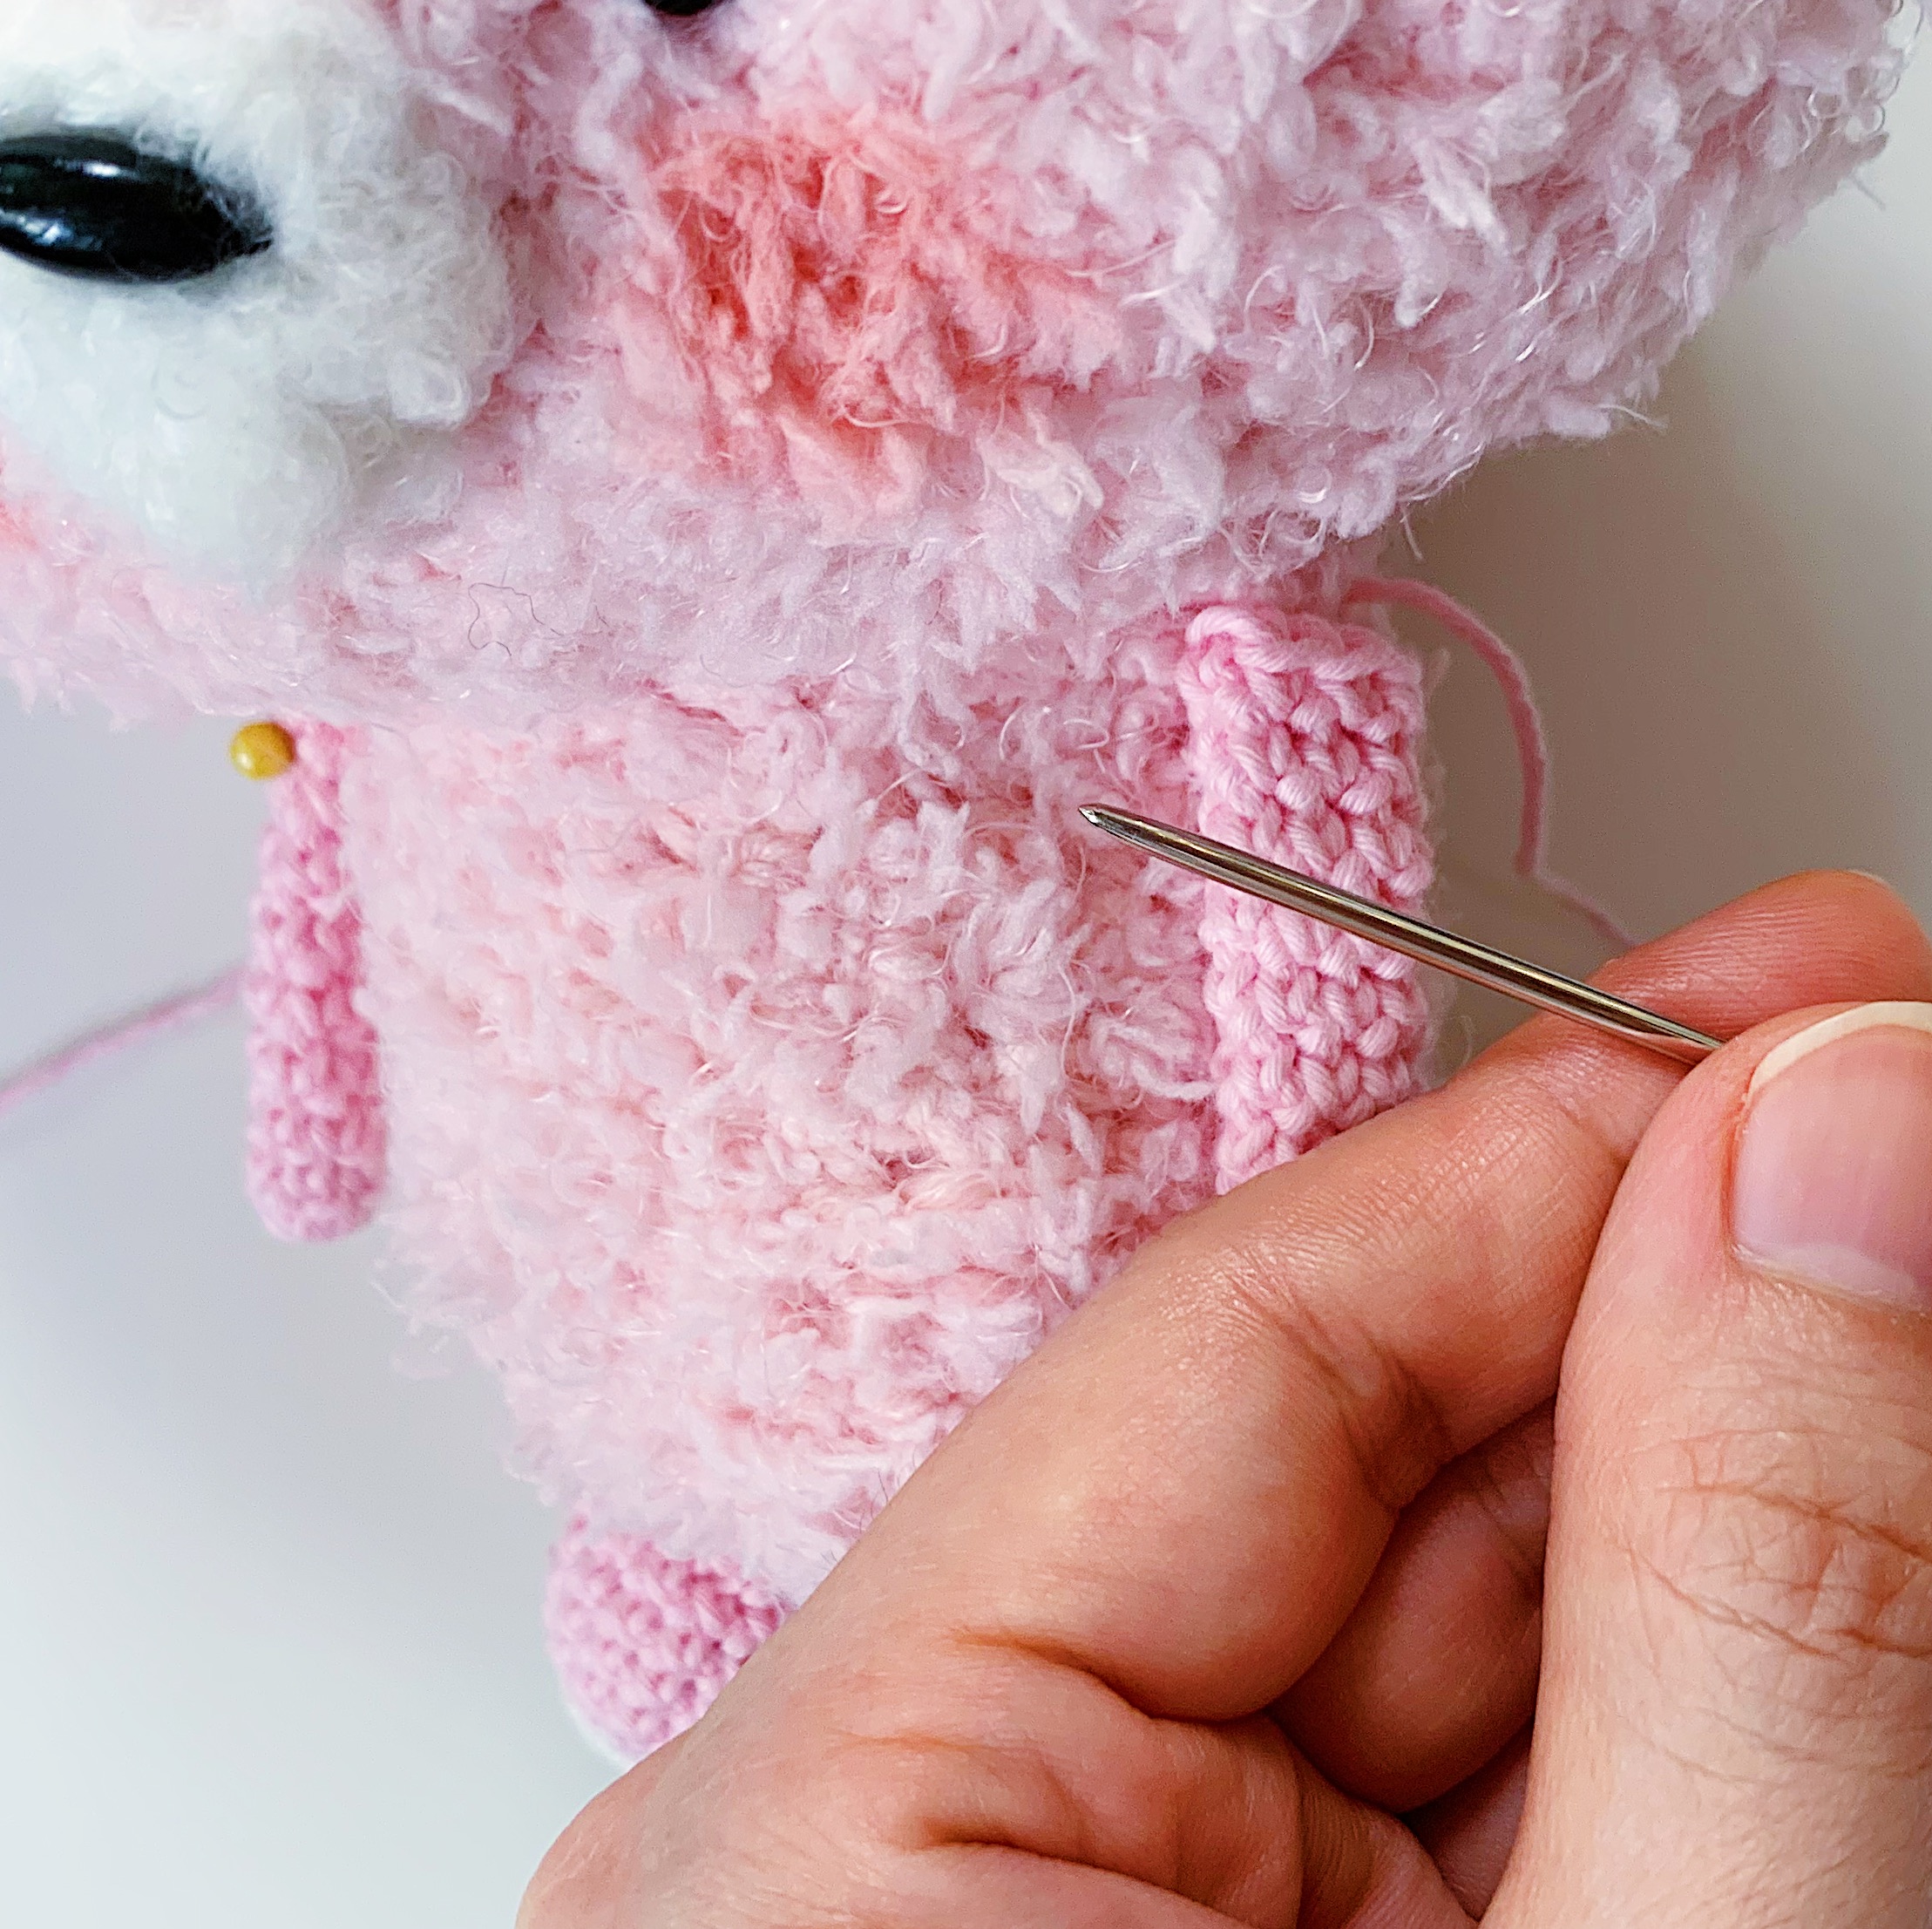
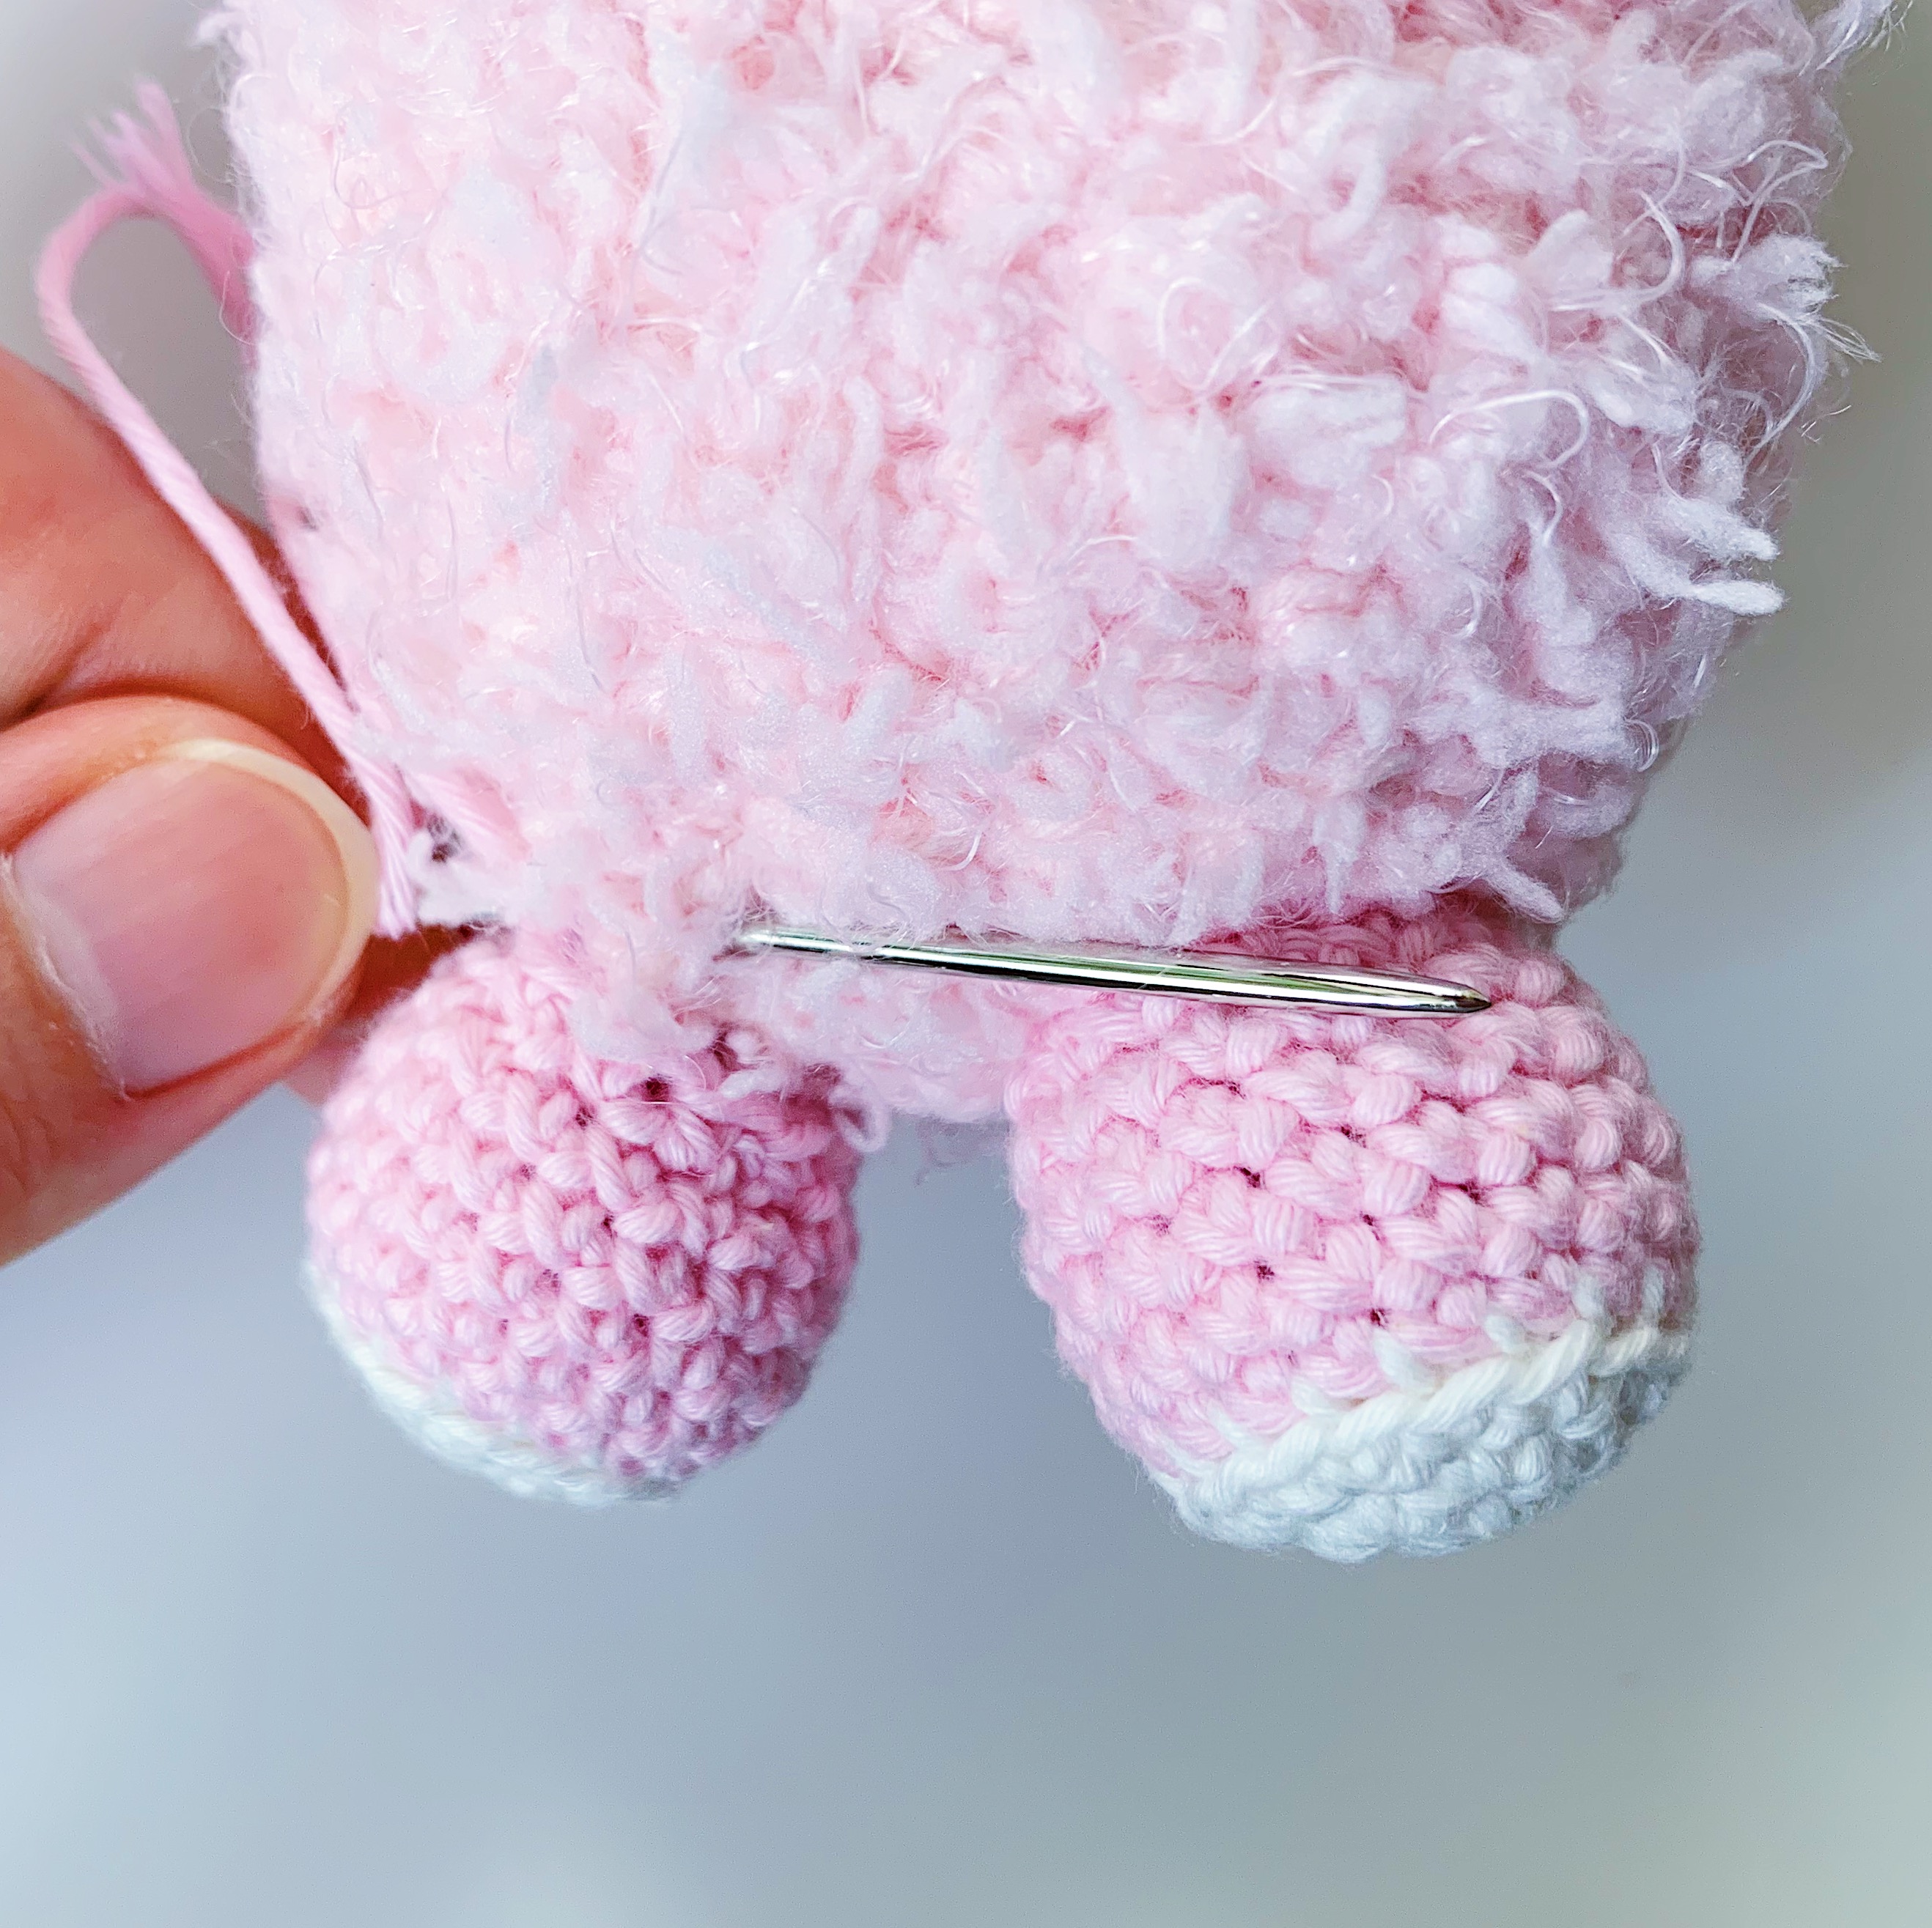
Legs (3mm hook)
Make 2 with Dk-weight white yarn:
Round 1: Sc 6 in magic ring {6}.
Round 2: [Inc] around {12}.
Round 3: [Inc, sc 1] around {18}.
Change to Dk-weight pink yarn.
Round 4: In back loops only, sc around {18}.
Rounds 5-8 (4 rounds): Sc around {18}.
Round 9: [Inv dec, sc 1] around {12}.
Fasten off and leave a long end for sewing.
Stuff firmly.
ASSEMBLING BODY PARTS
- Sew body onto head.
- Sew on arms.
- Sew on legs.
Scarf (4mm hook)
With 1 pastel green fuzzy yarn + 1 pastel green normal yarn:
Row 1: Ch 4, hdc in second ch from hook across {3}.
*Remember to work in back loops only for fuzzy yarn paired up with normal yarn!
Subsequent rows: Hdc in each st across {3}.
Continue until your scarf measures about 34cm in length, then check if it can loop comfortably around Mei-chan’s neck.
Fasten off and weave in ends.

ANOTHER REMINDER: Please remember that when you’re working with fuzzy yarn paired up with a normal yarn, all subsequent rounds are worked in BACK LOOPS ONLY.
Hat (6mm hook)
With 1 grey fuzzy yarn + 1 grey normal yarn:
Round 1: Ch 2, Sc 6 in second ch from hook {6}.
Round 2: [Inc] around {12}.
Round 3: [Inc, sc 1] around {18}.
Round 4: [Inc, sc 2] around {24}.
Round 5: [Inc, sc 3] around {30}.
Round 6: [Inc, sc 4] around {36}.
Round 7: [Inc, sc 5] around {42}.
Round 8: [Inc, sc 6] around {48}.
Round 9: [Inc, sc 7] around {54}.
Round 10: [Inc, sc 8] around {60}.
Rounds 11-17 (7rounds): Sc around {60}.

You will now be making the first ear flap.
Row 18: Sc in the next 10 sts {10}.
Row 19: Ch 1, turn. Sc across {9}.
Row 20: Ch 1, turn, Dec, sc in the next 5, dec {7}.
Row 21: Ch 1, turn. Sc across {7}.
Row 22: Ch 1, turn, Dec, sc in the next 3, dec {5}.
Row 23: Ch 1, turn. Sc across {5}.
Row 24: Ch 1, turn, Dec, sc, dec {3}.
Row 25: Ch 1, turn. Sc across {3}.
Row 26: Ch 1, turn, Dec, sc {2}.
Fasten off and leave a long end to make the straps.

Left Ear Flap
Attach your paired-up yarn to your hook.
Skip approximately 22 sts from the other ear flap, then join your yarn.
Row 1: Sc in the next 10 sts {10}.
Row 2: Ch 1, turn. Sc across {9}.
Row 3: Ch 1, turn, Dec, sc in the next 5, dec {7}.
Row 4: Ch 1, turn. Sc across {7}.
Row 5: Ch 1, turn, Dec, sc in the next 3, dec {5}.
Row 6: Ch 1, turn. Sc across {5}.
Row 7: Ch 1, turn, Dec, sc, dec {3}.
Fasten off and leave a long end to make the straps.
Totoro Hat Ears (6mm hook)
Make 2 with 1 grey fuzzy yarn + 1 grey normal yarn:
Round 1: Ch 2, Sc 3in second ch from hook {3}.
Round 2: [Inc] around {6}.
Round 3: [Inc, sc 1] around {9}.
Rounds 4-7 (4 rounds): Sc around {9}.
Fasten off and leave a long end for sewing.
*No stuffing required.
Whipstitch the ears onto the top of the hat.
Wear hat onto Mei-chan and tie the ends into a bow.
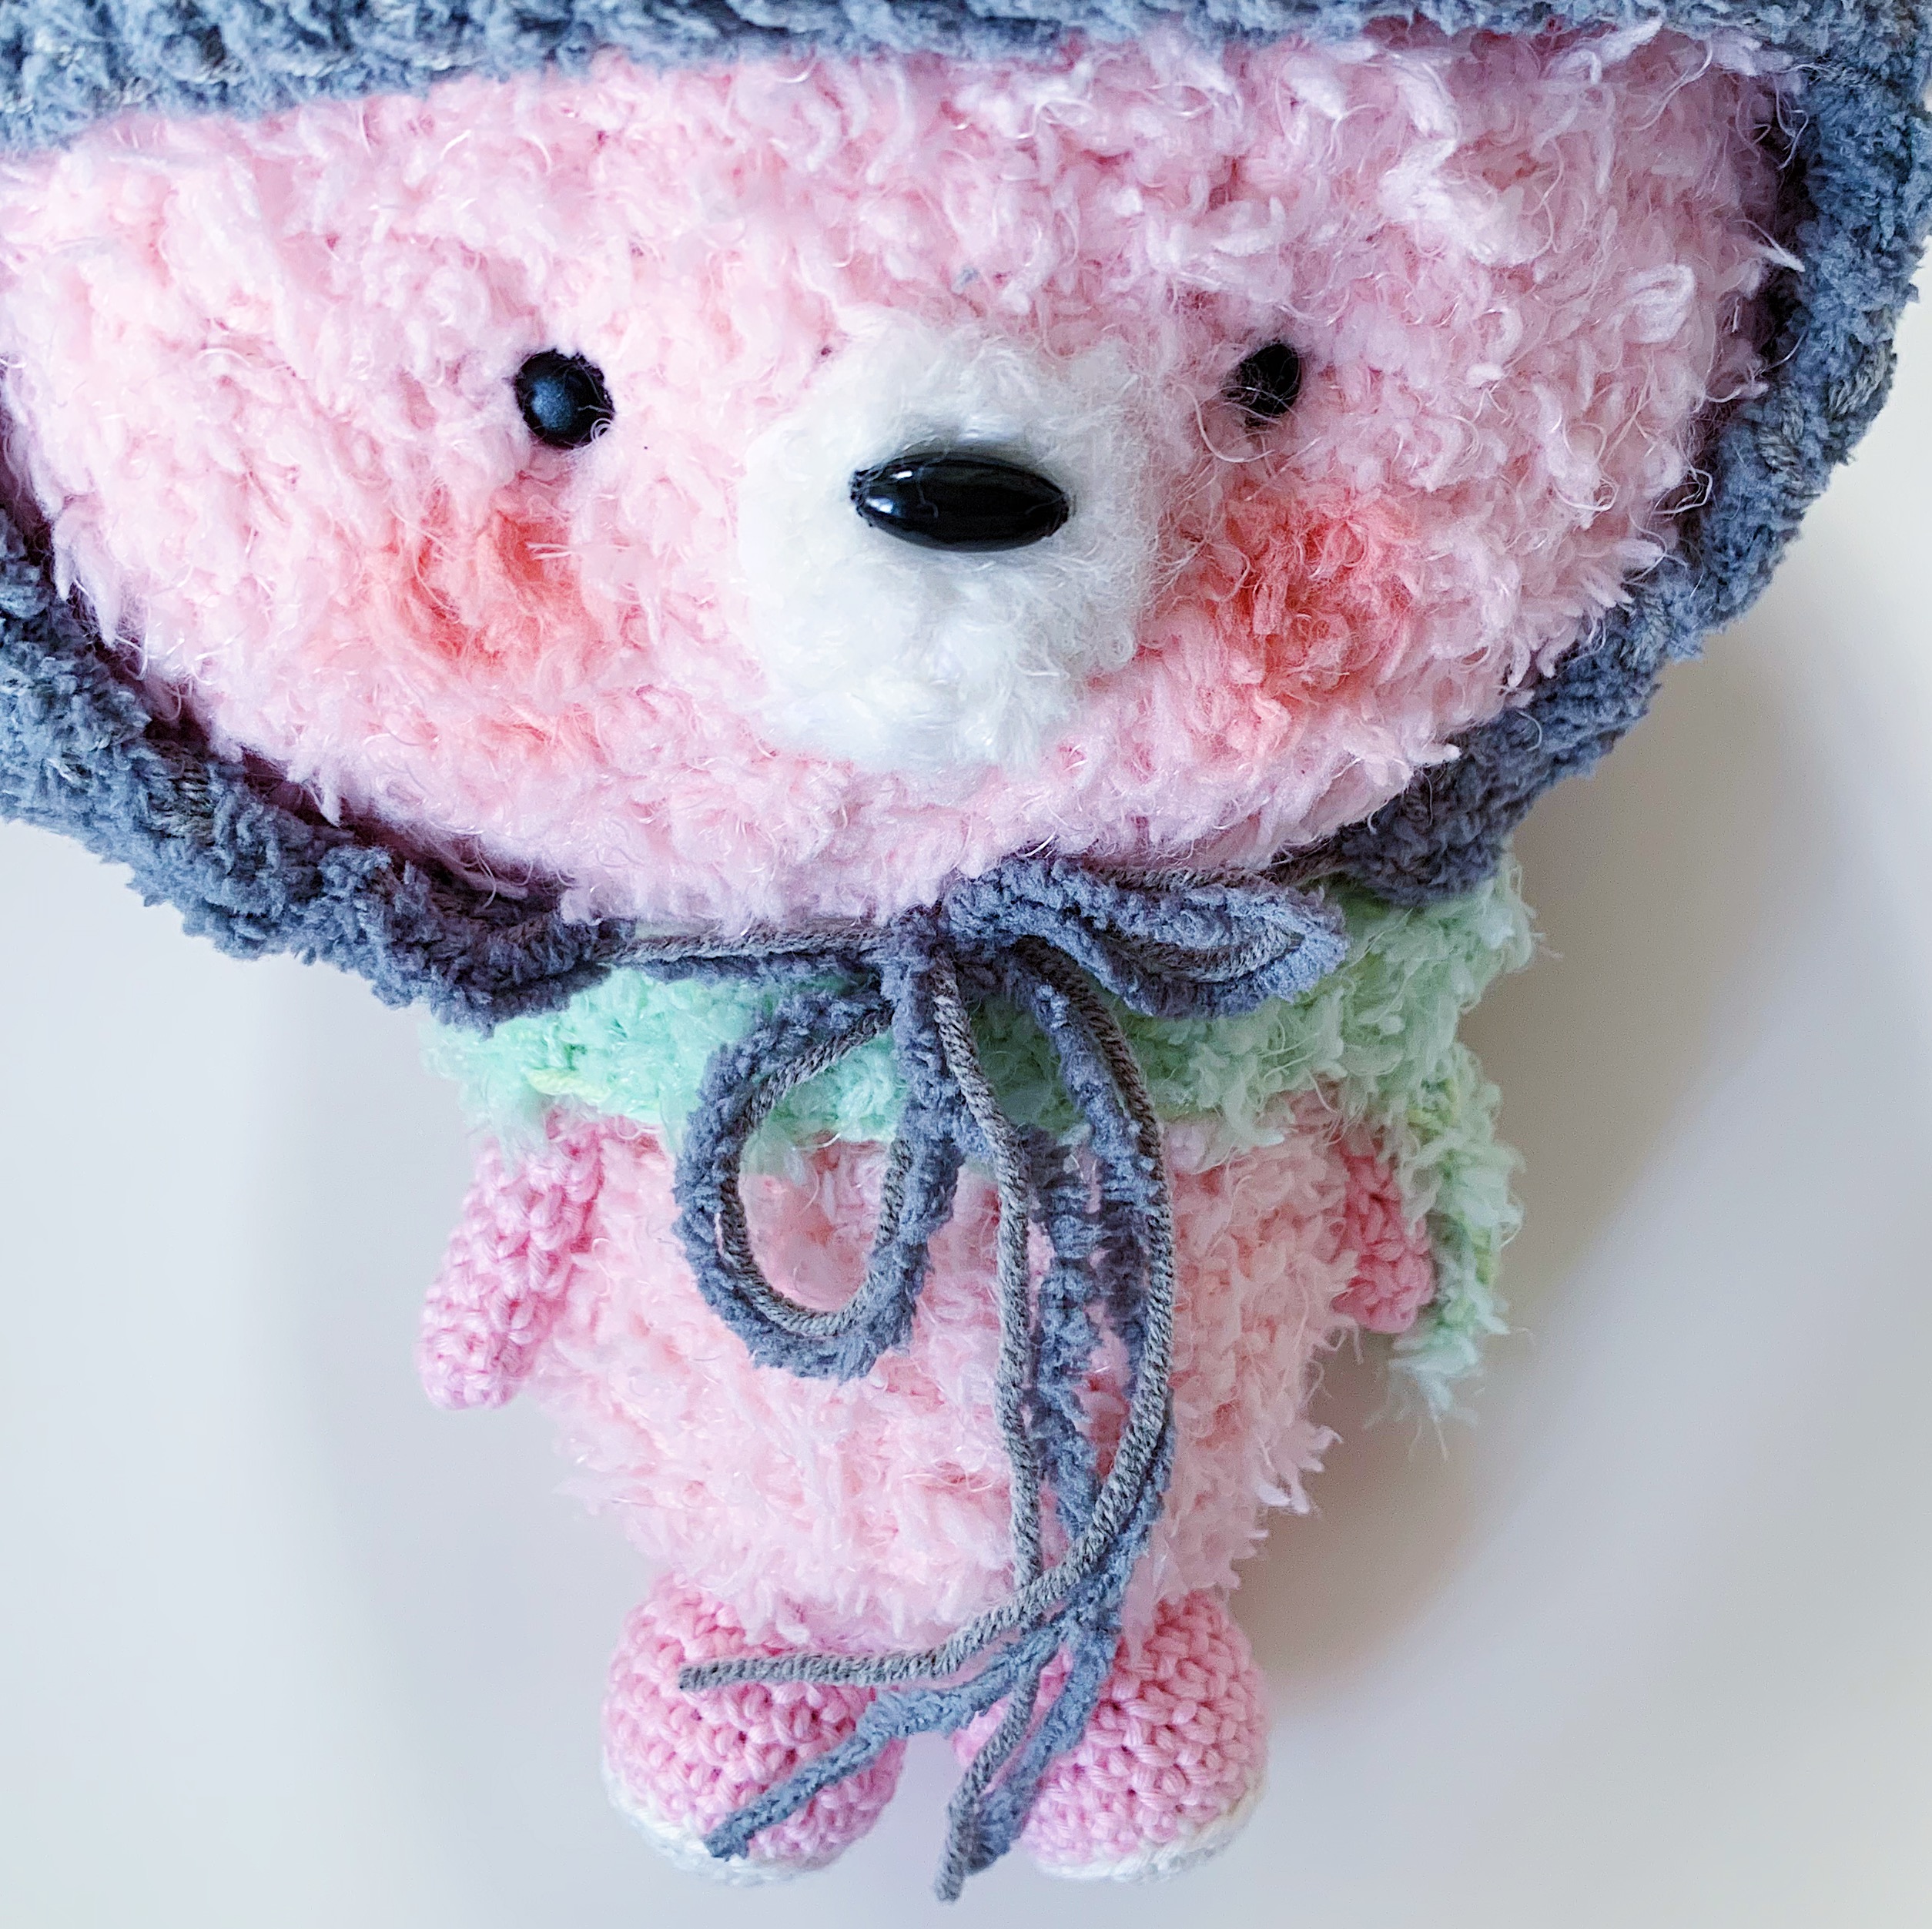
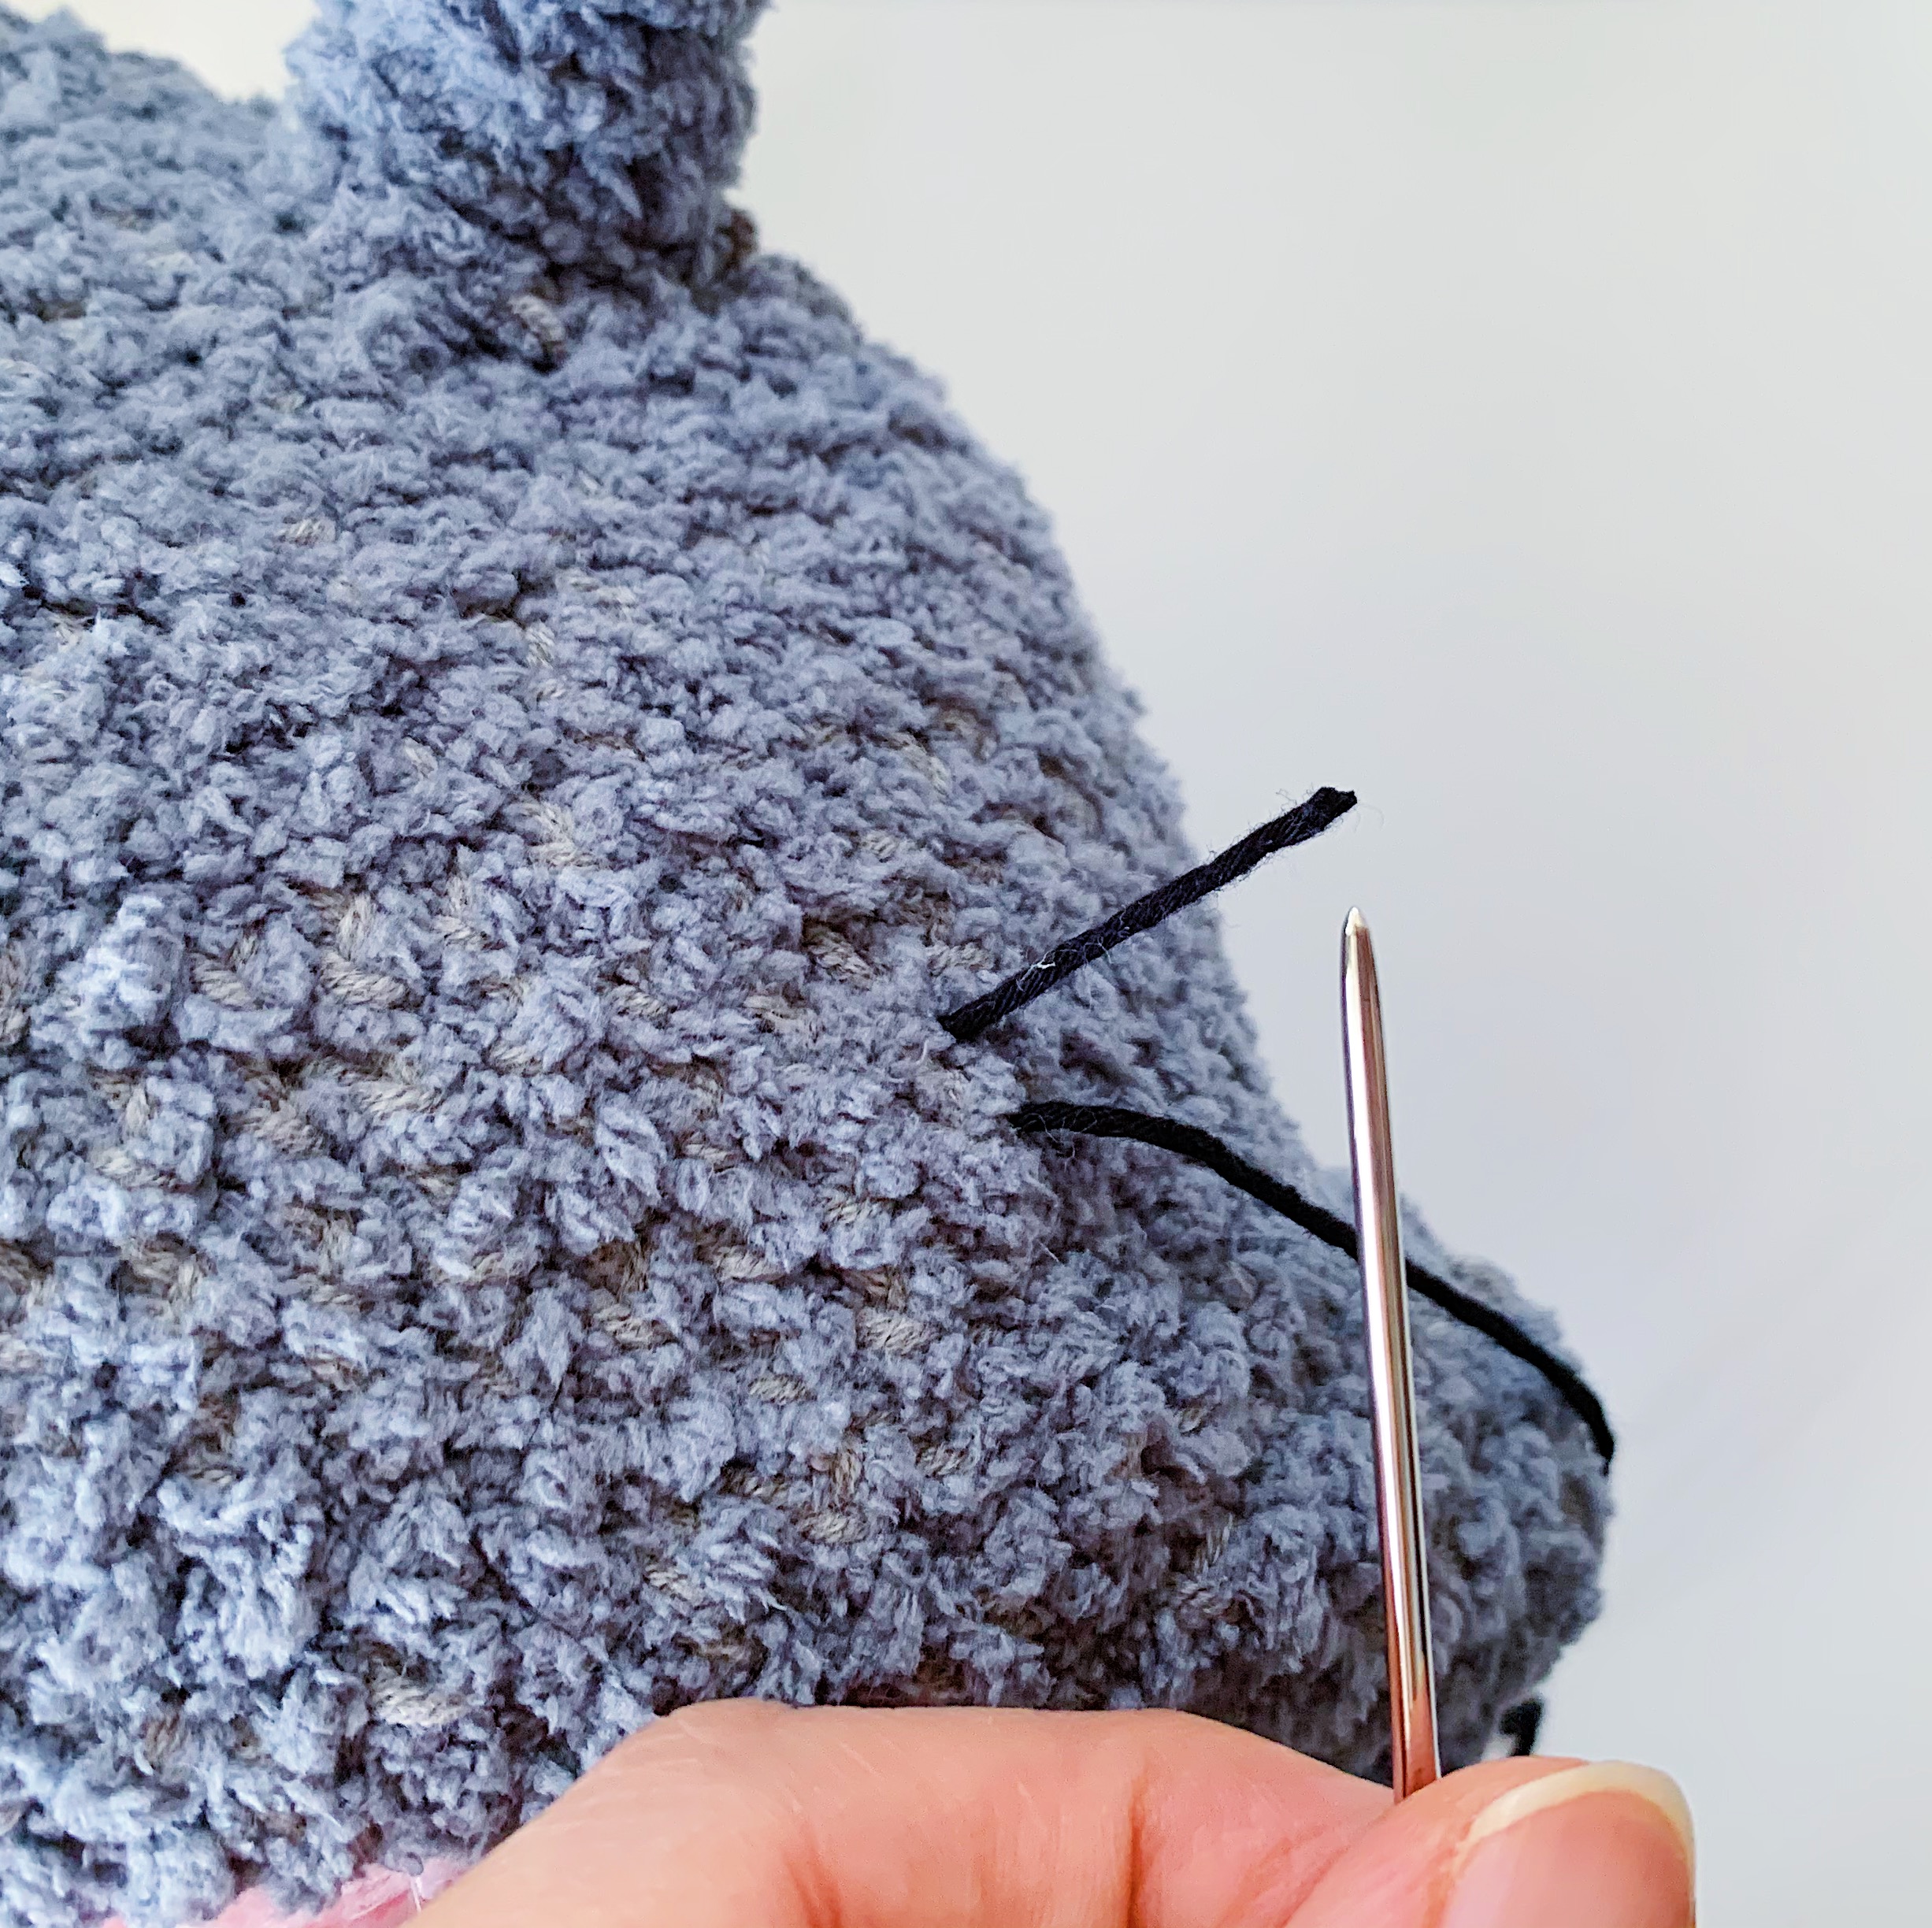

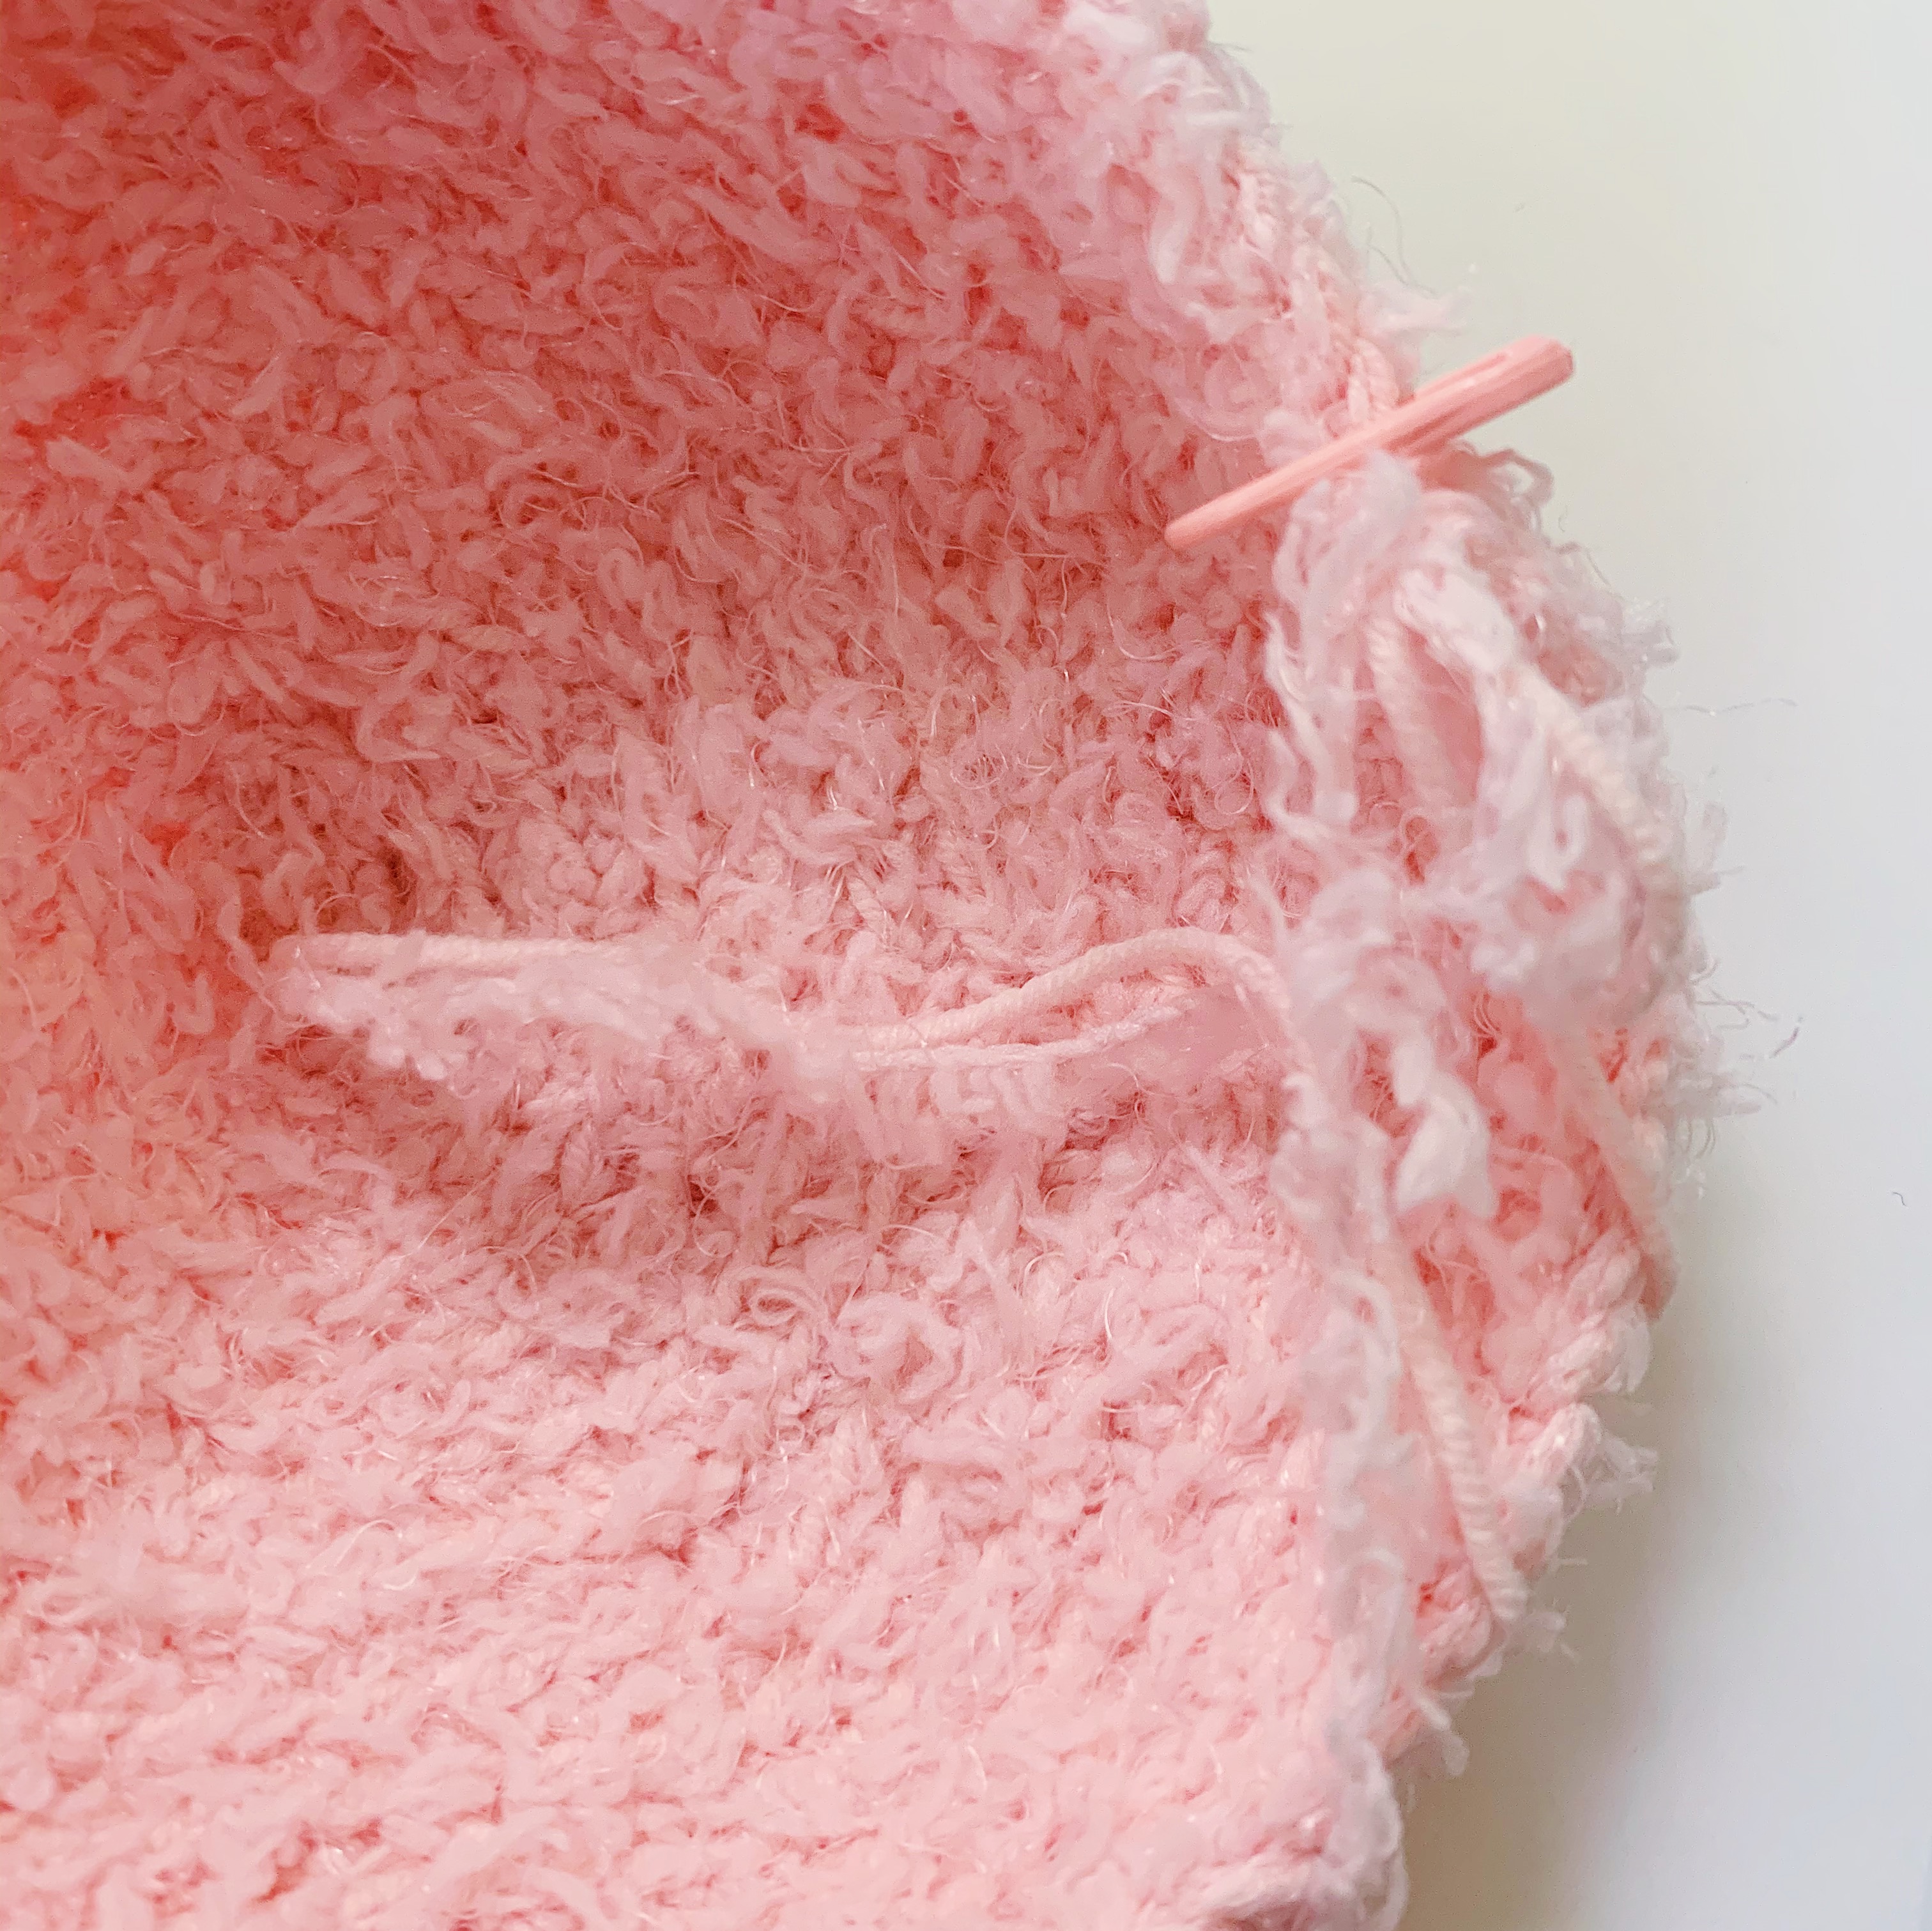
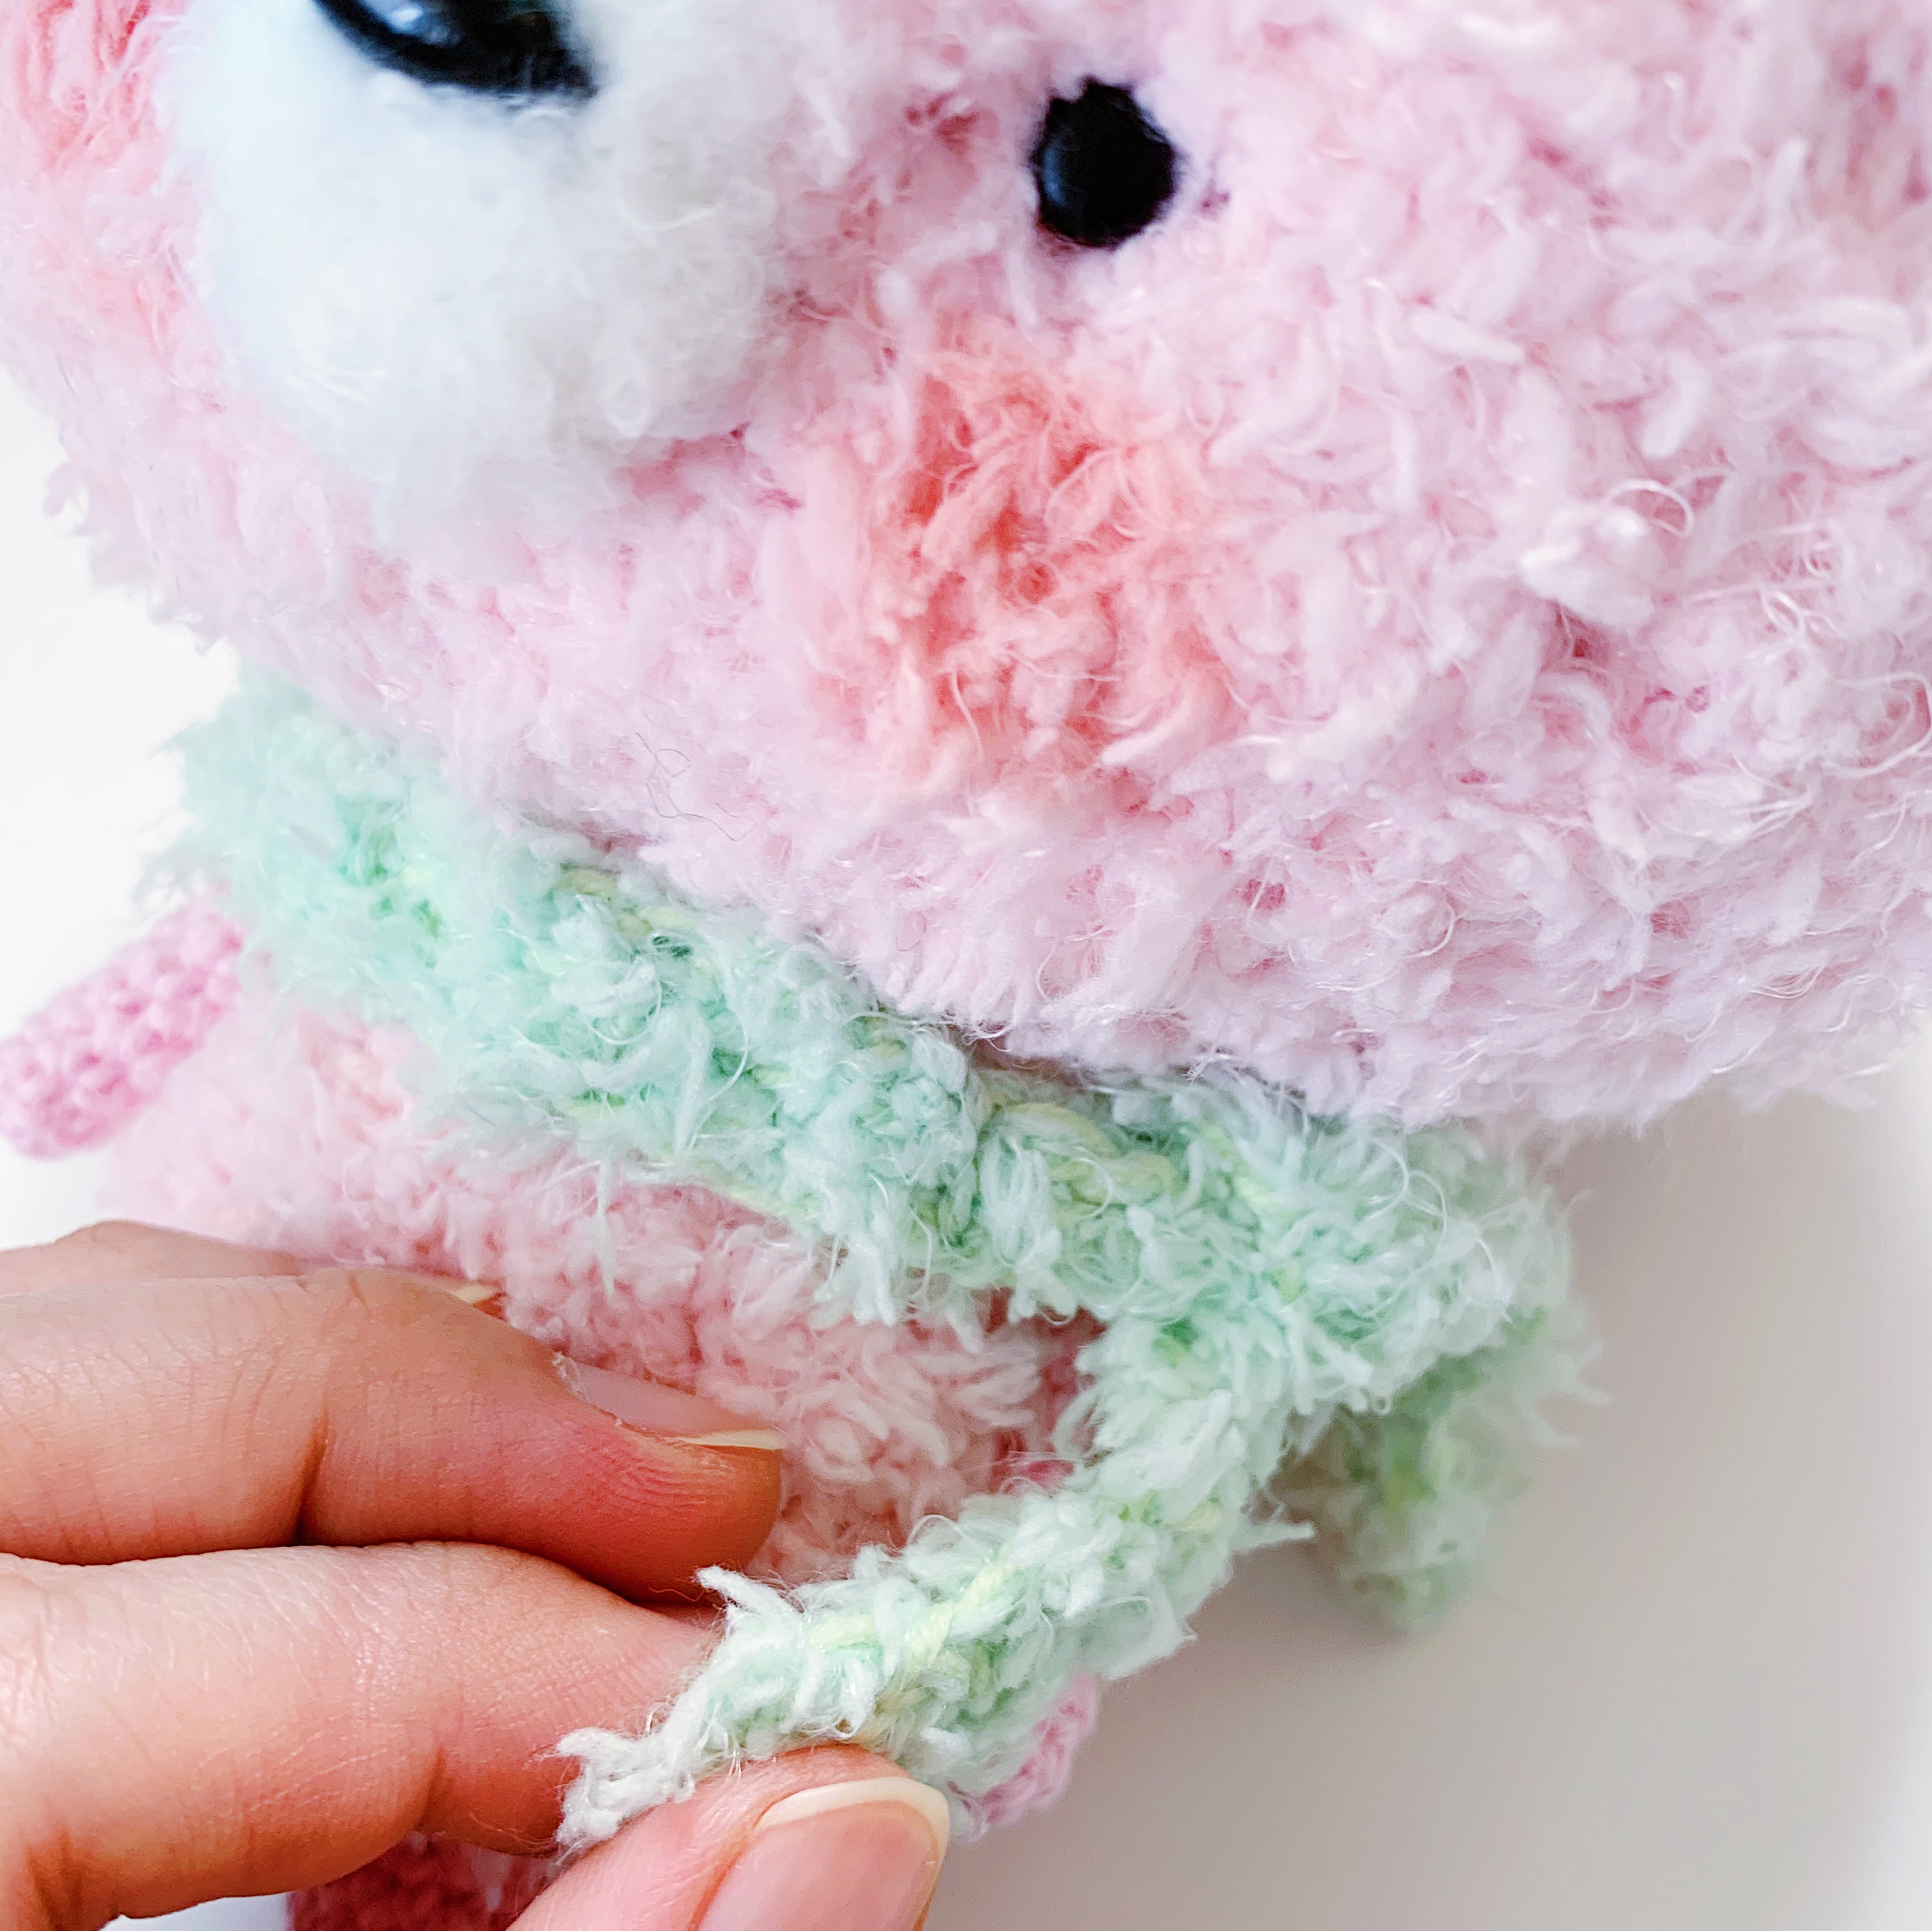
Whiskers
- To make the whiskers, loop and sew on a strand of black yarn as shown in the pictures.
- You may dab on some craft glue to help the whiskers stiffen up and stand out better.
