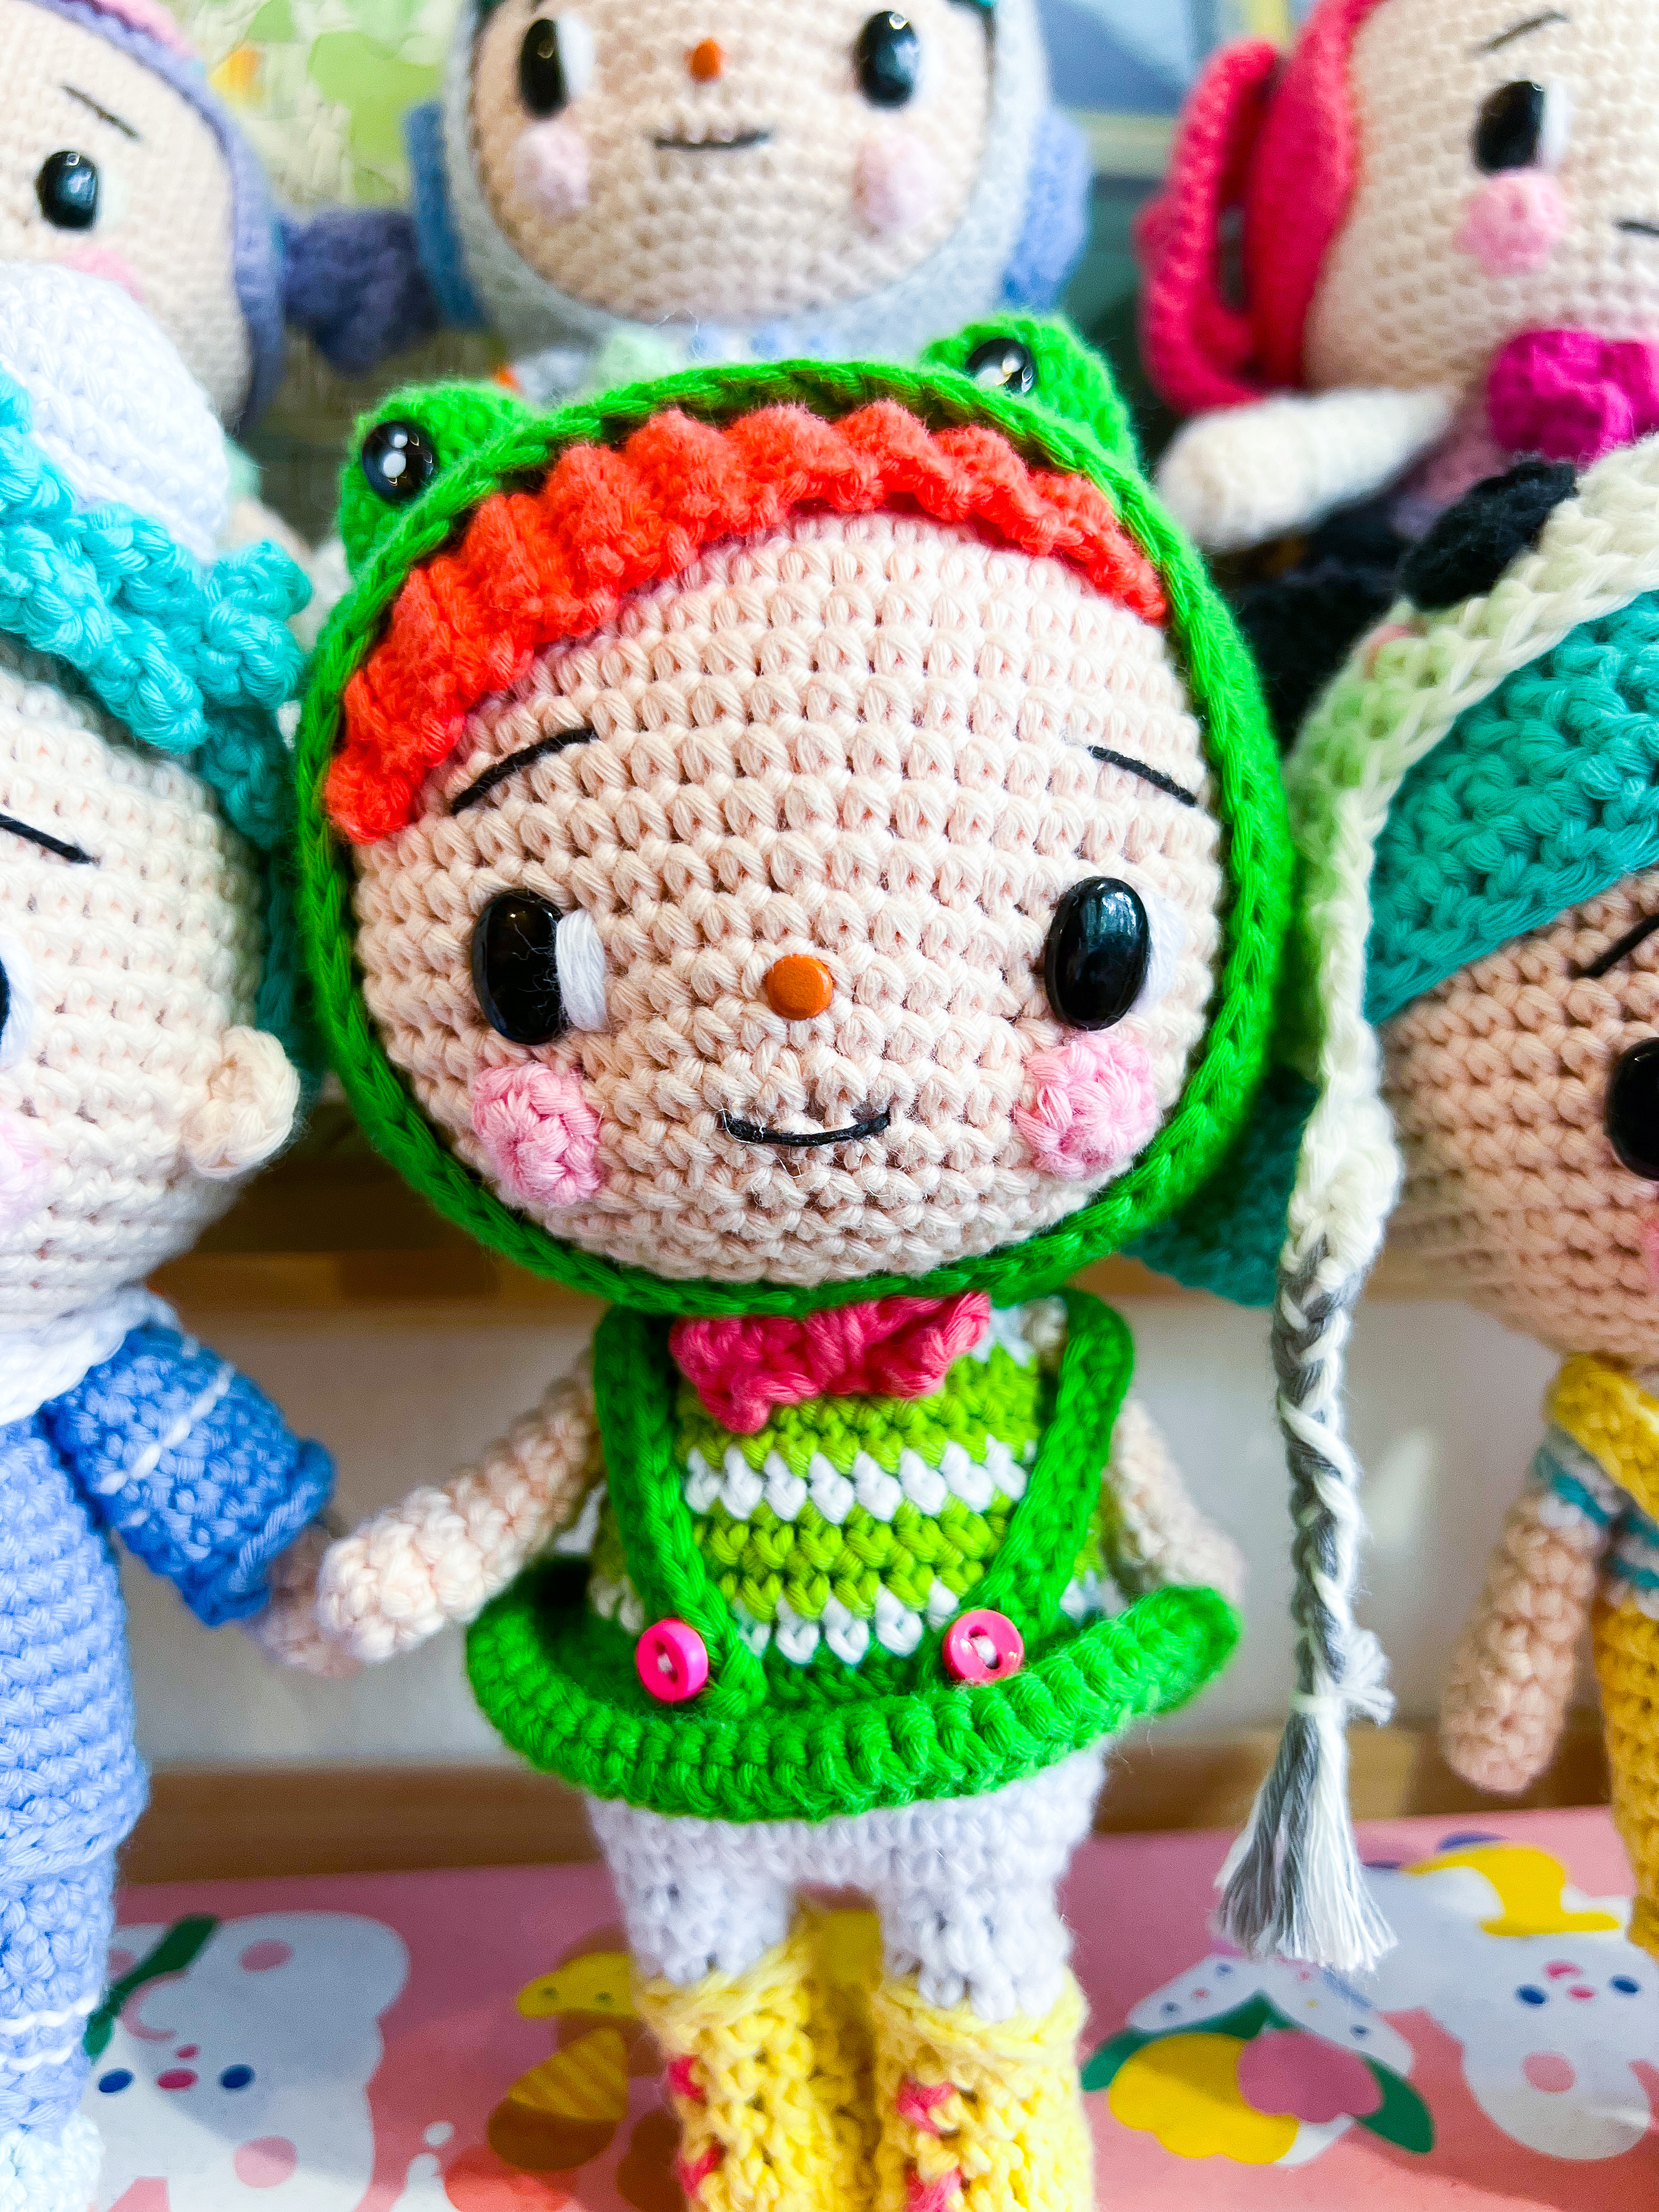
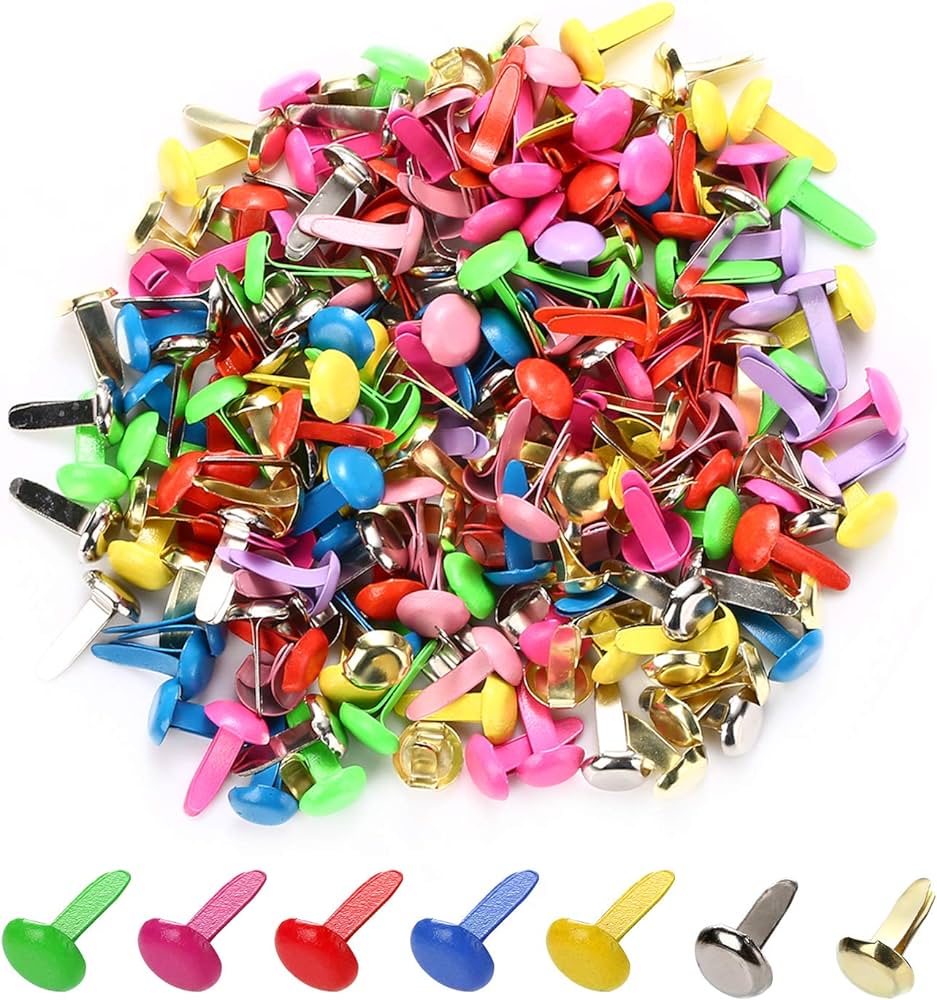
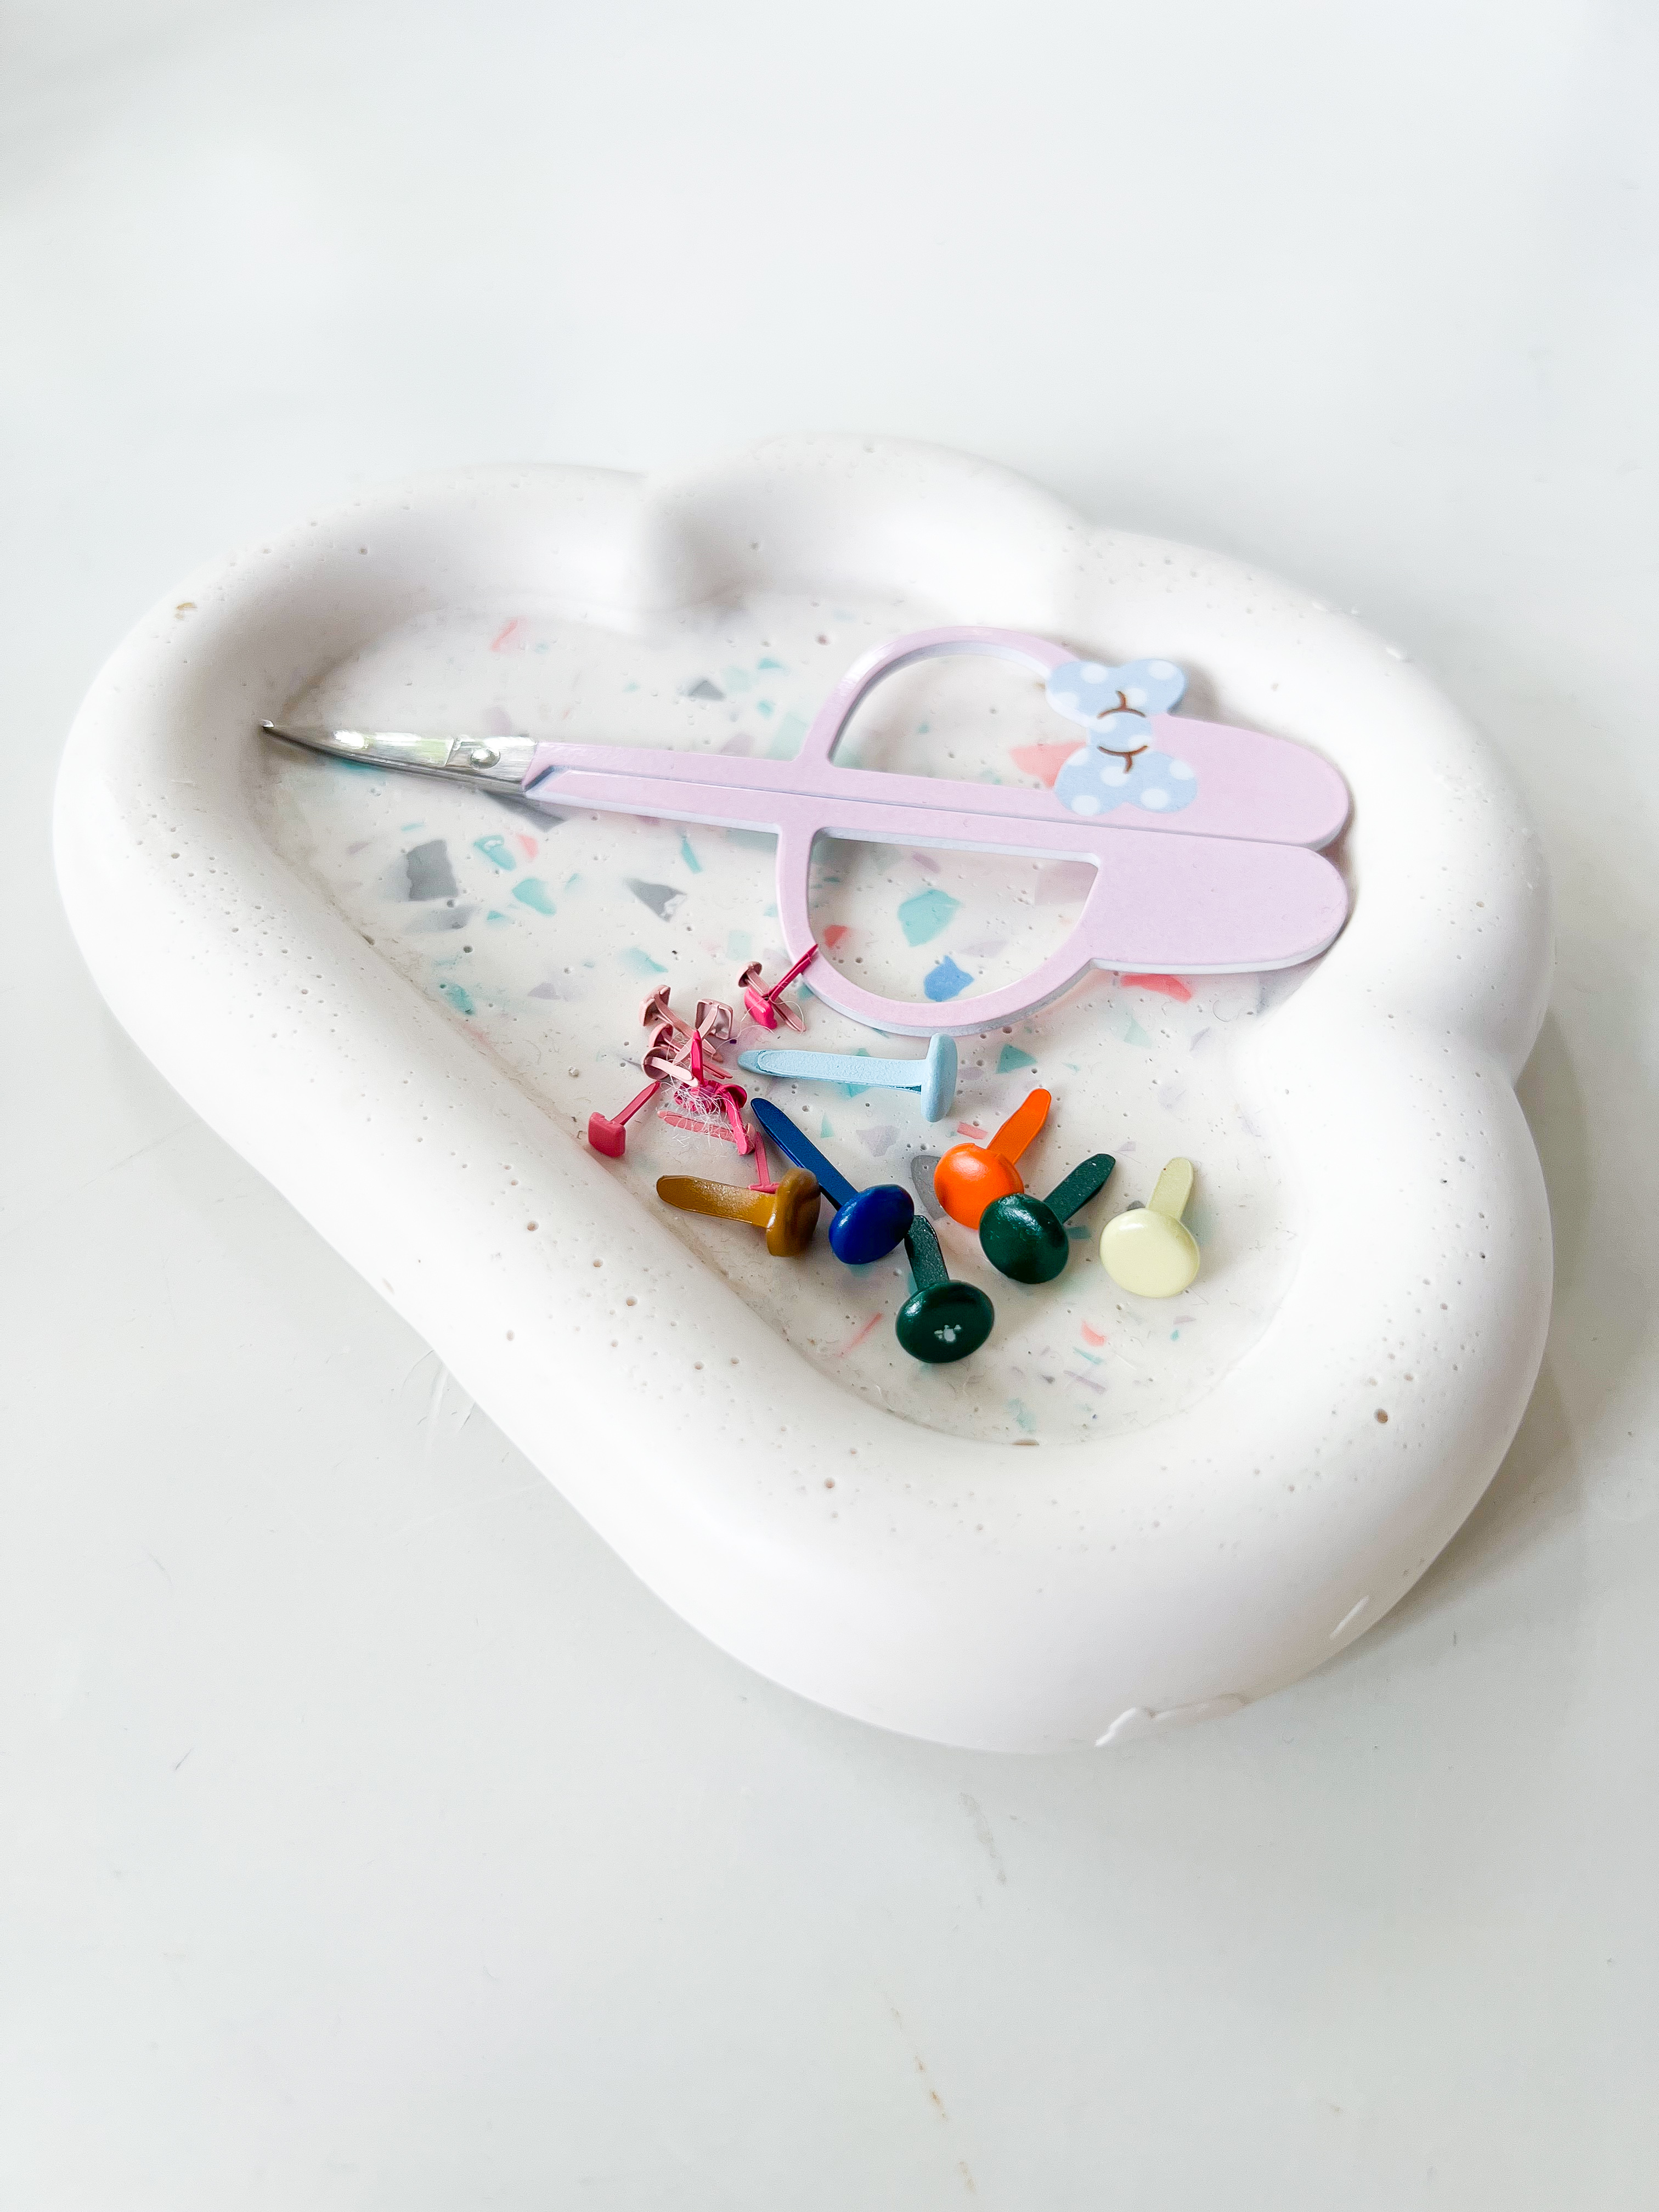
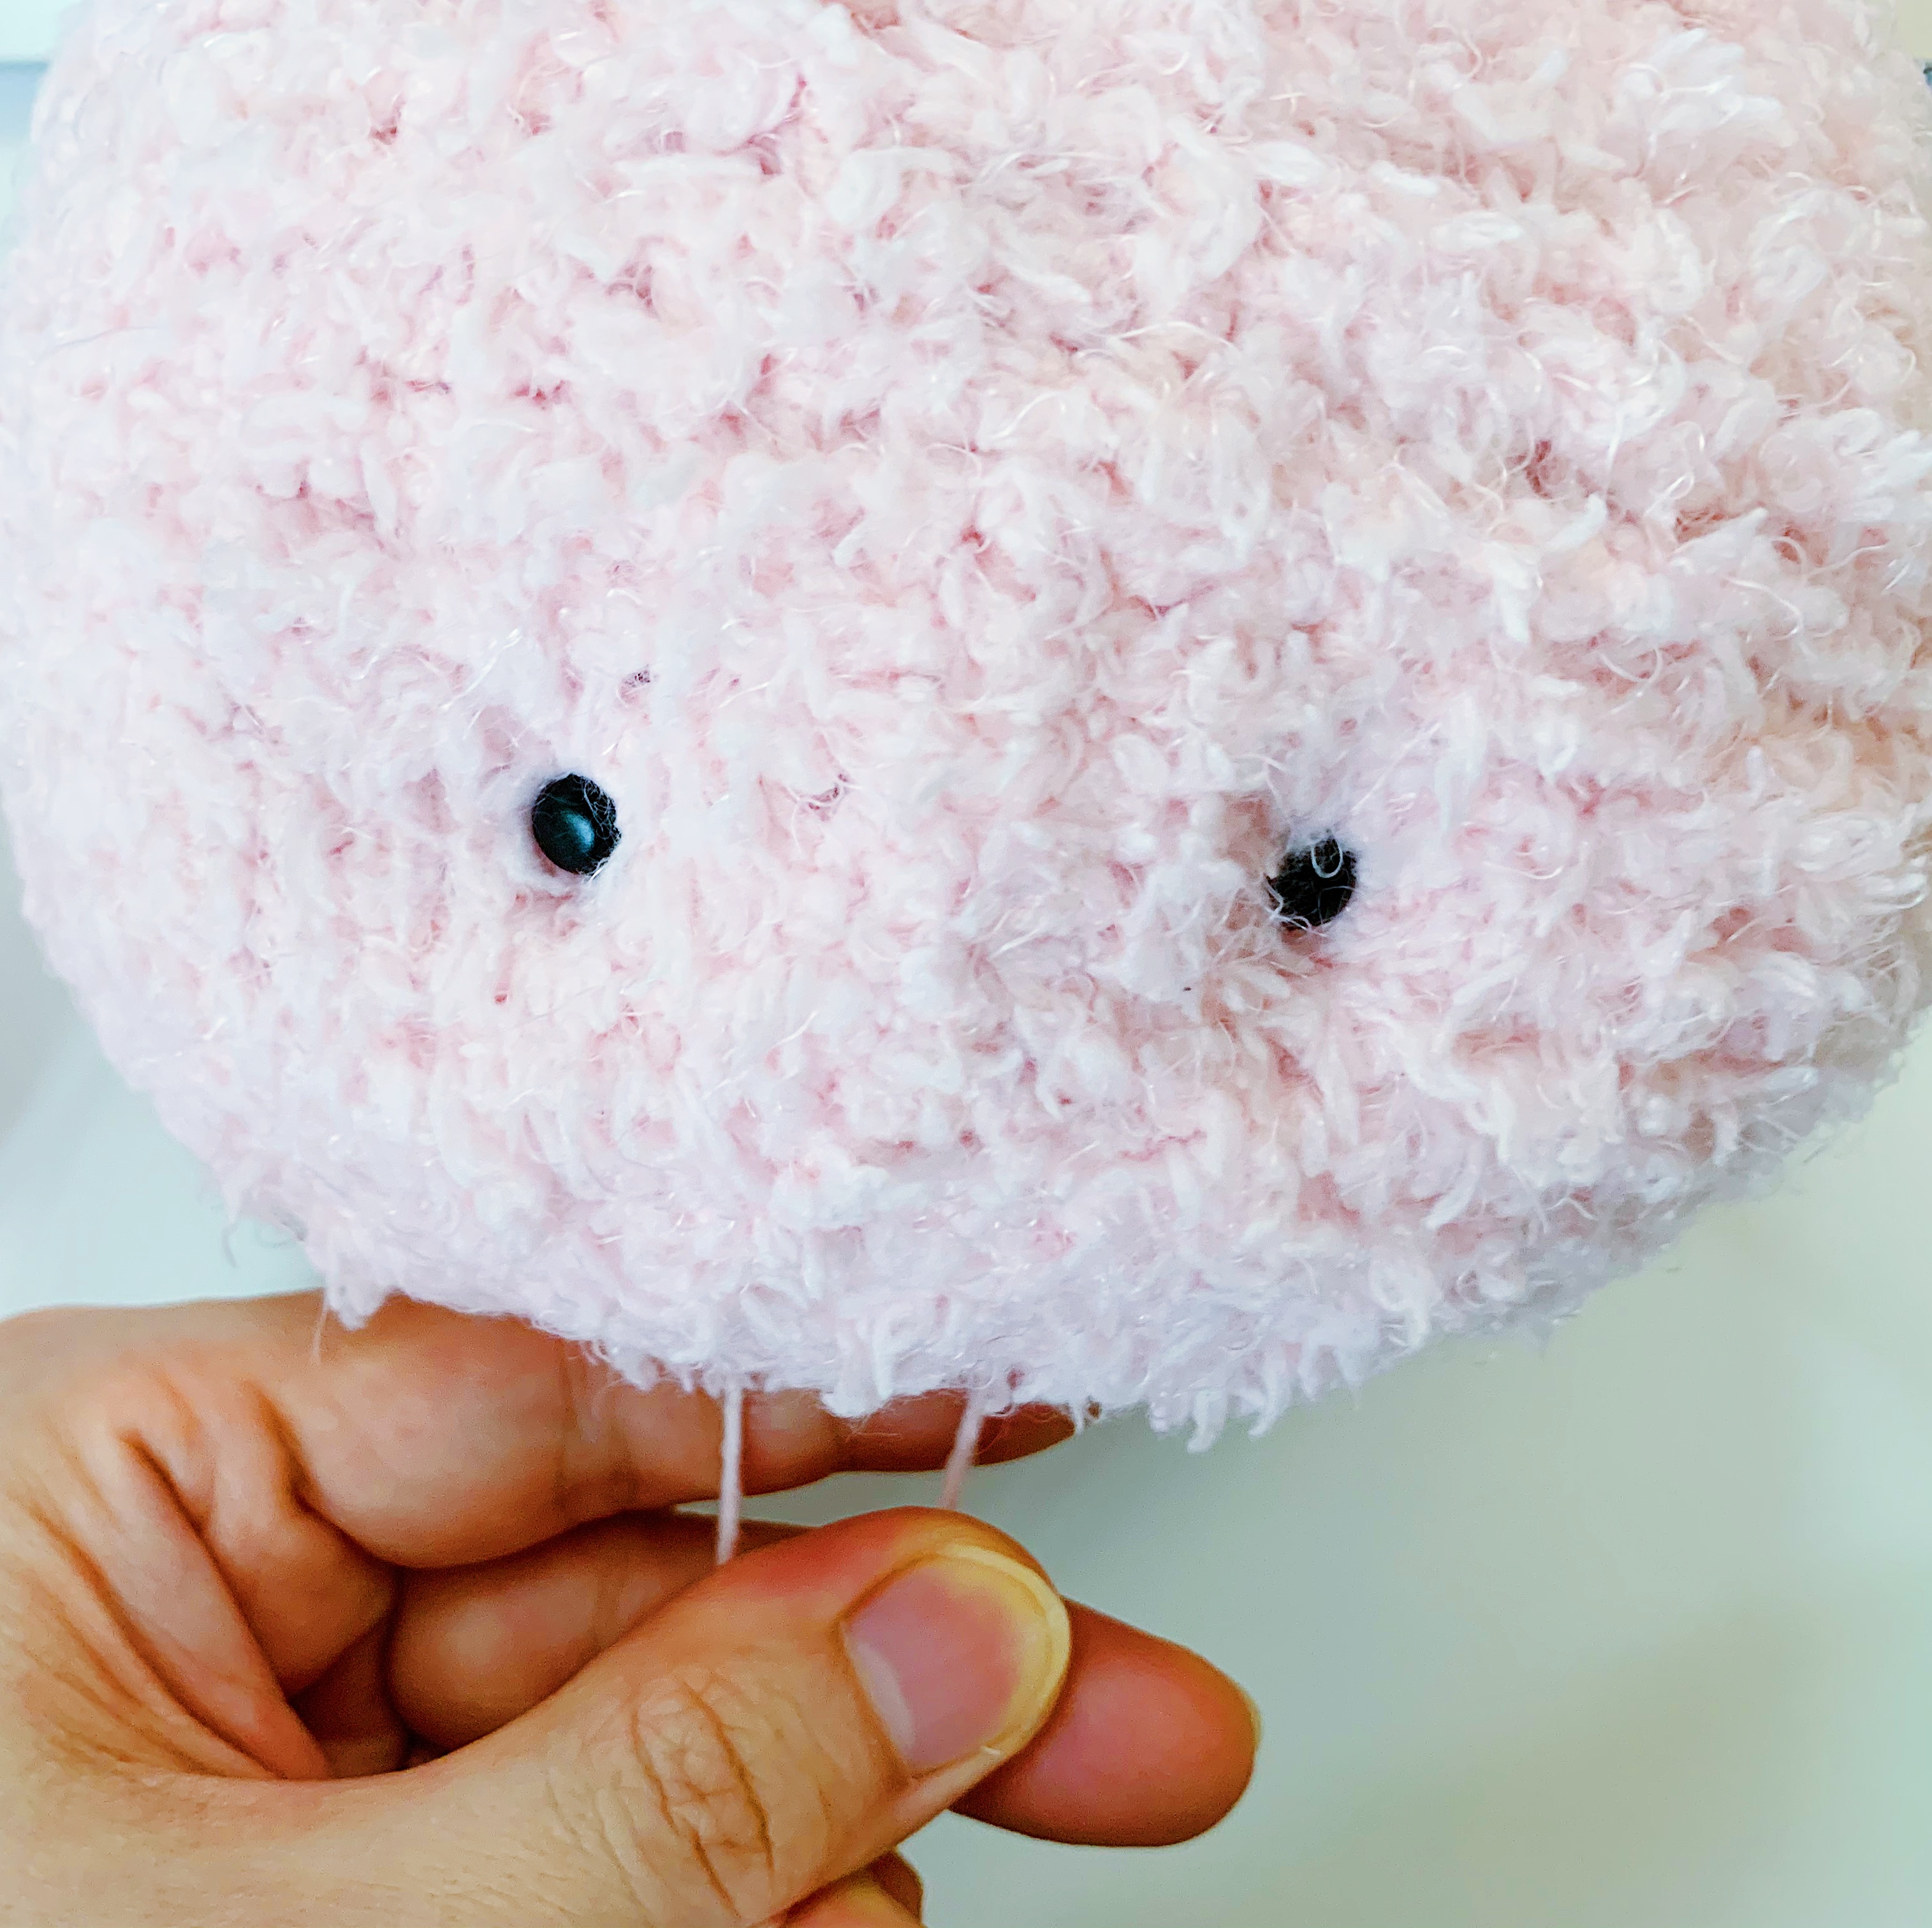
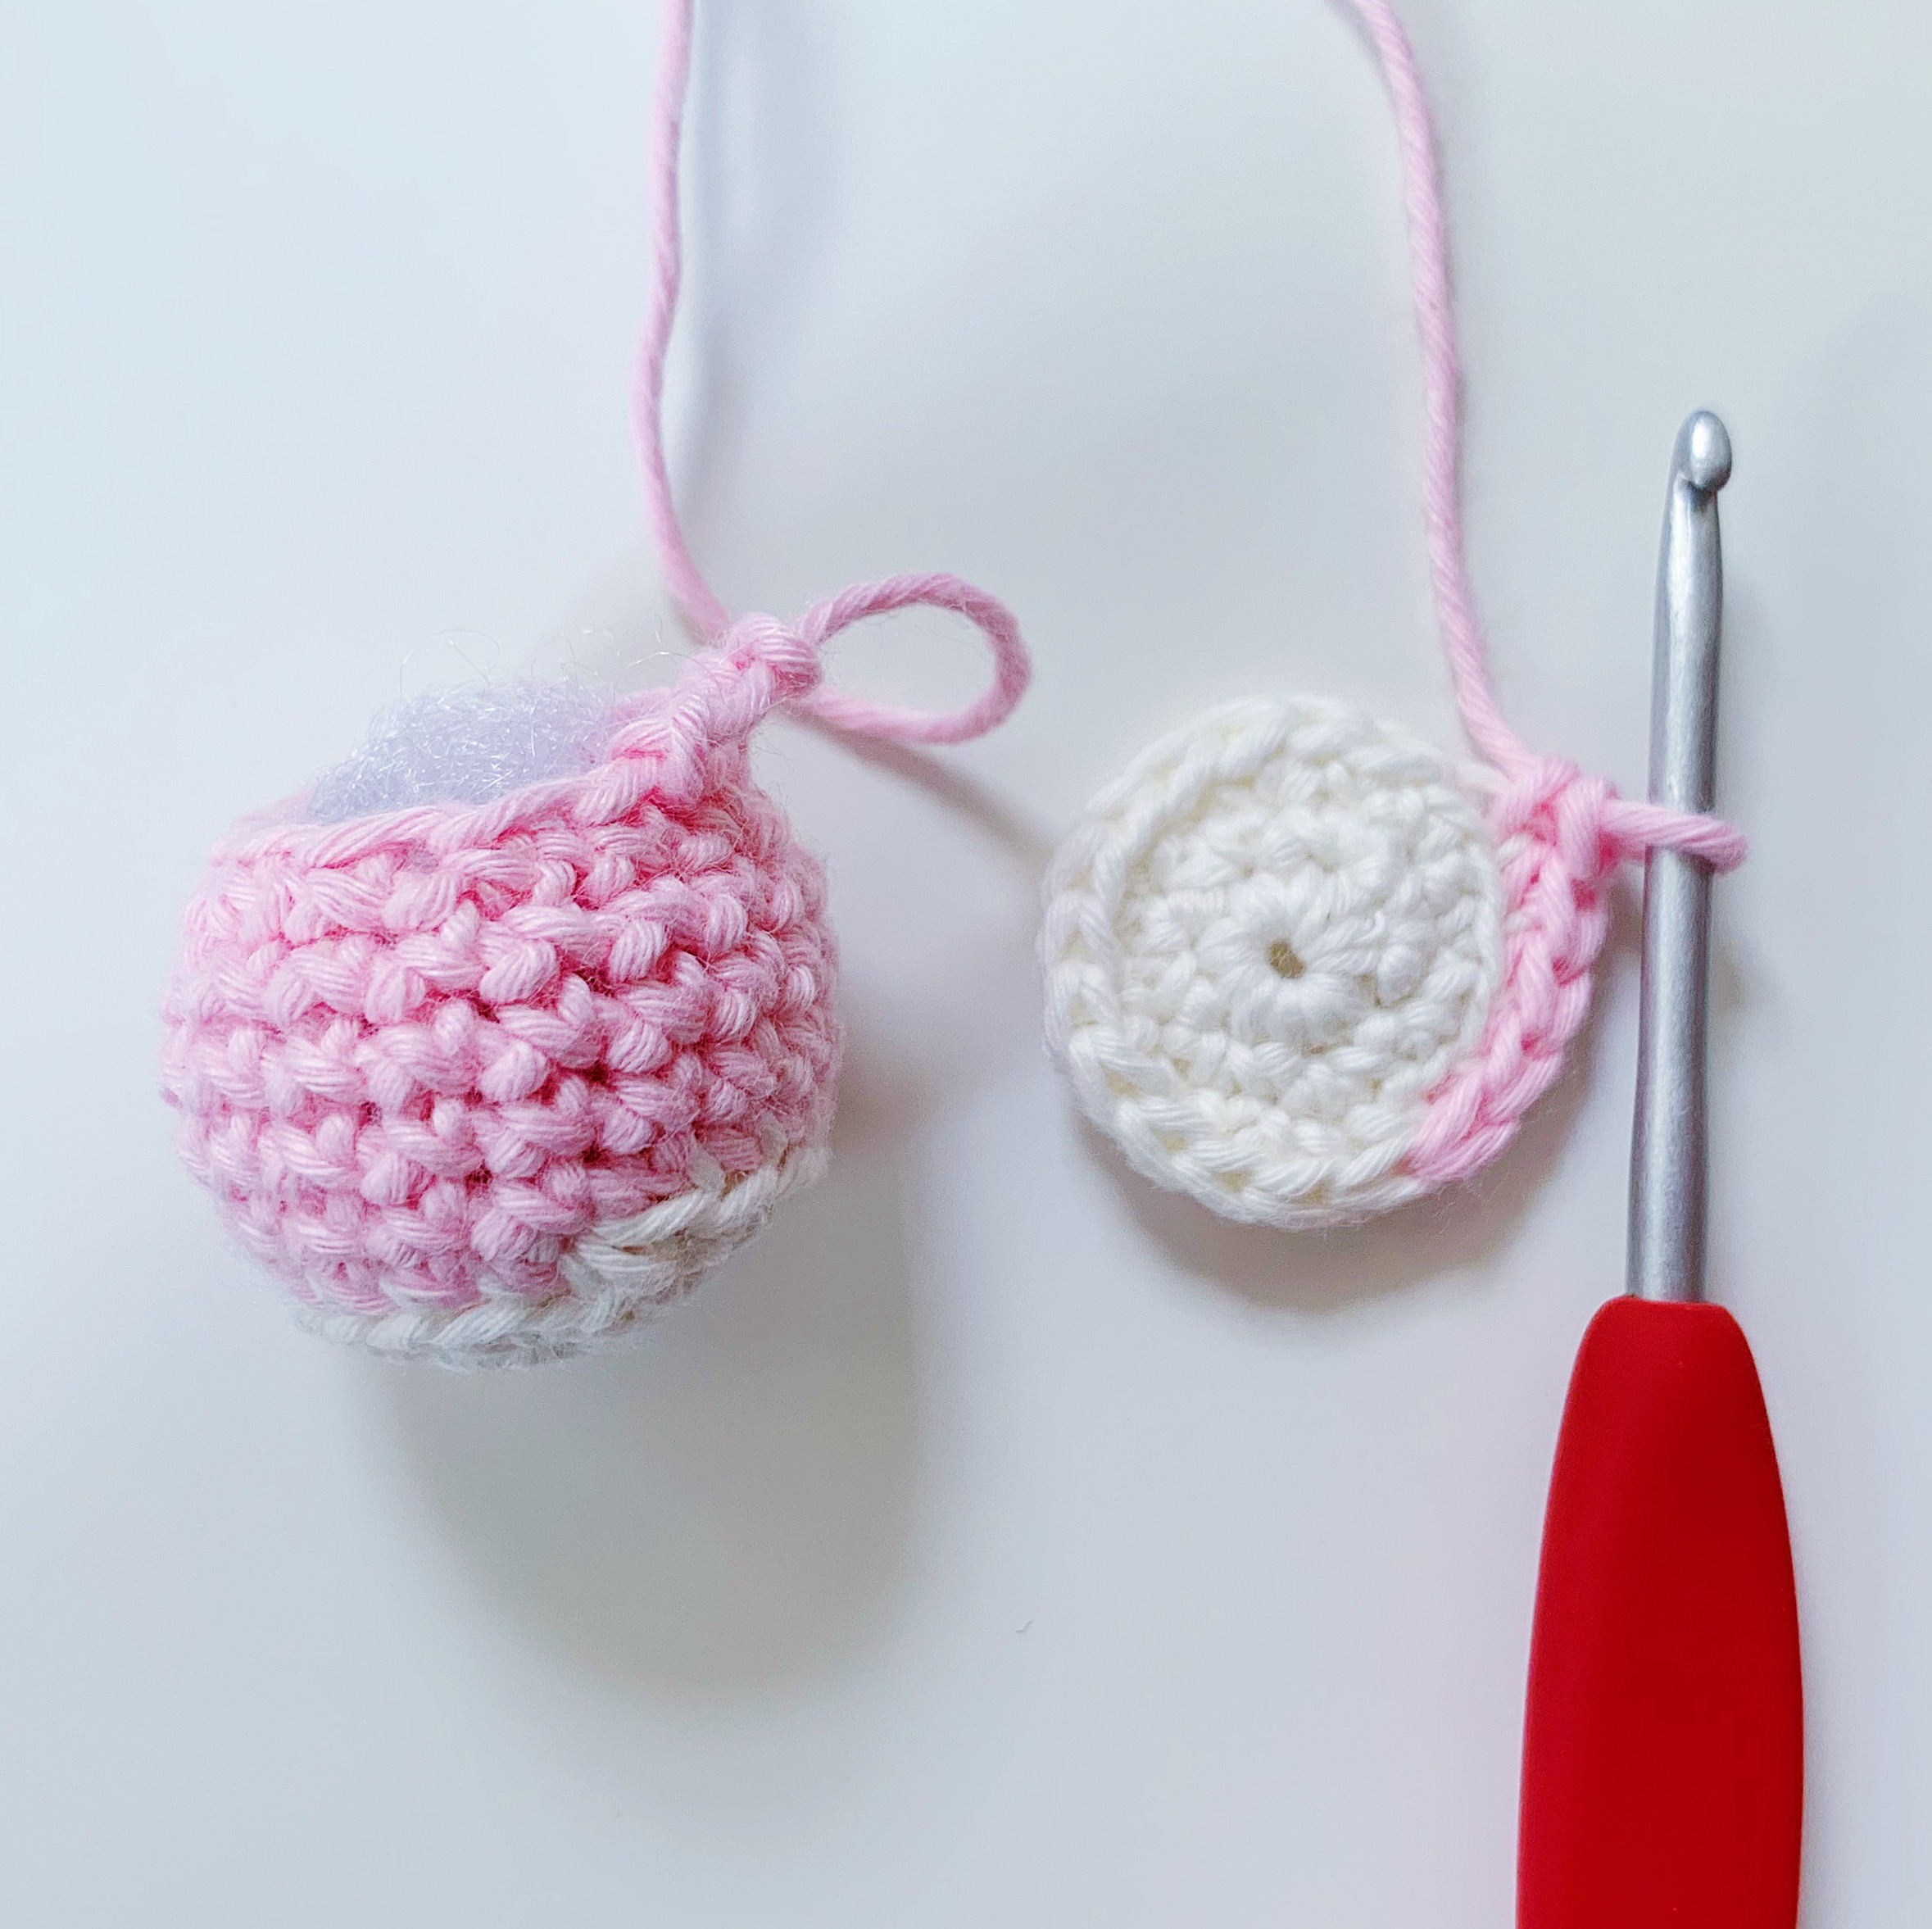
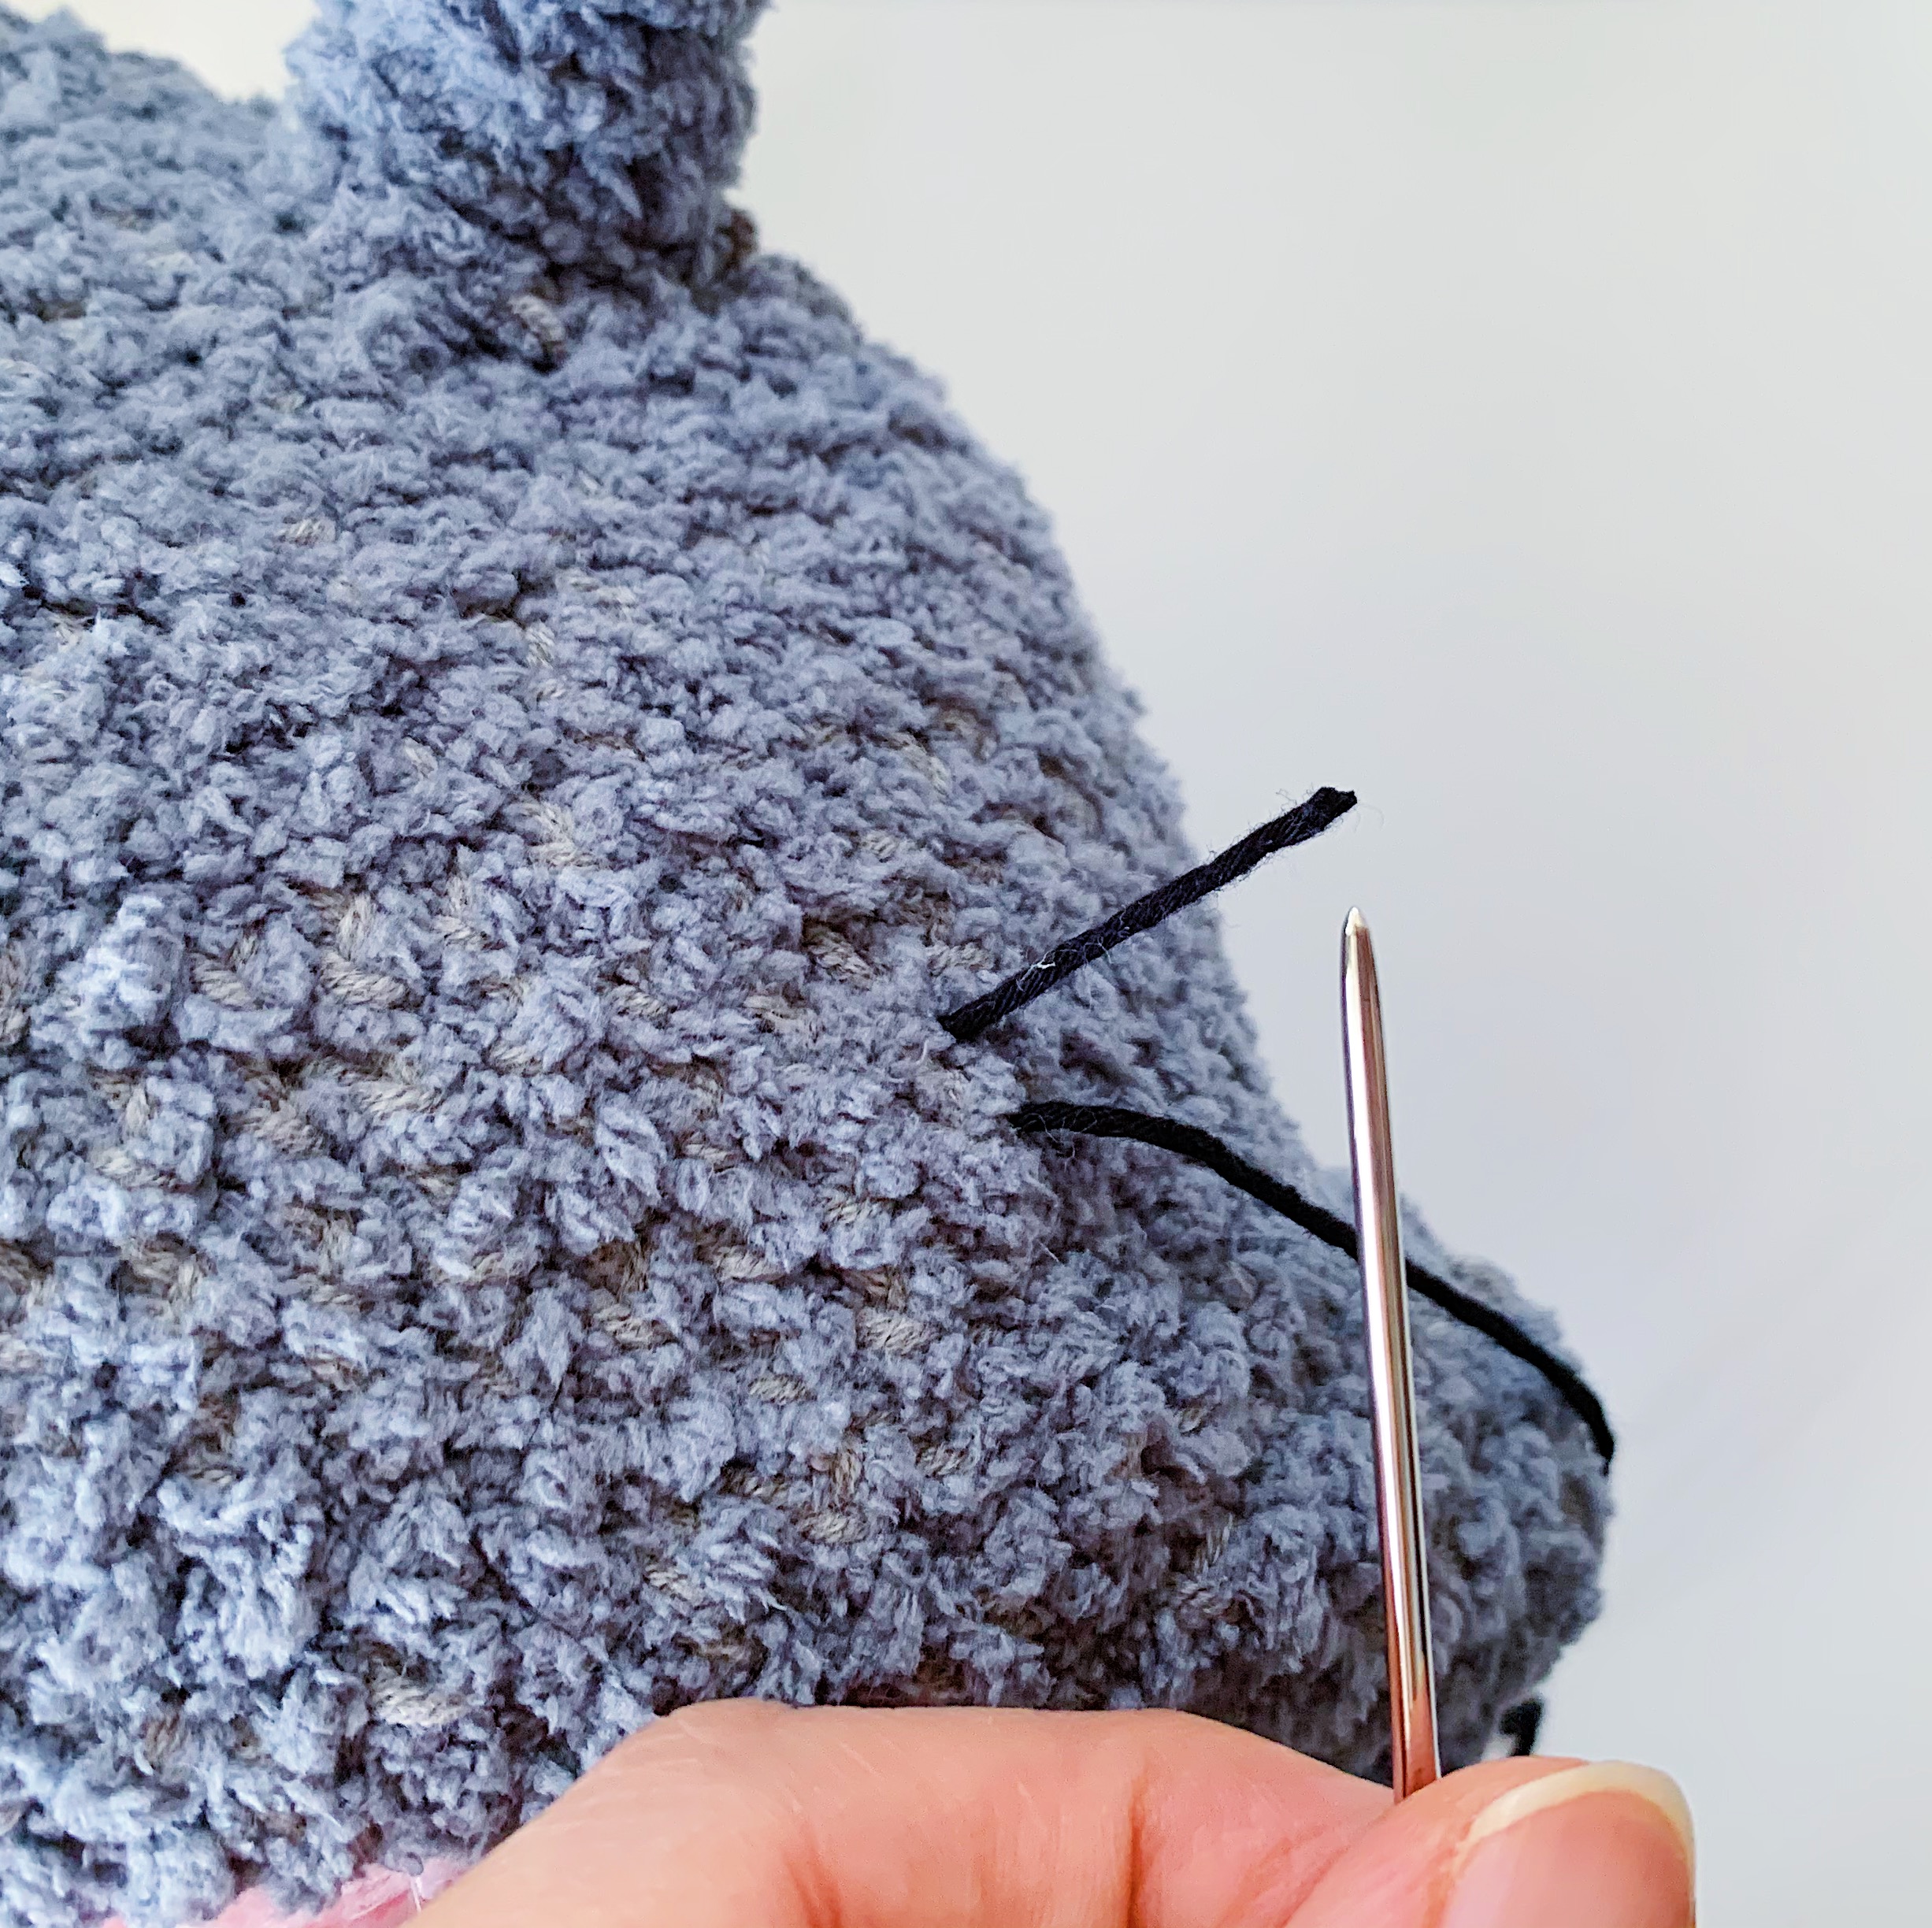
I’m still getting a lot of enquiries whenever I use “brads” for my amigurumi, so I wanted to share how you can find these brads and what to look out for.
For my book Amigurumi People, I used a small orange brad for the noses of all the dolls. I actually found these brads online in a local craft store and I pretty much stocked up on it in case they ran out!
These “brads” are actually used for scrapbooking crafts and they come in all colours and shapes and sizes. I’ve found the circular ones to be the most useful for amigurumi. I like to use the black/blue ones for eyes and the pink one for cheeks.
They actually work the same way like safety eyes – you can insert them and divide the “prongs” at the back of the brads to secure them on the inside of your doll before finishing up. Or you could also add it later with some glue. Do note though, that dolls with brads will not be suitable for children under three. I would say they fall off a bit easier than safety eyes.
If you can remember, I used it on all the dolls in Hello Kitty Crochet 🙂
I originally bought these pink brads in a craft store here in KL, Malaysia. I’ve not been able to find them again since though.
But! You can easily find similar ones online, if you’d like to try them.
I’ve just released two patterns, and you can find both on my Patreon!
1) Rion the Chinese Dragon (just in time for Lunar New Year)
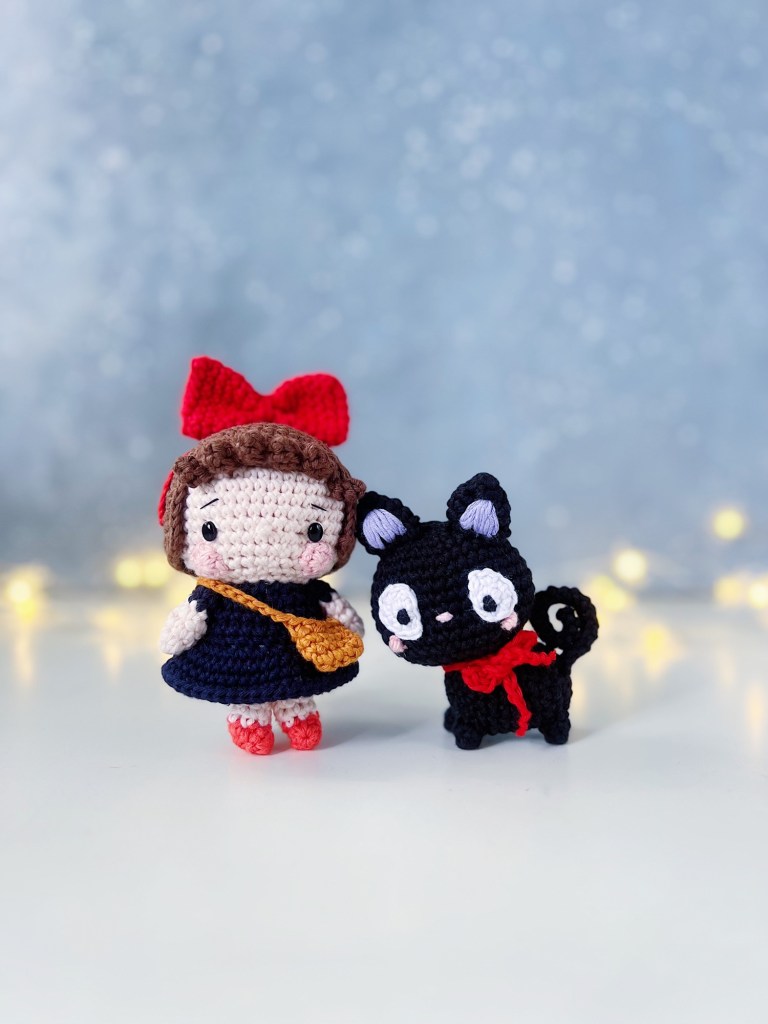
2) Kiki and Jiji (more Studio Ghibli patterns coming soon!)
It would mean so much to me for you to join my Patreon. I have so much to share with you and I love the fact that Patreon lets me do everything in one place.
I already have a series of video tutorials up, as well as some of my older Amigurumei patterns as a gift for you when you join my Patreon “club” 💖
If you have any questions at all, please leave a comment below!
Thank you for being here with me. I can’t wait to see you on Patreon 💖💖💖
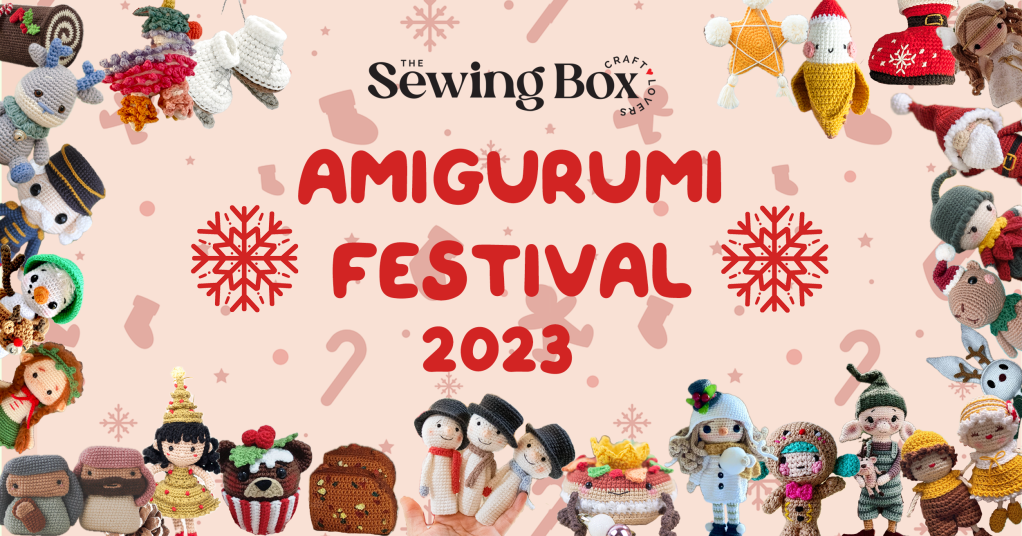
I’ve been sharing about my newest collaboration with The Sewing Box Magazine on Instagram, but if you’re new here, hello there!
The Sewing Box has organized a number of Amigurumi Festivals through the years, and I’m so honoured to be a part of their Christmas Amigurumi Festival 2023 💖💖💖
What is an “amigurumi festival”, you may ask? Well, it is a get-together where designers around the world (handpicked by The Sewing Box) design never-before-seen patterns and make them available to you in a “bundle pack”. Over 20 patterns. One price only.
For the Christmas Amigurumi Festival 2023, it’s USD$21.50 for 25 patterns from 25 designers, plus a bonus e-book packed with Christmas stories and recipes from traditions around the world. It is available for a limited time only, from today (Nov 21st) until Dec 4th.
My design for this year’s festival is Panko the Gingerbread Girl 💖💖💖 As a token of appreciation for your support and love, anyone who buys the Christmas Amigurumi Festival bundle pack will be gifted a bonus pattern of your choice from my shops, and also a shoutout on my next Instagram Reel. Just send me an email with your proof of purchase (or DM me on Instagram @amigurumei) and I’ll reply right away ⭐️⭐️⭐️
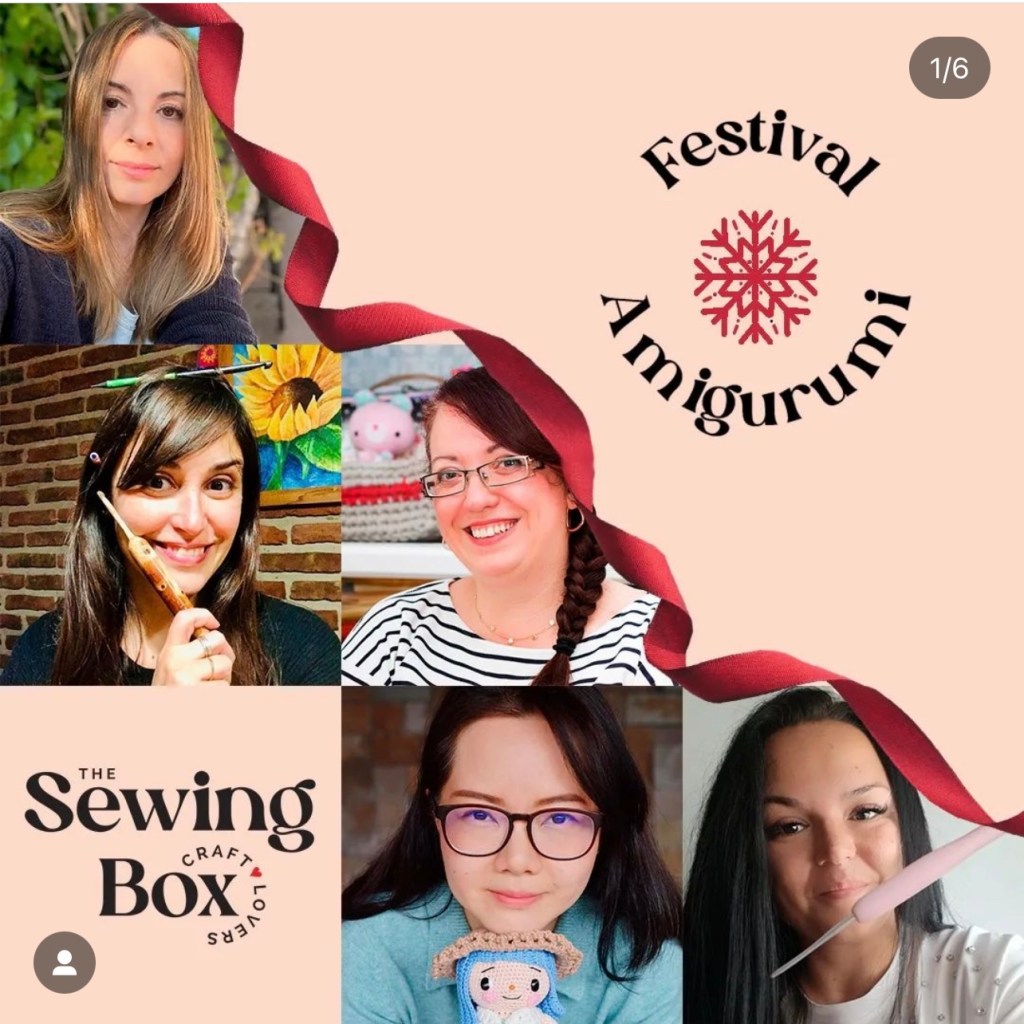
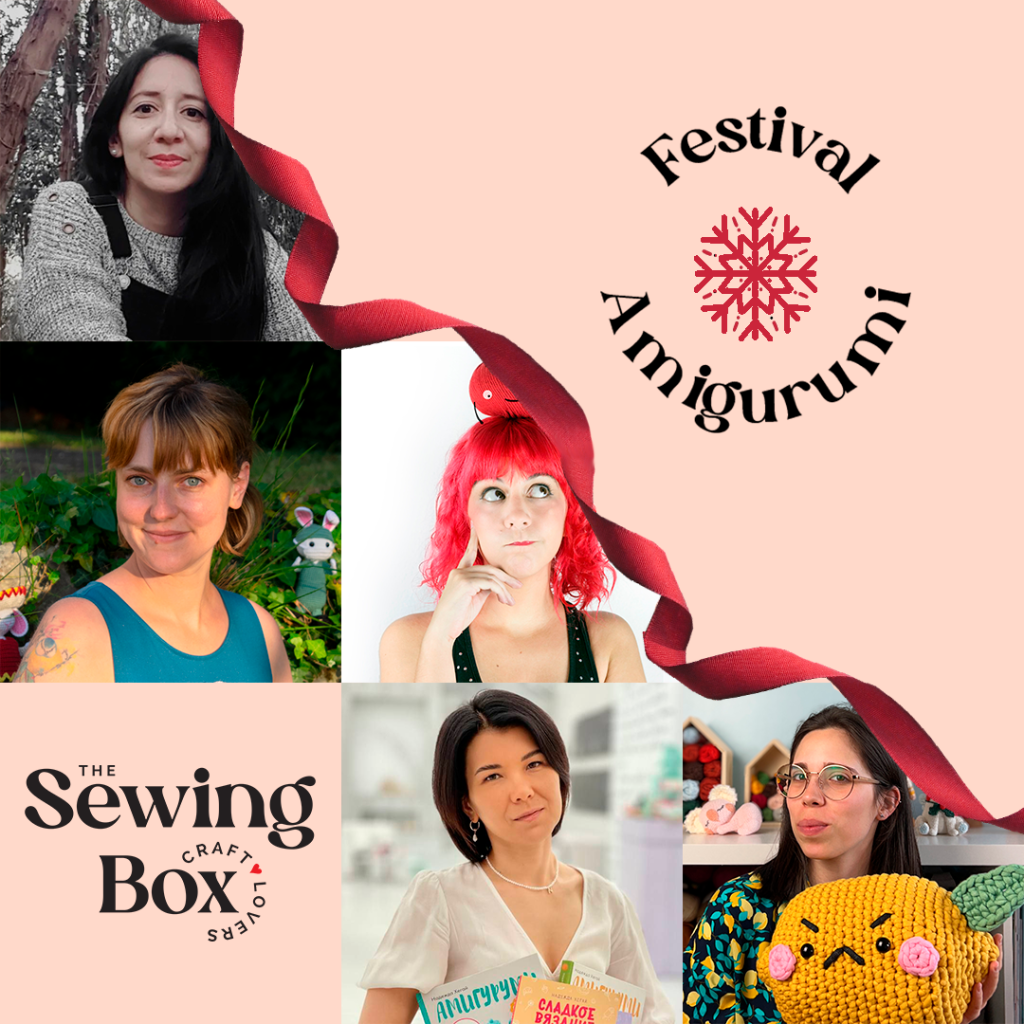
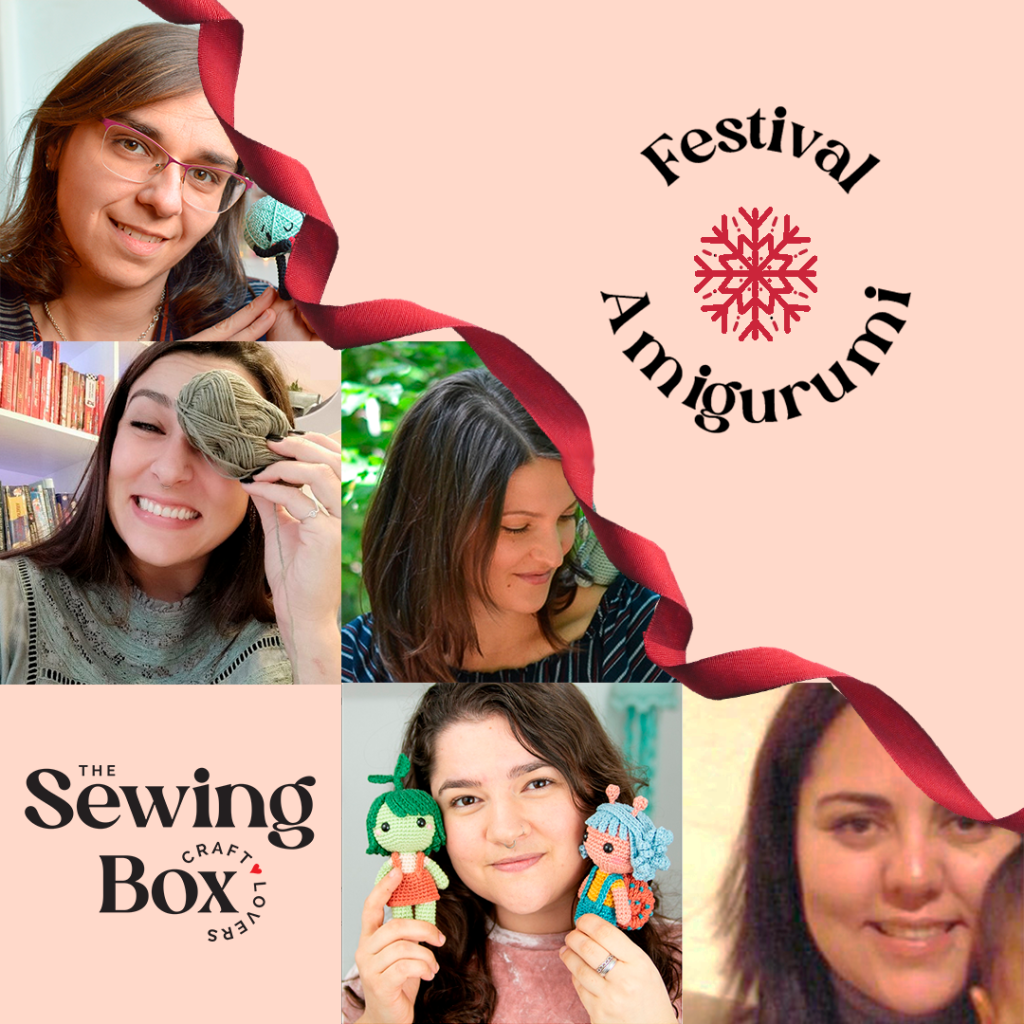
Here’s a look at all of us who are a part of this Festival 💖💖💖
I have a FREE pattern for you, and some of you may have seen this on my Instagram @amigurumei .
You can find the pattern for Yuzu the Baby Bee Fairy here for 24 hours (I will upload it onto a different platform after that, but it will still be FREE) 🙂
The pattern is a part of the 2023 Crochet Summit by You.Make , where you can crochet along with me through an online crochet class (in other words, my first video tutorial, from start to finish!).
Please do let me know if you are able to register for FREE (from Nov 9 – 10) and view the videos (but it is only FREE for 24 hours). There are also other tutorials from designers that you might enjoy. Do explore!
I hope to share the full video on my YouTube soon. Stay tuned!
Do tag me on Instagram @amigurumei when you finish your baby bee!
P/S I must admit that I had a lot on my plate when I jumped on board this project too. I hope you’ll still enjoy the pattern and if you do spot any mistakes, please do let me know!
If you’re new here, I just wanted to share that my I have a new book, Amigurumi People, and it’s currently available for pre-orders on Amazon worldwide, as well as Kinokuniya and other major online bookstores.
You can see more about my book on Instagram @amigurumei 💖💖💖
I promise to share more when I can!
Thank you for being here with me!
Mei
P/S I am so happy to be working with Tuva Publishing again on this new book. They said yes to including so many step-by-step tutorial photos – I hope you’ll find them useful in making your own Amigurumi People dolls 💖
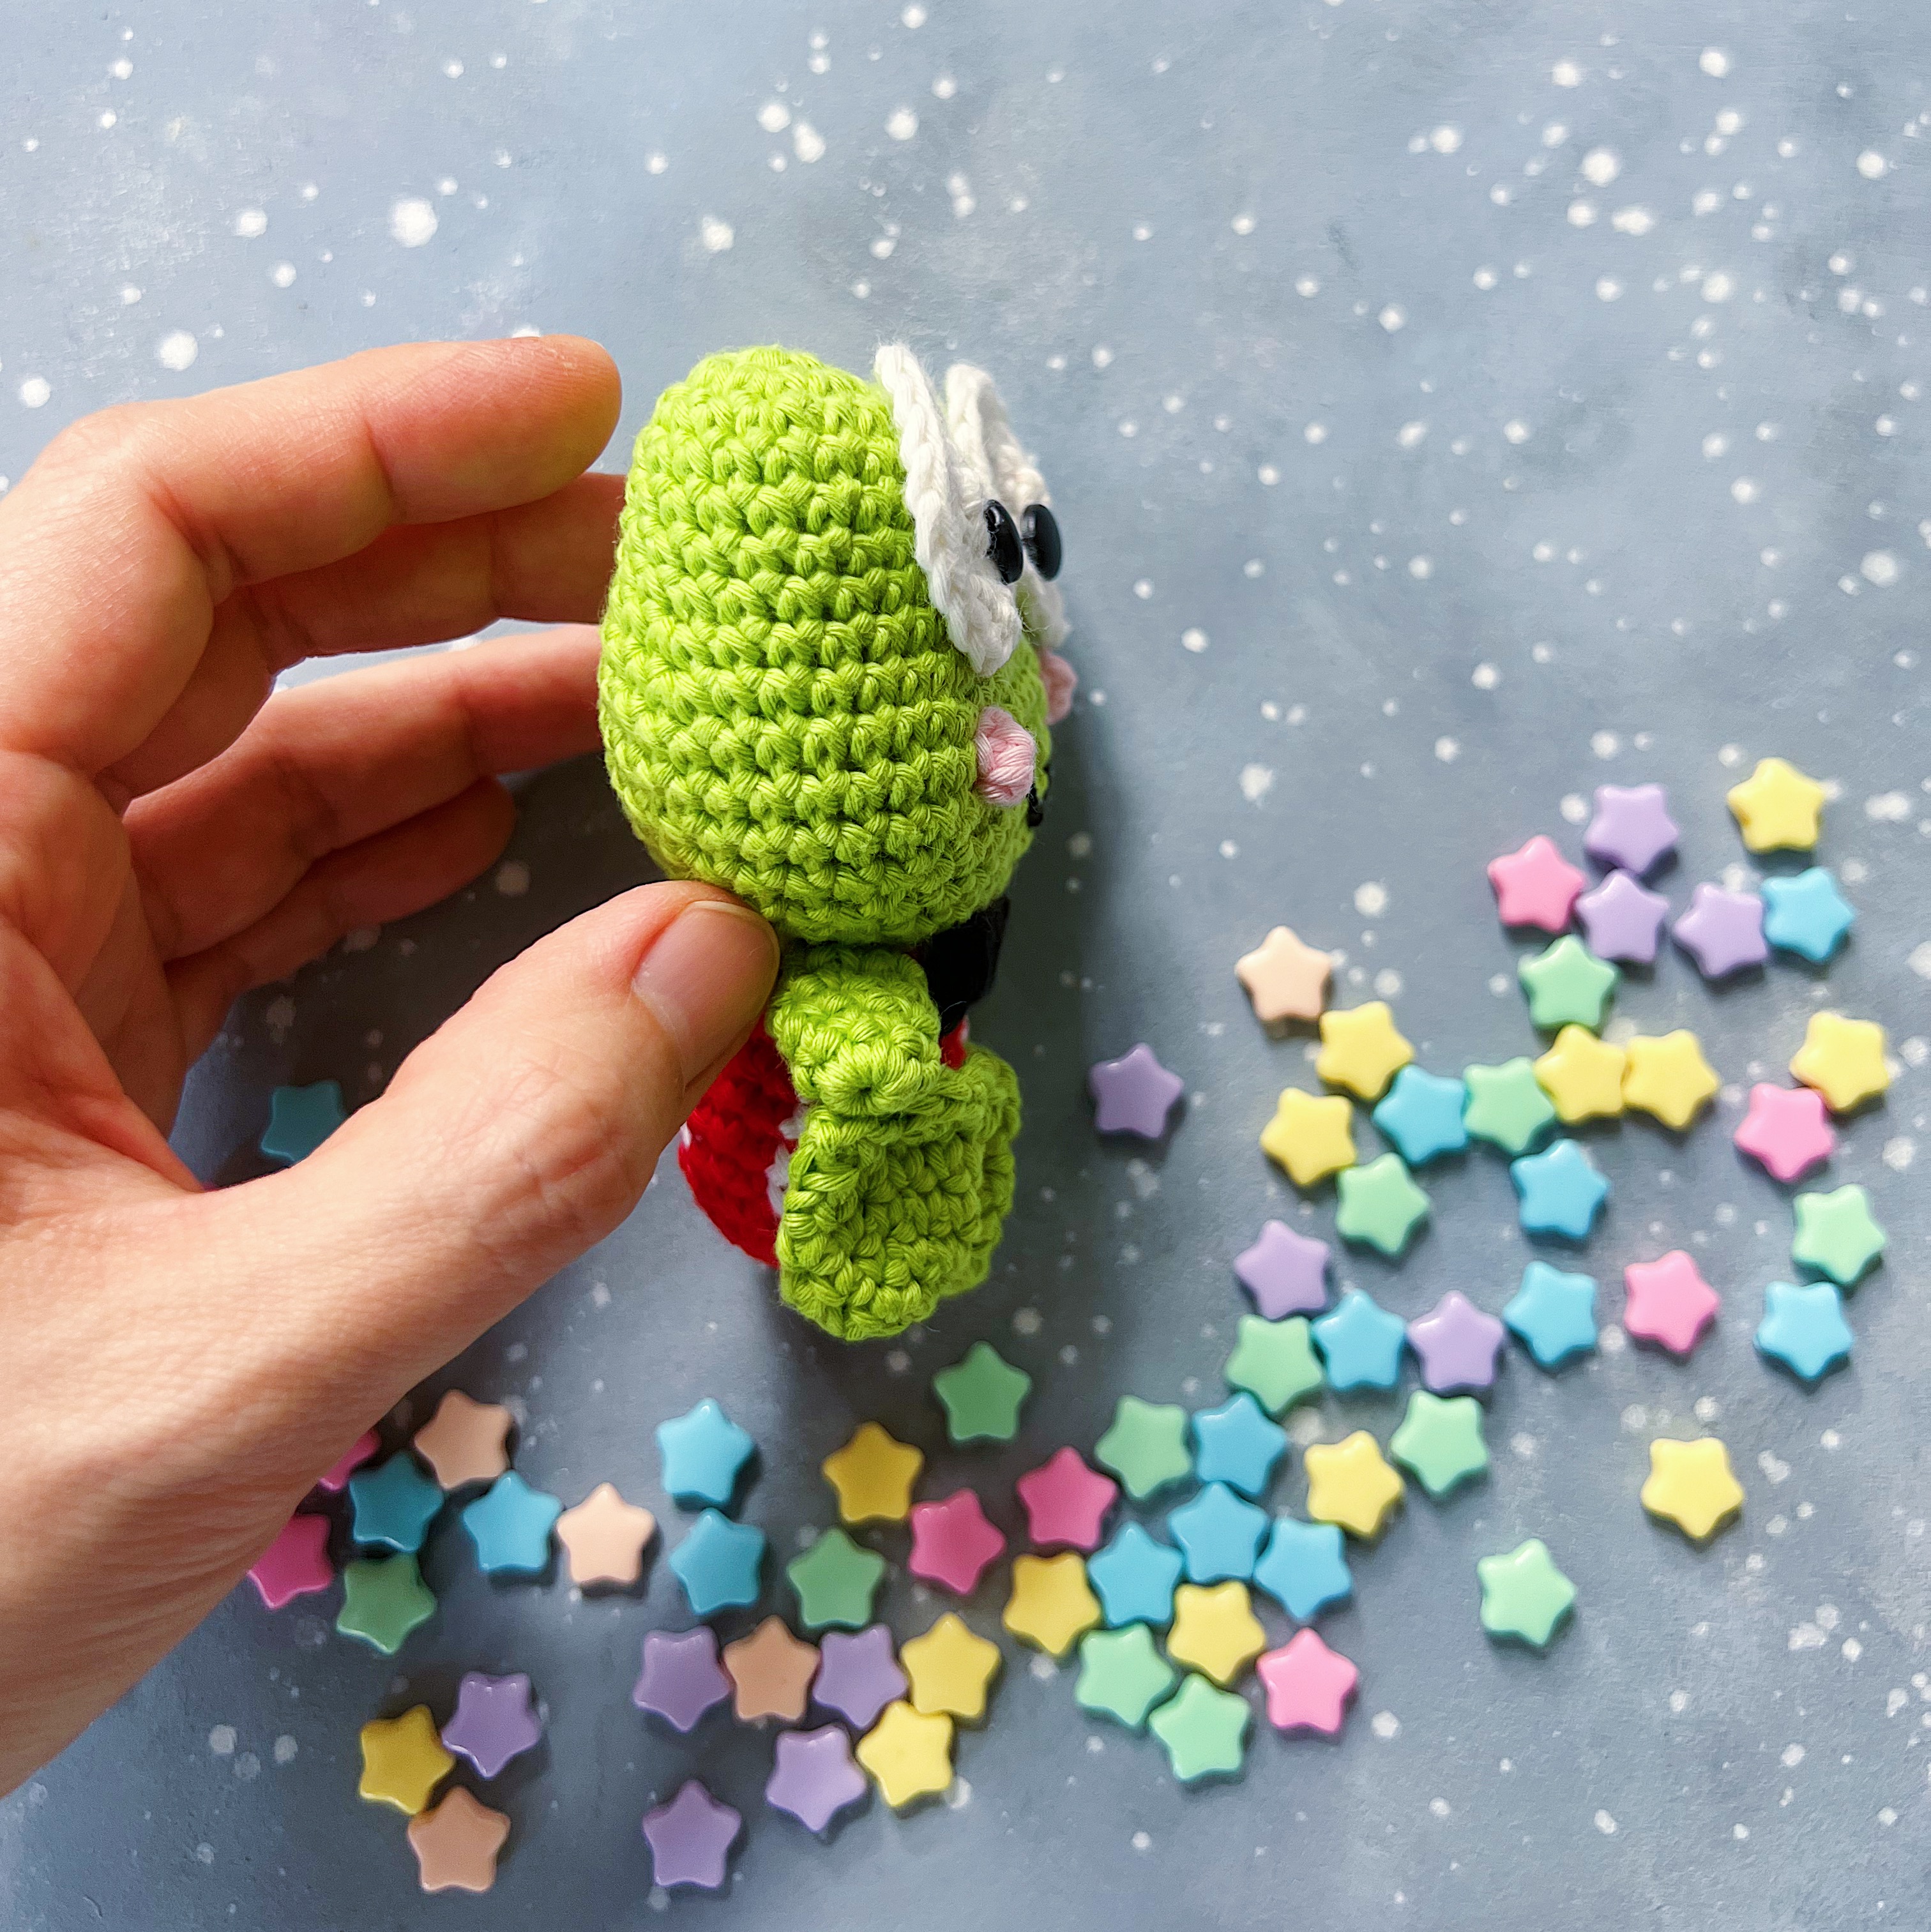
Who doesn’t love Keroppi? (Or Kero kero keroppi, as I remember him being called?)
He brings back lots of childhood memories and the sight of him just makes me feel child-like all over again.
There used to be department stores that would dedicate an entire area to Sanrio merchandise and I remember how it felt like being there, and also the sweet candy scent that came with all things kawaii.
And so as promised, here is the FREE PATTERN for Keroppi. I have given him new clothes and added on a crochet bowtie and cheeks. I hope you’ll enjoy him!
Tag me on instagram @amigurumei when you do make Keroppi! Also, check out my Reels on Keroppi!
Materials Dk-weight yarn in apple-green, white, red, black and light pink. 3mm crochet hook 2 x black brads (8mm) or doll’s eyes Black crochet thread or embroidery floss Darning needle Stuffing Craft glue
Head (Part 1) With apple-green yarn: R1: Make a magic ring, 6sc in ring (6). R2: Inc in each st around (12). R3: [Sc in next st, inc in next st] 6 times (18). R4-6 (3 rounds): Sc in each st around (18). Fasten off and leave a long end for sewing.
Head (Part 2) With apple-green yarn: R1: Make a magic ring, 6sc in ring (6). R2: Inc in each st around (12). R3: [Sc in next st, inc in next st] 6 times (18). R4-6 (3 rounds): Sc in each st around (18). R7: Sc in the next 9 sts. Join to Head Part 1 by making the next sc in the Head Part 1 piece (any stitch). Continue to make one sc each in the next 17 sts. Now you’ll be joining back to Head Part 2: make the next 9 sts in the Head Part 2 piece (36). R8: [Sc in next 5 sts, inc in next st] 6 times (42). R8: [Sc in next 6 sts, inc in next st] 6 times (48). R10-11 (2 rounds): Sc in each st around (48). R12: [Sc in next 6 sts, inv dec] 6 times (42). R13: [Sc in next 5 sts, inv dec] 6 times (36). R14: [Sc in next 4 sts, inv dec] 6 times (30). R15: [Sc in next 3 sts, inv dec] 6 times (24). R16: [Sc in next 2 sts, inv dec] 6 times (18). Start stuffing the head. R17: [Sc in next st, inv dec] 6 times (12). R18: Inv dec all around (6). Fasten off and weave in ends. Use any long tail end left to close the gaps (if you have any) between the two head-joins.
Eyes (Make 2) With white yarn: R1: Make a magic ring, 5sc in ring (5). R2: Inc in each st around (10). R3: [Sc in next st, inc in next st] 6 times (15). R4: [Sc in next 2 sts, inc in next st] 6 times (20). Clean fasten off and leave a long end for sewing.
Cheeks (Make 2) With light pink yarn: Make a magic ring, 4sc in ring (4). Fasten off and leave a long tail for sewing.
Body With red yarn: R1: Make a magic ring, 6sc in ring (6). R2: Inc in each st around (12). R3: [Sc in next st, inc in next st] 6 times (18). R4: [Sc in next 2 sts, inc in next st] 6 times (24). In the next round, you will be alternating between red and white yarn. R5-9 (5 rounds): [In red, sc in each of the next 3sts, change to white yarn, sc in the each of the next 3 sts] repeat 3 more times (24). R10: In red, sc in each of the next 2sts, inv dec. Change to white yarn, sc in each of the next 2 sts, inv dec. Change to red yarn, sc in each of the next 2 sts. Change to white yarn, inv dec, sc in the next st. Change to red yarn, sc in the next st, inv dec. Change to white yarn, sc in the next 2 sts. Change to red yarn, inv dec, sc in the next st. Change to white yarn, sc in the next st, inv dec. (18). Fasten off and leave a long end for sewing. Stuff body. **Remember to start changing the yarn colour before you complete the final stitch of the previous colour. **Instead of cutting or carrying the different yarn colours along, I just dropped each yarn and picked it up again whenever the colour changes happened. This works for small body pieces and shouldn’t cause any puckering. I hope this works for you too!
Arms (Make 2) With apple-green yarn: R1: Make a magic ring, 7sc in ring (7). R2-5 (4 rounds): Sc in each st around (7). Fasten off and leave a long end for sewing. No stuffing is required for the arms.
Webbed feet (Make 2) (Please head to my YouTube to see a video tutorial on how to crochet the webbed foot — I have also included the video below. Just scroll down all the way!) With apple-green yarn R1: Make a magic ring, 5sc in ring (5). R2: Inc in each st around (10). R3-5 (3 rounds): Sc in each st around (10). Flatten piece. The following will be made by working across both sides of the piece. R6: Start with sc 1 in the same st where your hook is attached now. Ch 2, sl st to the next st, 3hdc in the next st, sl st to the next st, sc in the next st, ch 2, sc in the same st. Fasten off and thread the tail end through to the center of the piece. Leave a long end for sewing.
Bowtie With black yarn, ch 6. R1: Sc across (5). R2: Ch 1, turn. Sc across (5). Fasten off and leave a long end for sewing. Thread the tail end through to the center and use it to loop around the center of the bowtie about 4 times. It should start looking like a bowtie 🙂 Knot the ends at the back to secure the shape. Leave a long yarn end for sewing.
Getting the face ready 1. Position the eye pieces one on each mound of the head piece. Try to keep them as close to each other as possible, almost touching. 2. Glue on the eyes — position them towards the lower left and right hand side of each eye. 3. For the lips, sew on a V with black crochet thread between R12 & 13 (centred beneath the eyes), approximately 6 sts in length. 4. Sew on the cheeks.
Final Assembly
Sew body onto the head. Keep in mind that your Keroppi will look more amazing if the stripes on the body can be seen from the front. Adjust accordingly before sewing in place.
Sew on bowtie.
Sew arms to the sides of the body.
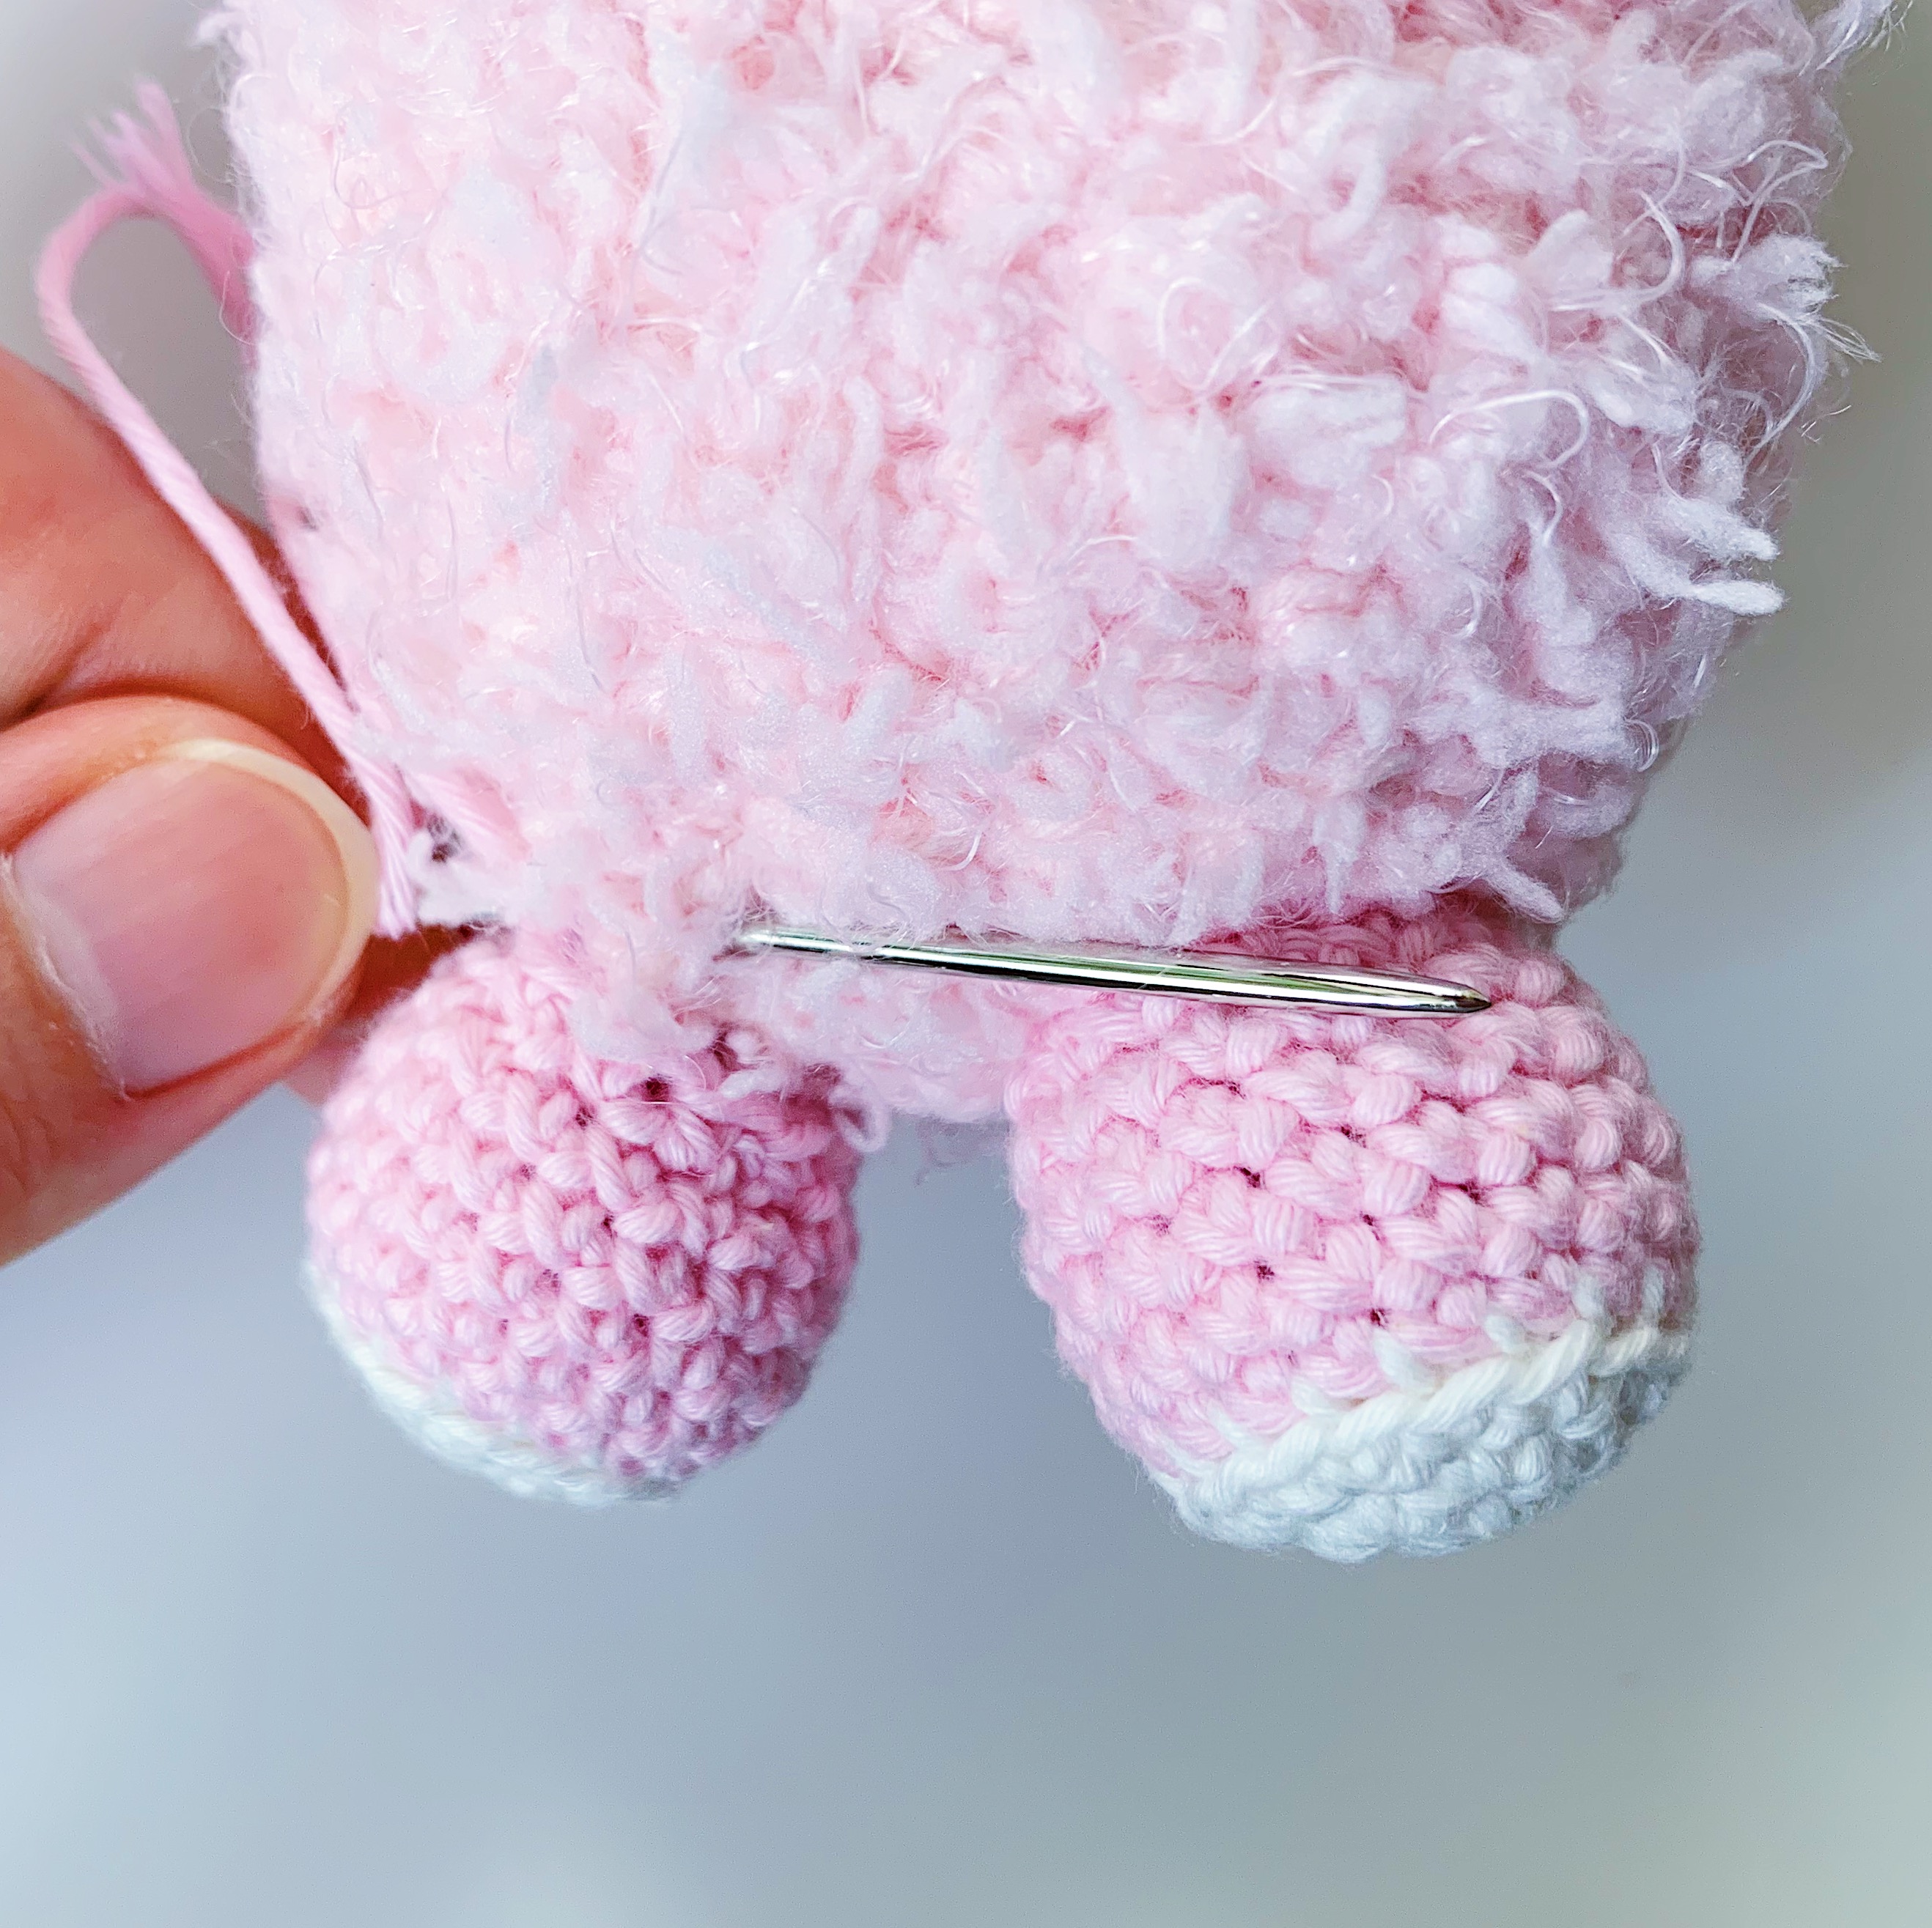
Sew webbed feet onto the front of the body (making sure that your stitches are only on the back part of the feet so that it isn’t noticeable in front).
P/S The original pattern for Keroppi appeared in Hello Kitty Crochet. The book is currently all sold out and there are no reprints at the moment.
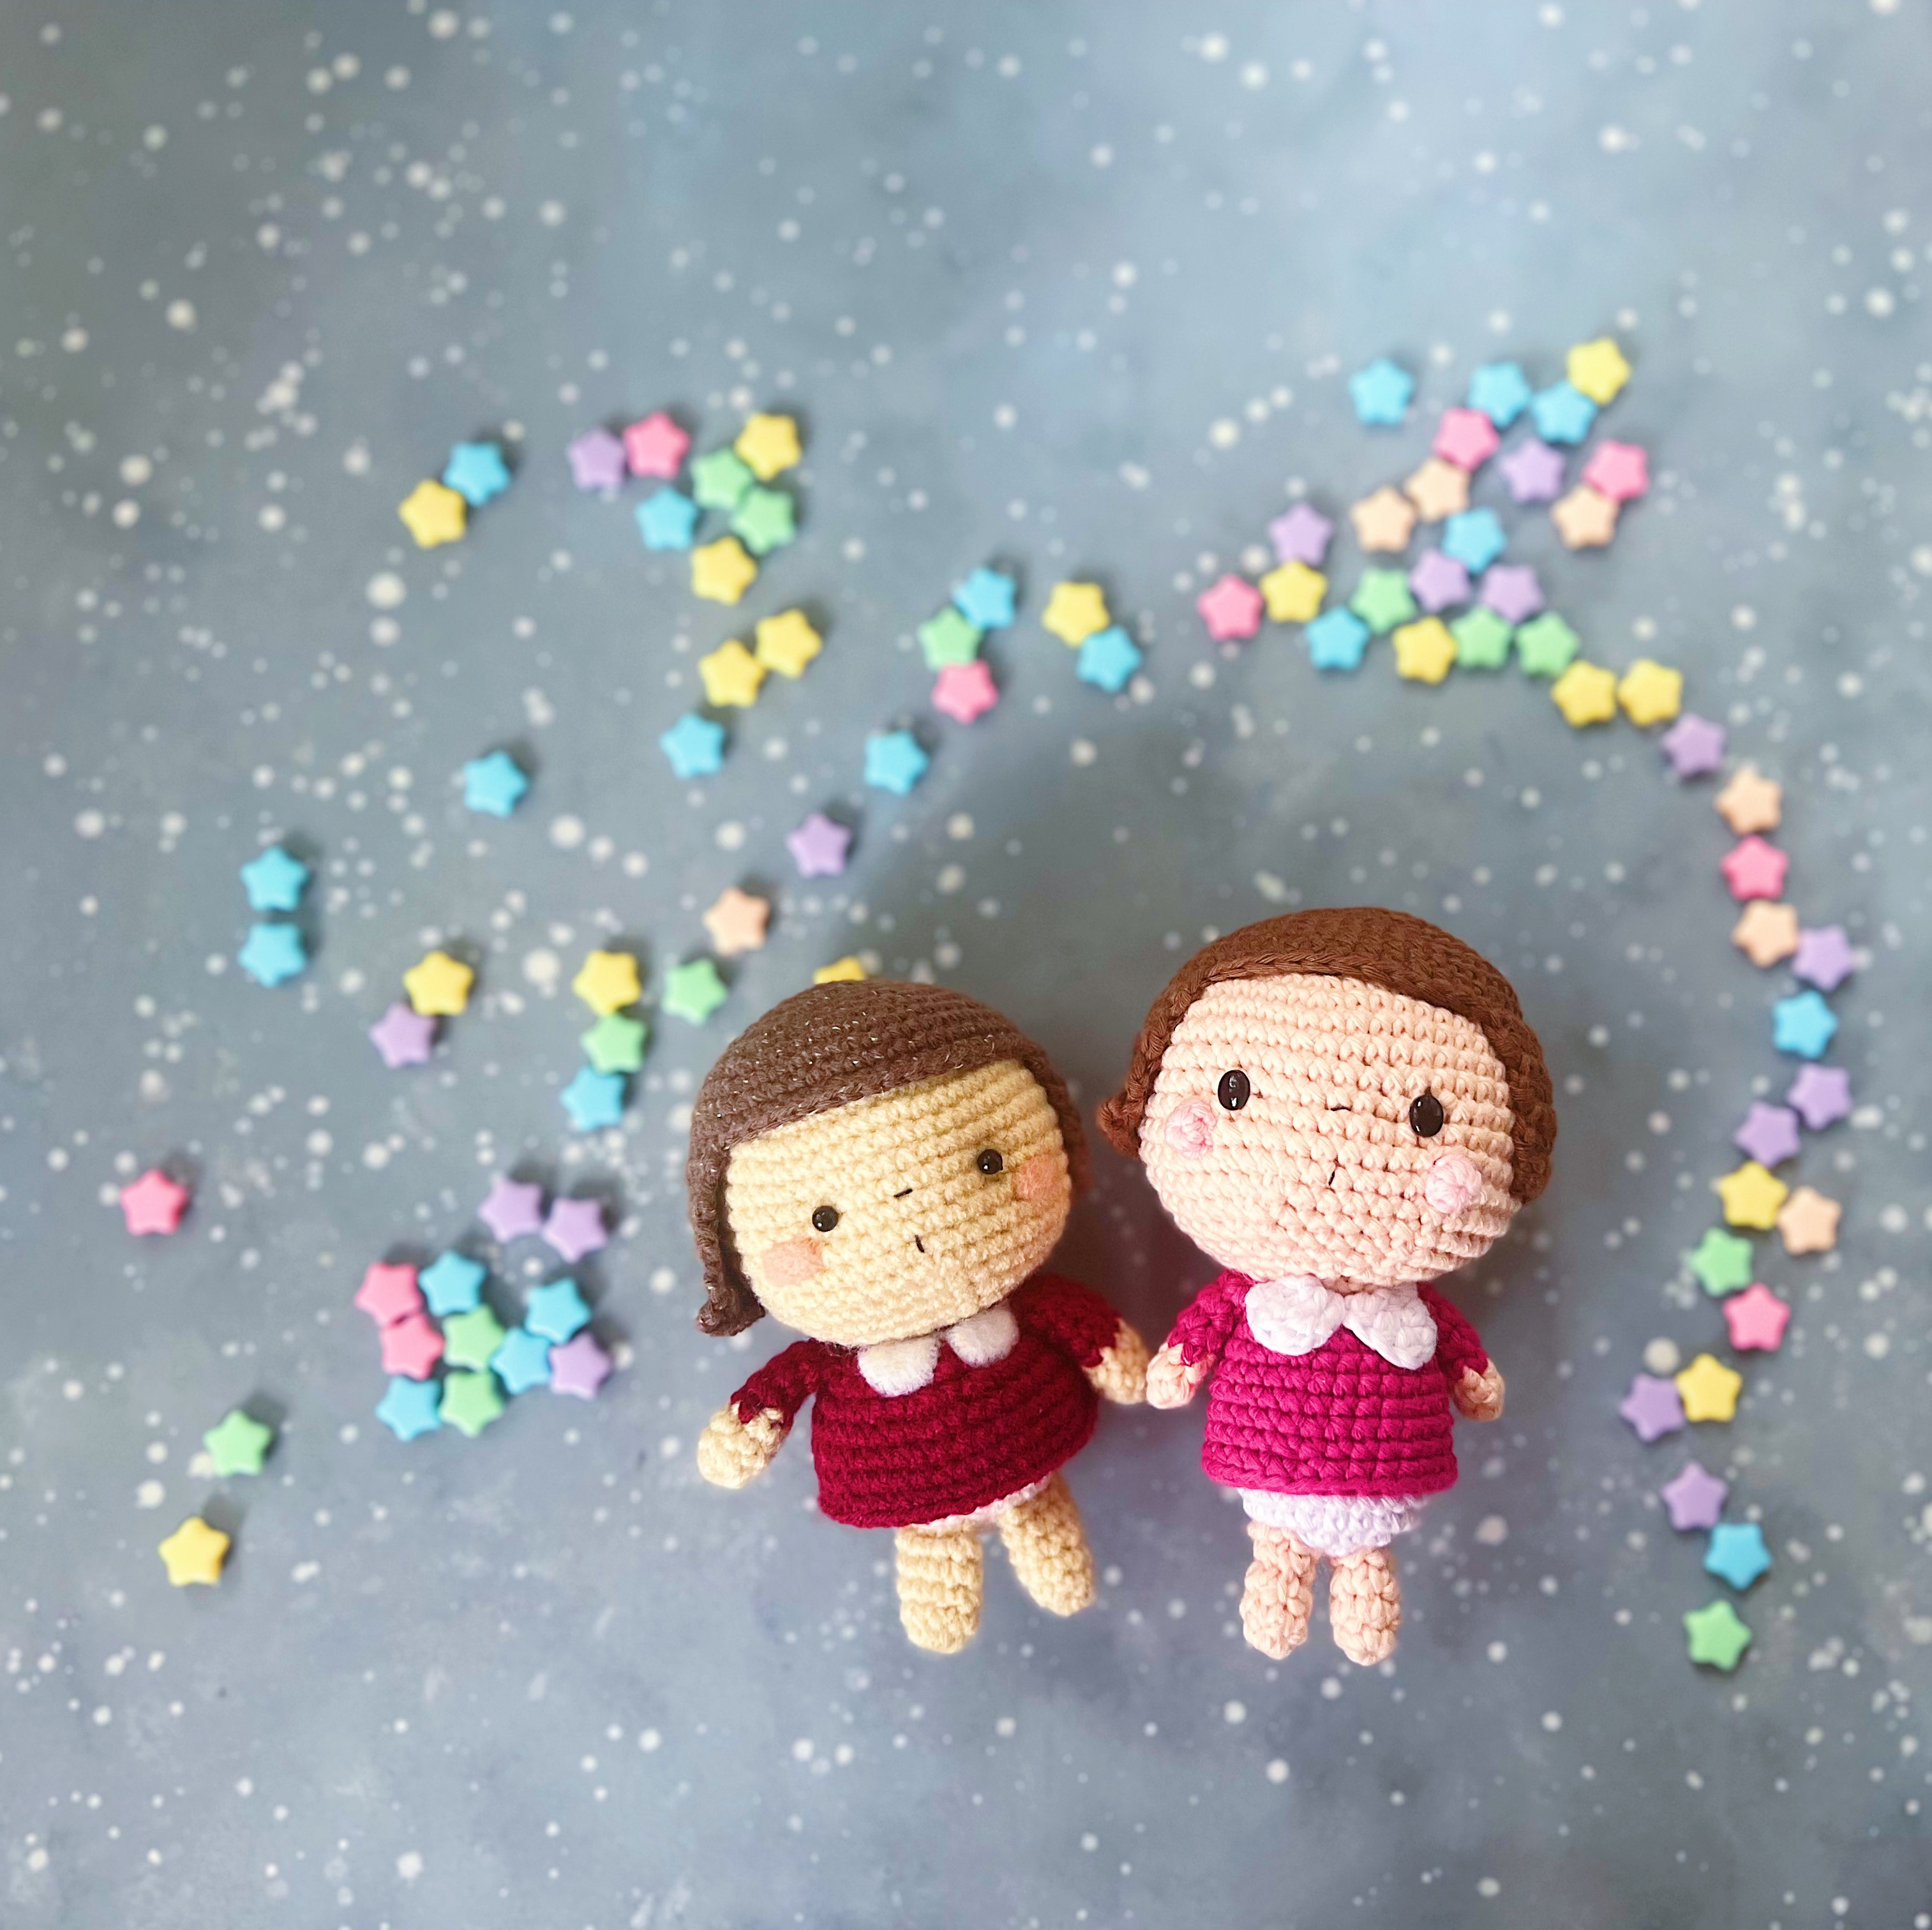
It has taken me 10 years to finally share this, but here we are!
Chiyo-chan’s pattern for FREE, just scroll down below!
She isn’t the first amigurumi doll I’ve made, but she might be for you! This pattern is perfect for beginners who can already read crochet patterns, and are looking for more challenging patterns to try out. Perhaps you are making customised gifts for your friends or a little girl — you can use this pattern and model it after the person you are making the gift for! Simply change the hair colour/length and dress her up any way you like 🙂
Originally featured in Issue Five of Simply Crochet Magazine, Chiyo-chan is the supercute fun girl you need to have in your life. You can read more about her debut HERE.
The pattern was published in UK terms but I will share it in US terms here, with some updates. I hope you’ll enjoy making little Chiyo-chan!
FREE PATTERN FOR CHIYO-CHAN
Materials: Dk yarn in skin, dark brown, burgundy, white and light pink. 2.5mm crochet hook Black sewing thread Sewing needle Tapestry needle Stuffing 2 x oval doll’s eyes (I used a 5mm-wide pair)
Head
With yarn in a skin colour of your choice: R1: Make a magic ring, 6sc in ring (6). R2: Inc in each st around (12). R3: [Sc in next st, inc in next st] 6 times (18). R4: [Sc in next 2 sts, inc in next st] 6 times (24). R5: [Sc in next 3 sts, inc in next st] 6 times (30). R6: [Sc in next 4 sts, inc in next st] 6 times (36). R7: [Sc in next 5 sts, inc in next st] 6 times (42). R8: [Sc in next 6 sts, inc in next st] 6 times (48). R9-15 (7 rounds): Sc in each st around (48). R16: [Sc in next 6 sts, inv dec] 6 times (42). You can lock in your safety eyes now. Position them at R12, about 7-8 sts apart. R17: [Sc in next 5 sts, inv dec] 6 times (36). R18: [Sc in next 4 sts, inv dec] 6 times (30). R19: [Sc in next 3 sts, inv dec] 6 times (24). R20: [Sc in next 2 sts, inv dec] 6 times (18). Start stuffing the head. R21: [Sc in next st, inv dec] 6 times (12). R22: Inv dec all around (6). Fasten off, leaving a long tail to close the opening (and to make Eye Indentations). Using the tail and a tapestry needle, close the opening securely. Do not trim yarn tail.
Making Eye Indentations (video tutorial below and also on my Instagram Reels and Youtube channel) 1. With the remaining yarn tail from the head, (threaded into a needle), bring the yarn back up to the stitch right next to the left safety eye on R12. 2. Insert the needle back into the Head in the next stitch, bringing it out at the bottom of the Head. Gently tug on the yarn to create a slight indentation. 3. Repeat for the right side of the Head. Secure the yarn tail with a knot at the base of the Head and trim excess yarn.
Adding a nose + lips 1. With sewing thread and needle, make a small horizontal stitch for the nose, positioning it at the centre of the face between the eyes on R12. 2. For the mouth, bring the thread down to R15 and make a small vertical stitch, aligning it with the position of the nose. 3. Bring remaining thread down to the bottom of the Head. Secure with a knot and trim ends.
Cheeks (Make 2) With light pink yarn: Make a magic ring, 4sc in ring (4). Fasten off and leave a long tail for sewing. Sew onto the Head, to the bottom-side of each eye.
Hair With dark brown yarn: R1: Make a magic ring, 6sc in ring (6). R2: Inc in each st around (12). R3: [Sc in next st, inc in next st] 6 times (18). R4: [Sc in next 2 sts, inc in next st] 6 times (24). R5: [Sc in next 3 sts, inc in next st] 6 times (30). R6: [Sc in next 4 sts, inc in next st] 6 times (36). R7: [Sc in next 5 sts, inc in next st] 6 times (42). R8: [Sc in next 6 sts, inc in next st] 6 times (48). R9-11 (3 rounds): Sc in each st around (48). Now you will be working back and forth in Rows to give the hair length. Row 12: Sc in the next 33 sts. Leave remaining sts unworked (33). Rows 13-19 (7 rows): Ch 1, turn. Sc in the next 33 sts (33). Fasten off and leave a long end for sewing. Place hair piece on top of head, with the bangs facing forward, and sew in place with backstitches. (You don’t have to sew all around the hair, just spaced-out gaps will do).
Body With white yarn: R1: Make a magic ring, 6sc in ring (6). R2: Inc in each st around (12). R3: [Sc in next st, inc in next st] 6 times (18). R4: [Sc in next 2 sts, inc in next st] 6 times (24). R5-6: Sc in each st around (24). R7: Sc in the front loop only of each st around (24). ** Please see note. Change yarn colour to skin. R8: Sc in the back loop only of each st around (24). R9-10: Sc in each st around (24). R11: [Sc in next 2 sts, inv dec] 6 times (18). Fasten off and leave a long tail for sewing.
**Not sure if the front loop only crochet is required, but this was in the original pattern 🙂
Dress (find the video tutorial below and also on Instagram and Youtube) To start, turn the body piece upside down. With burgundy yarn, make a slip knot on your hook. You will surface crochet the first round of the dress directly on to the Body. Surface crochet tip: Insert the hook between two stitches and bring it out in the next gap between the two stitches, from right to left. Yarn over and draw the loop through to the first stitch. Yarn over again and bring the yarn through both loops on the hook to complete the stitch. R1: Sc in each st of R11 of the Body, plus one extra stitch to connect the round. Sl st to join. (19sc + 1sl st). R2: Ch 1, sc in each st around. Sl st to join (19sc + 1sl st). R3: Ch 1, [sc in next st, inc in next st] around. Sl st to join (29sc + 1sl st). R4-8 (5 rounds): Ch 1, sc in each st around. Sl st to join (29sc + 1sl st). Fasten off and weave in ends. You may stuff the body now 🙂
Collar (Make 2) With white yarn, ch 4. R1: Hdc in the next 3 sts. R2: Ch 1, turn. Hdc in the next 3 sts. Fasten off and leave a long end for sewing.
Arms (Make 2) With yarn in a skin colour of your choice: R1: Make a magic ring, 6sc in ring (6). R2: Sc in each st around (6). Change to burgundy yarn. R3-6 (4 rounds): Sc in each st around (6). Fasten off and leave a long end for sewing. No stuffing is required for the arms.
Legs (Make 2) With yarn in a skin colour of your choice: R1: Make a magic ring, 6sc in ring (6). R2-4 (3 rounds): Sc in each st around (6). Fasten off and leave a long end for sewing. No stuffing is required for the legs.
Assembly Time! (You can see me assembling the doll on my Instagram Reels and also on Youtube) 1) By now, you should have your cheeks and hair sewn onto the head piece. 2) Attach body piece onto the bottom of the head with whipstitches. 3) Sew collar onto the front of the dress. 4) Sew on the arms. 5) Sew on the legs.
And you’re done! You can see in the picture below how the old and new Chiyo-chan look.
Please tag me on Instagram @amigurumei when you’re done making your own Chiyo-chan and I’ll reshare it on my feed! I have some Reel tutorials on Instagram for this pattern too, so be sure to check those out! You can see some of them below! There are more on my Youtube channel xoxox
P/S You may sell anything you make from this pattern but it would be awesome if you can mention that it’s a pattern from @amigurumei 🙂 It would be amazing if we could keep the pattern here because I really appreciate all your visits to my blog! Please do not copy and paste and share it in other groups – instead, please bring them here for the full pattern 🙂
My dearest friends, it has been too long! I am ashamed to say that this seems to be a yearly affair that I update this blog. If you want to see my daily updates, please find me on Instagram: @amigurumei 🙂
Today’s post has been something I’ve wanted to do for the longest time! And I finally sat down, and I did it!
The FREE PATTERN for Mei-chan is now here for you to enjoy!
You may remember Mei-chan from when I first started this blog, almost 10 years ago! She was a fuzzy character I created, inspired by my love for Studio Ghibli and My Neighbour Totoro.
I redid her pattern from scratch and created a bigger Mei-chan, and I love her so much! She will be a permanent fixture on my craft space for sure!
I hope you’ll enjoy making her!
*Do note that as this pattern is free, I hope that you’ll not distribute it without permission or resell it on any sites. You can, of course, sell any doll you make from this pattern 🙂
Mei-chan the Amigurumei Mascot
Skill level: Intermediate Measurements: 27.5cm tall x 17cm wide
Abbreviations
Ch: chain Sc: single crochet Inc: increase Hdc: half double crochet Inv dec: invisible decrease Ss: slip stitch BLO: back loops only
*This pattern is written in US crochet terms.
Materials
3mm, 4mm, 5.5mm, & 6mm hook Fuzzy yarn:
main body colour in pink
muzzle in white
hat in grey
scarf in pastel green
DK-weight yarn:
main body colour in pink
muzzle in white + leg bottoms
hat in grey
scarf in pastel green
whiskers in black
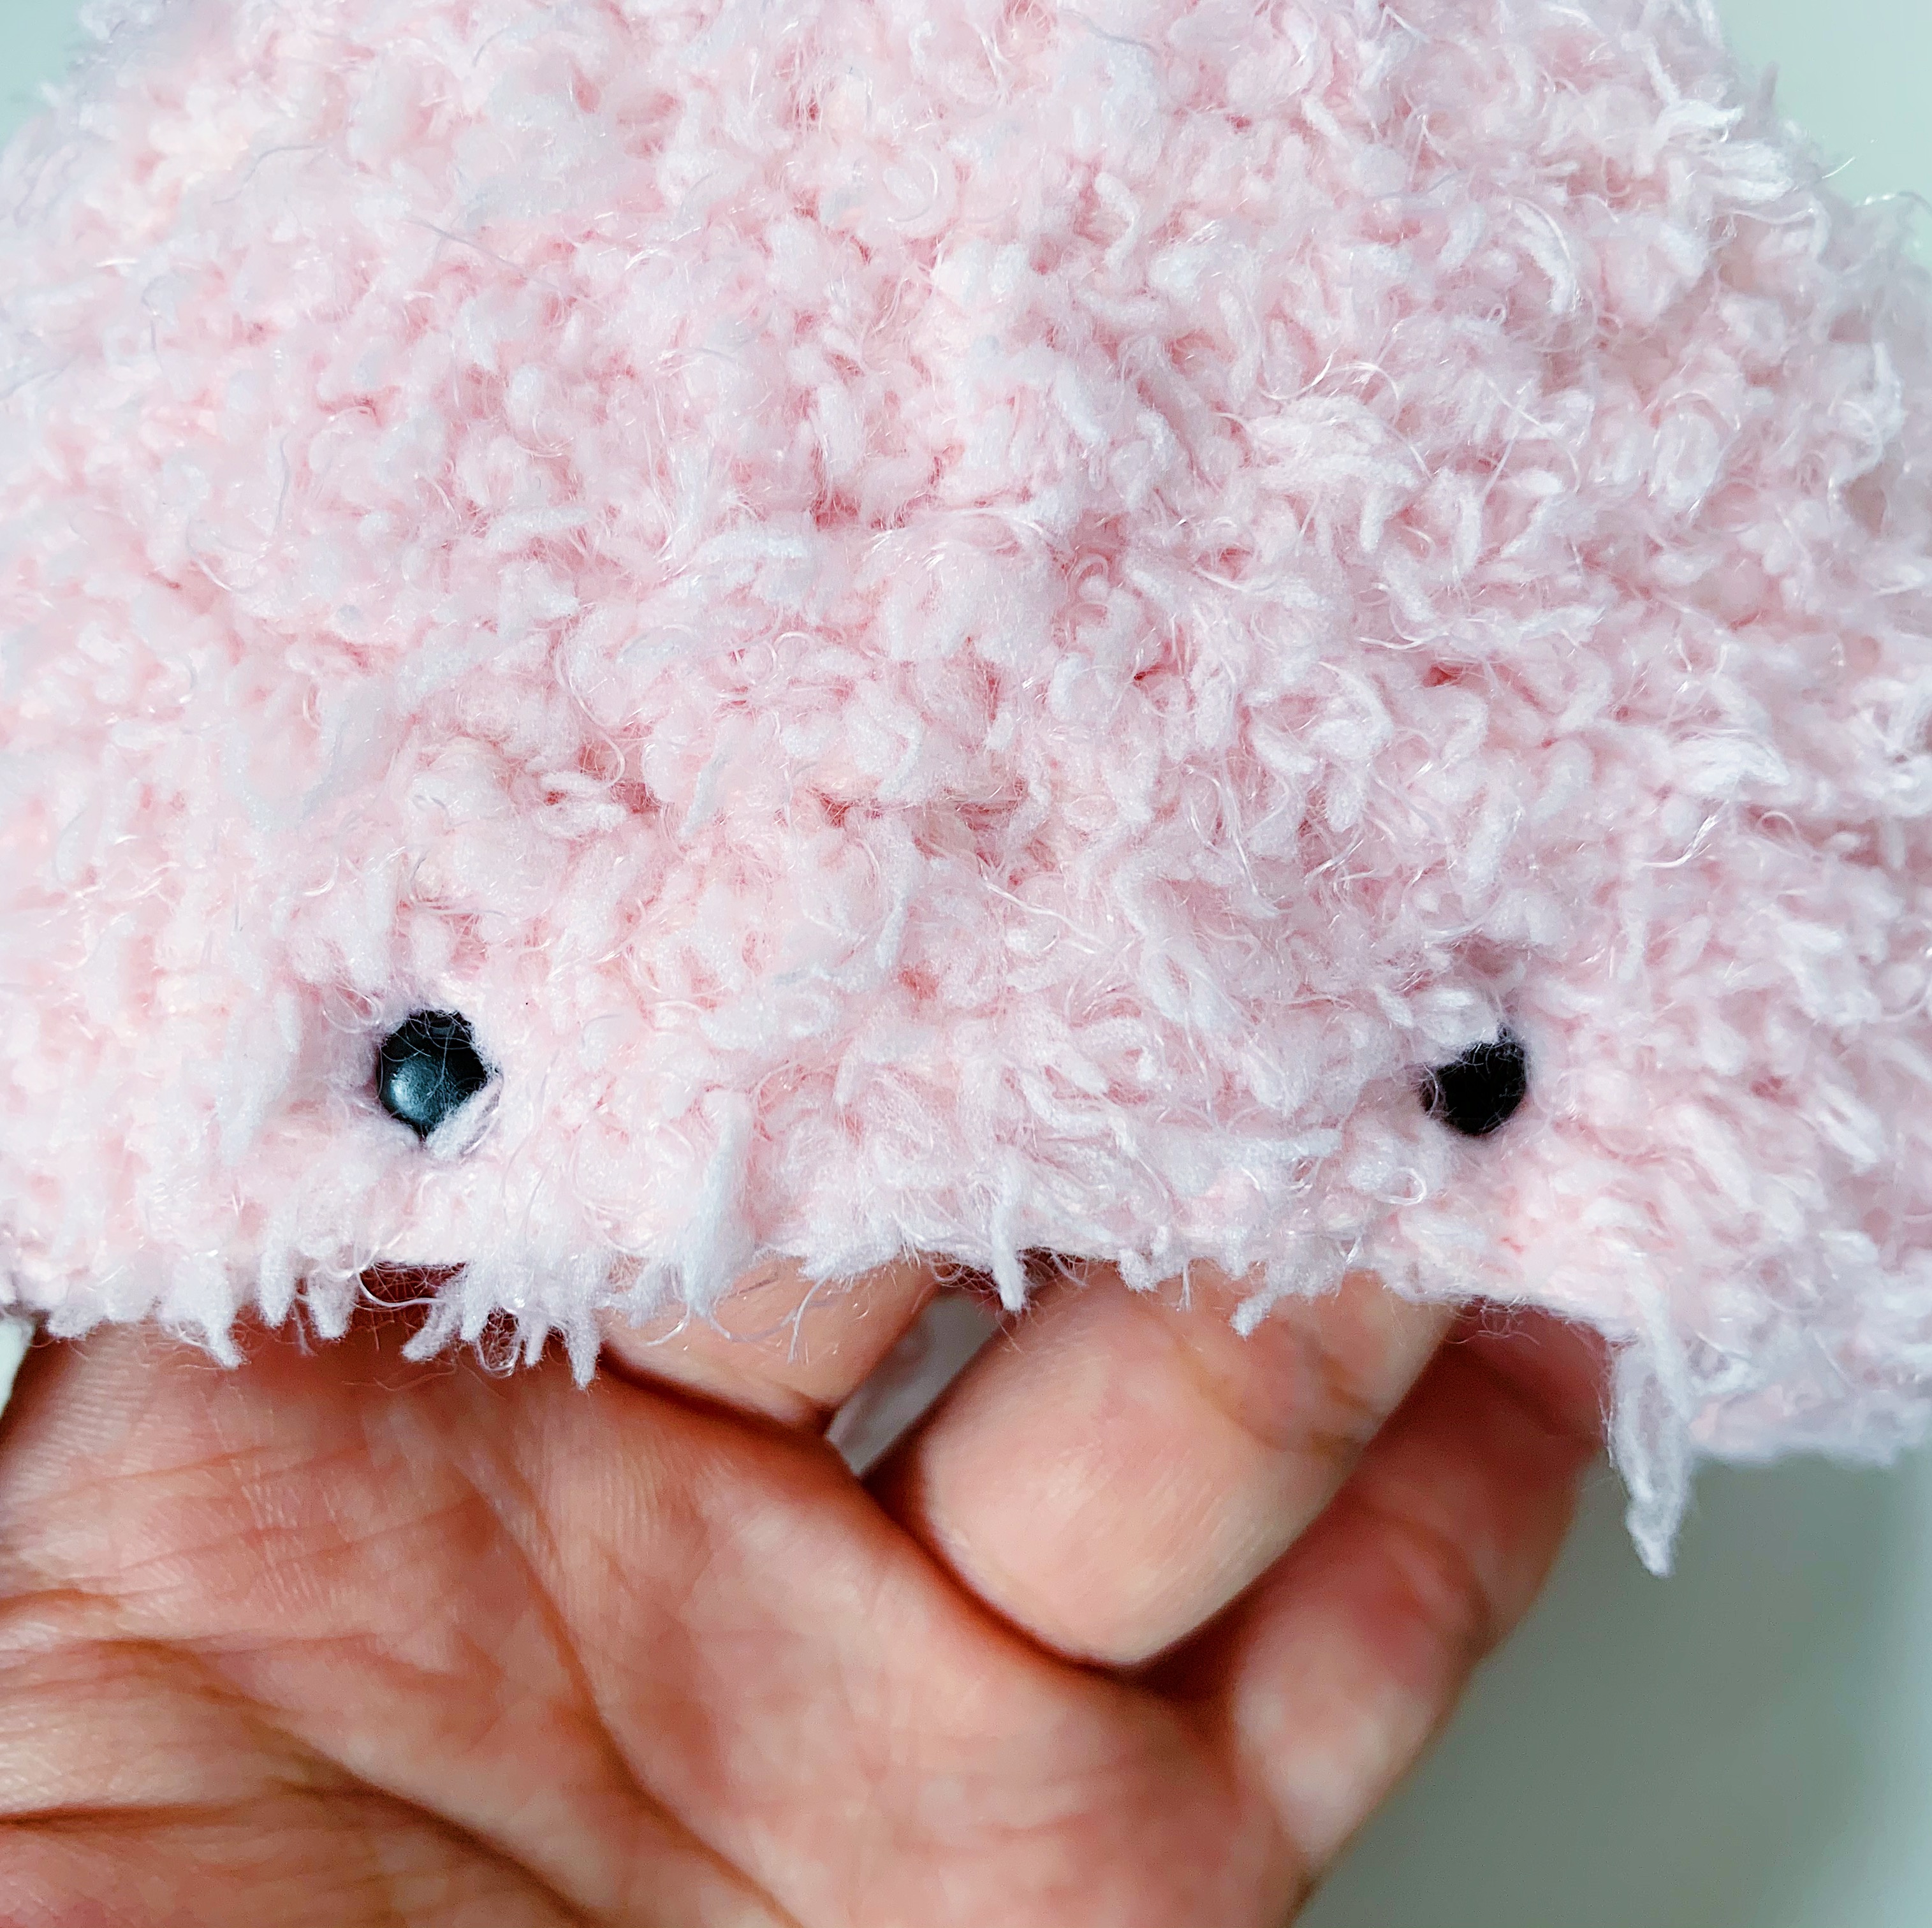
2 x 6mm black scrapbooking brads 1 oval bead Black sewing thread Darning needle Sewing needle Polyester fiberfill Q tip Blush Craft glue
Head (5.5mm hook)
**To crochet with fuzzy yarn, it is easier to pair 1 fuzzy yarn with 1 normal yarn of the same colour so that you can see where the stitches are. The wrong side is usually fuzzier, so we use this as the outer side of the doll (the part that is visible).
IMPORTANT NOTE: Please remember that when you’re working with fuzzy yarn paired up with a normal yarn, all subsequent rounds are worked in BACK LOOPS ONLY.
With 1 pink fuzzy yarn + 1 pink normal yarn:
Round 1: Ch 2, Sc 6 in second ch from hook {6}.
Round 2: [Inc] around {12}.
Round 3: [Inc, sc 1] around {18}.
Round 4: [Inc, sc 2] around {24}.
Round 5: [Inc, sc 3] around {30}.
Round 6: [Inc, sc 4] around {36}.
Round 7: [Inc, sc 5] around {42}.
Round 8: [Inc, sc 6] around {48}.
Round 9: [Inc, sc 7] around {54}.
Round 10: [Inc, sc 8] around {60}.
Rounds 11-18 (8 rounds): Sc around {60}.
You can position and secure the scrapbooking brads for the eyes now. It should be placed in the center, about 10cm from the top of the head, with 5 cm in between each eye.
Round 19: [Inv dec, sc 8] around {54}.
Round 20: [Inv dec, sc 7] around {48}.
Round 21: [Inv dec, sc 6] around {42}.
Round 22: [Inv dec, sc 5] around {36}.
Round 23: [Inv dec, sc 4] around {30}.
Round 24: [Inv dec, sc 3] around {24}.
Round 25: [Inv dec, sc 2] around {18}.
Stuff head firmly.
Round 26: [Inv dec, sc 1] around {12}.
Round 27: [Inv dec] around {6}.
Fasten off and leave a long end for sewing eye indentations.
Eye indentations
You only need a normal yarn for this. With a darning needle, bring the remaining yarn from the bottom of the head through to the left side of the head, near the left eye.
Make one horizontal stitch and bring the thread back down to the bottom of the head. Gently tug on the yarn to create a slight indentation.
Now repeat the above on the right side of the head, near the right eye. Knot the yarn end at the bottom of the head and trim off excess.
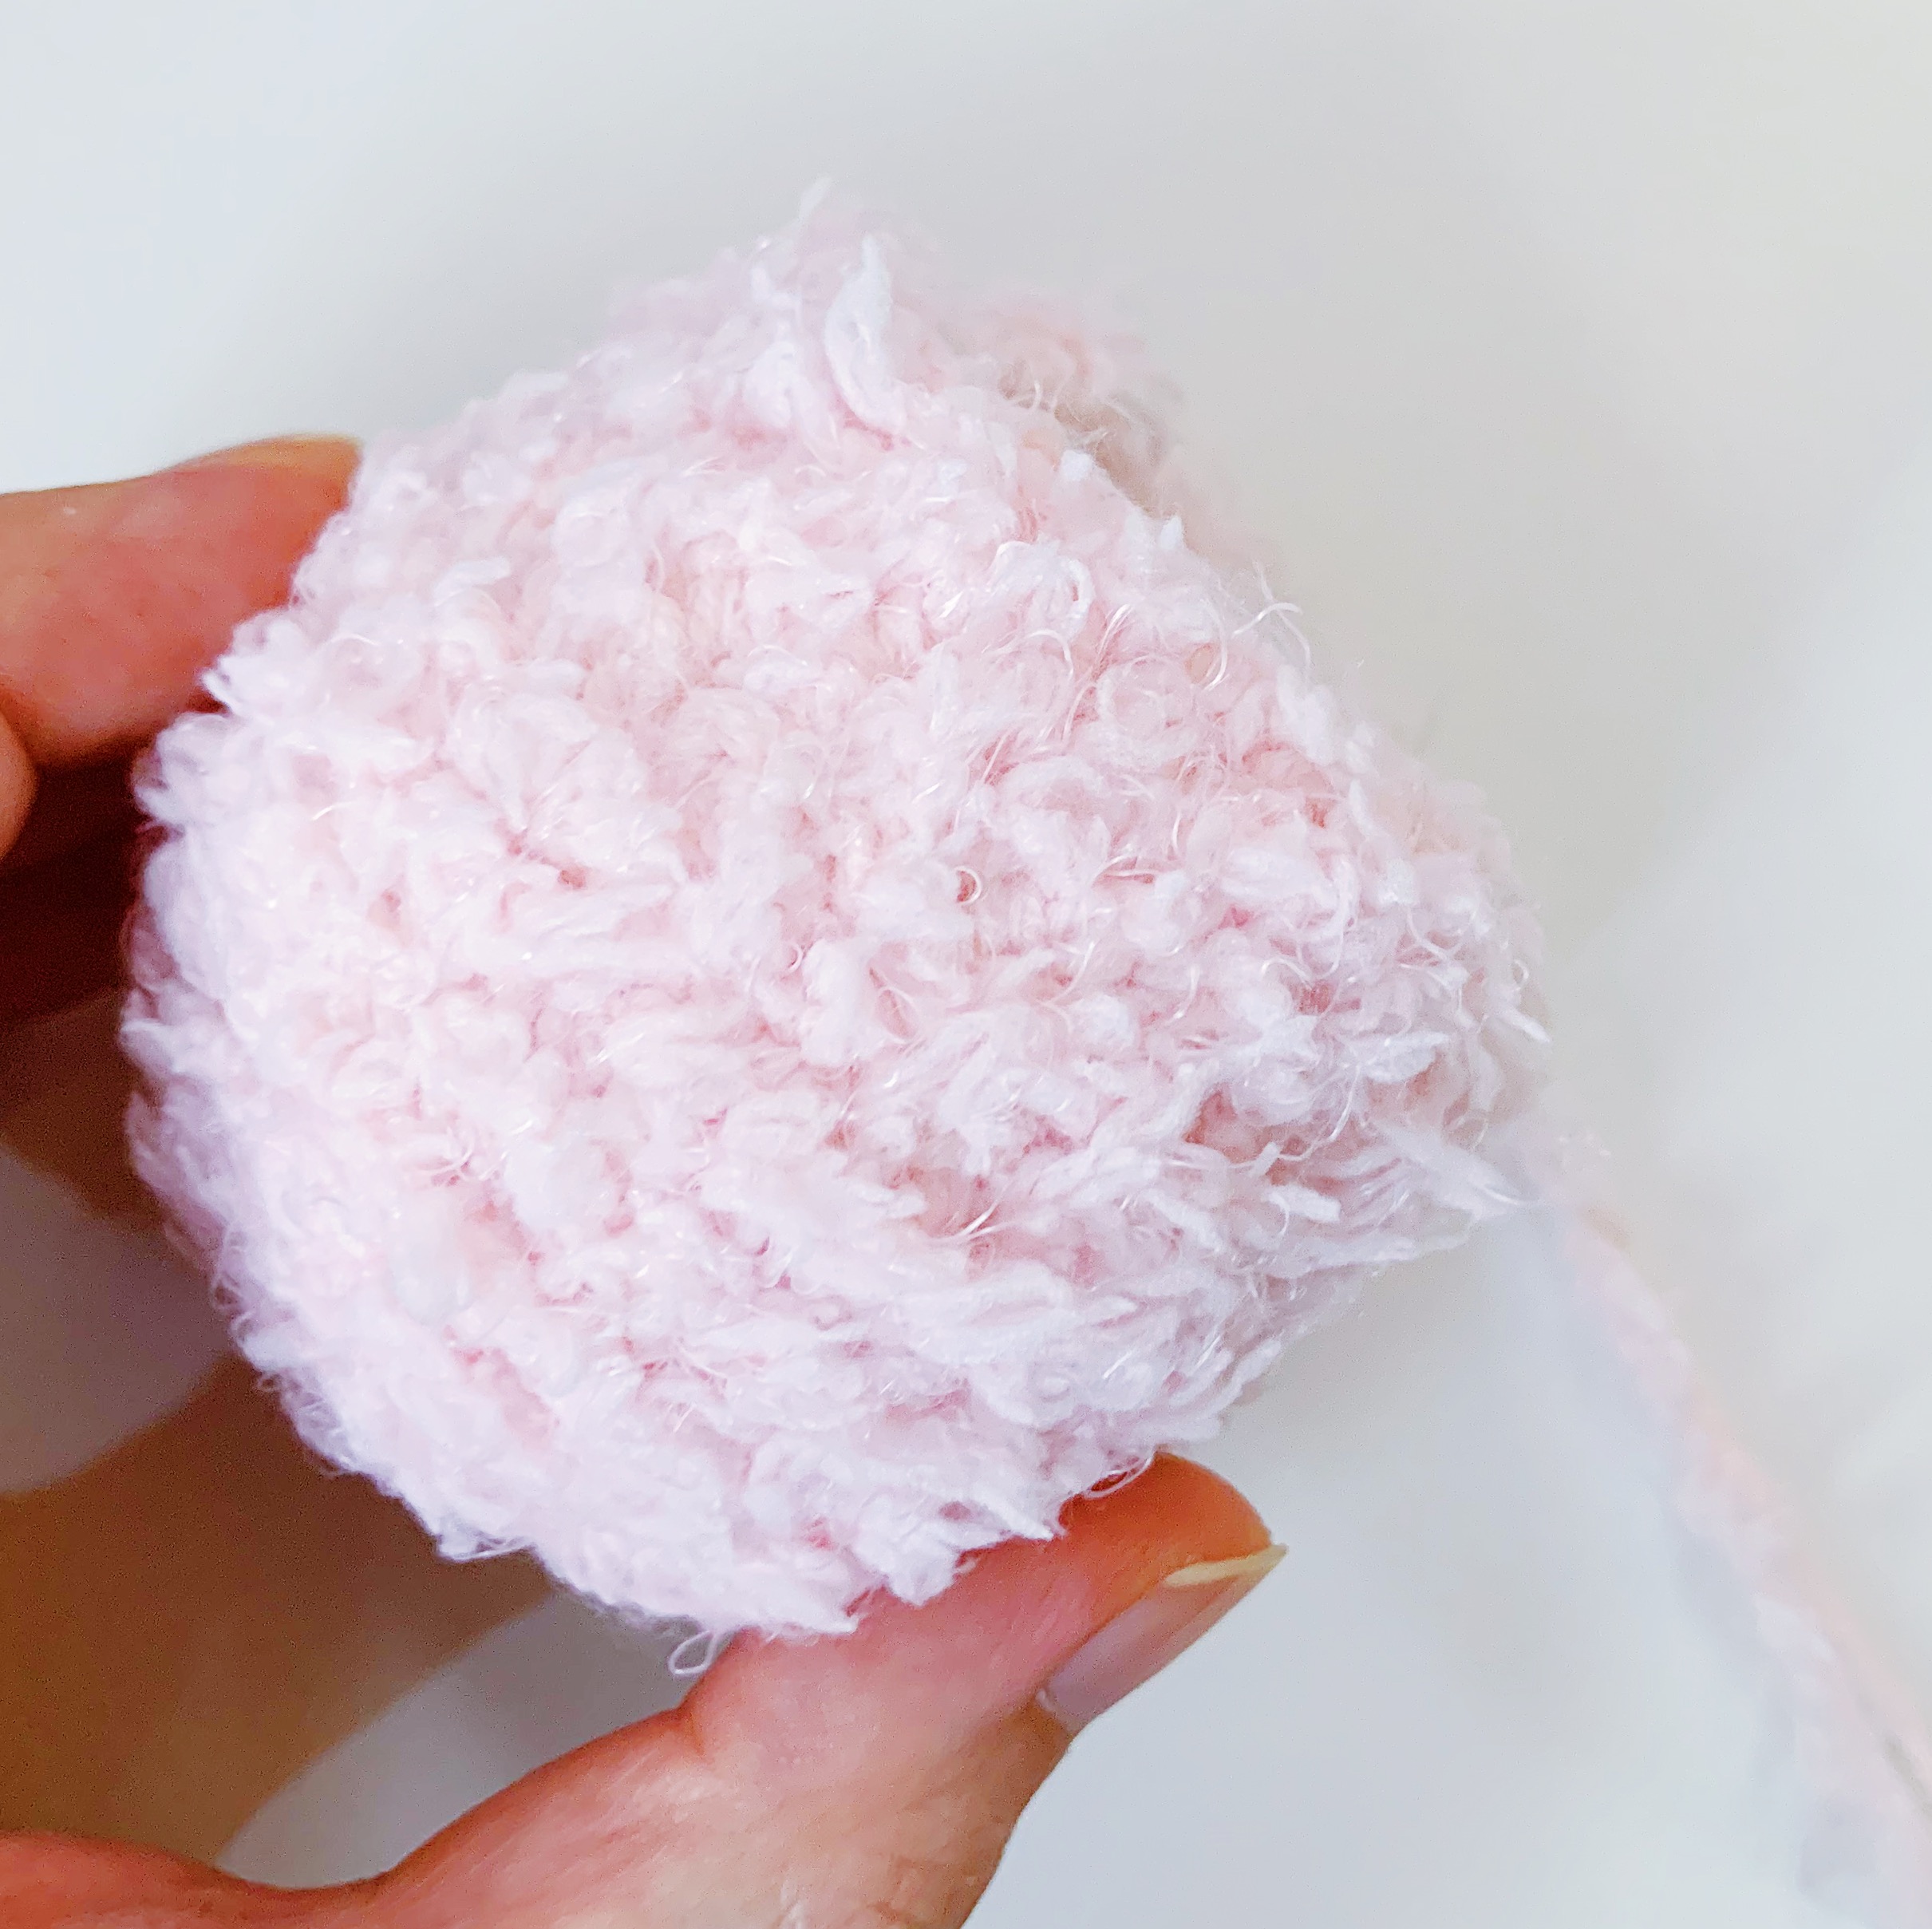
Muzzle (5.5mm hook)
With 1 white fuzzy yarn + 1 white normal yarn:
Round 1: Ch 2, Sc 10 in second ch from hook {10}.
Fasten off and leave a long end for sewing.
Sew muzzle on between the eyes with whipstitches.
**If it is too difficult to sew with the paired-up yarn, just hide the fuzzy yarn by pulling it through the doll, and use the remaining normal yarn for securing.
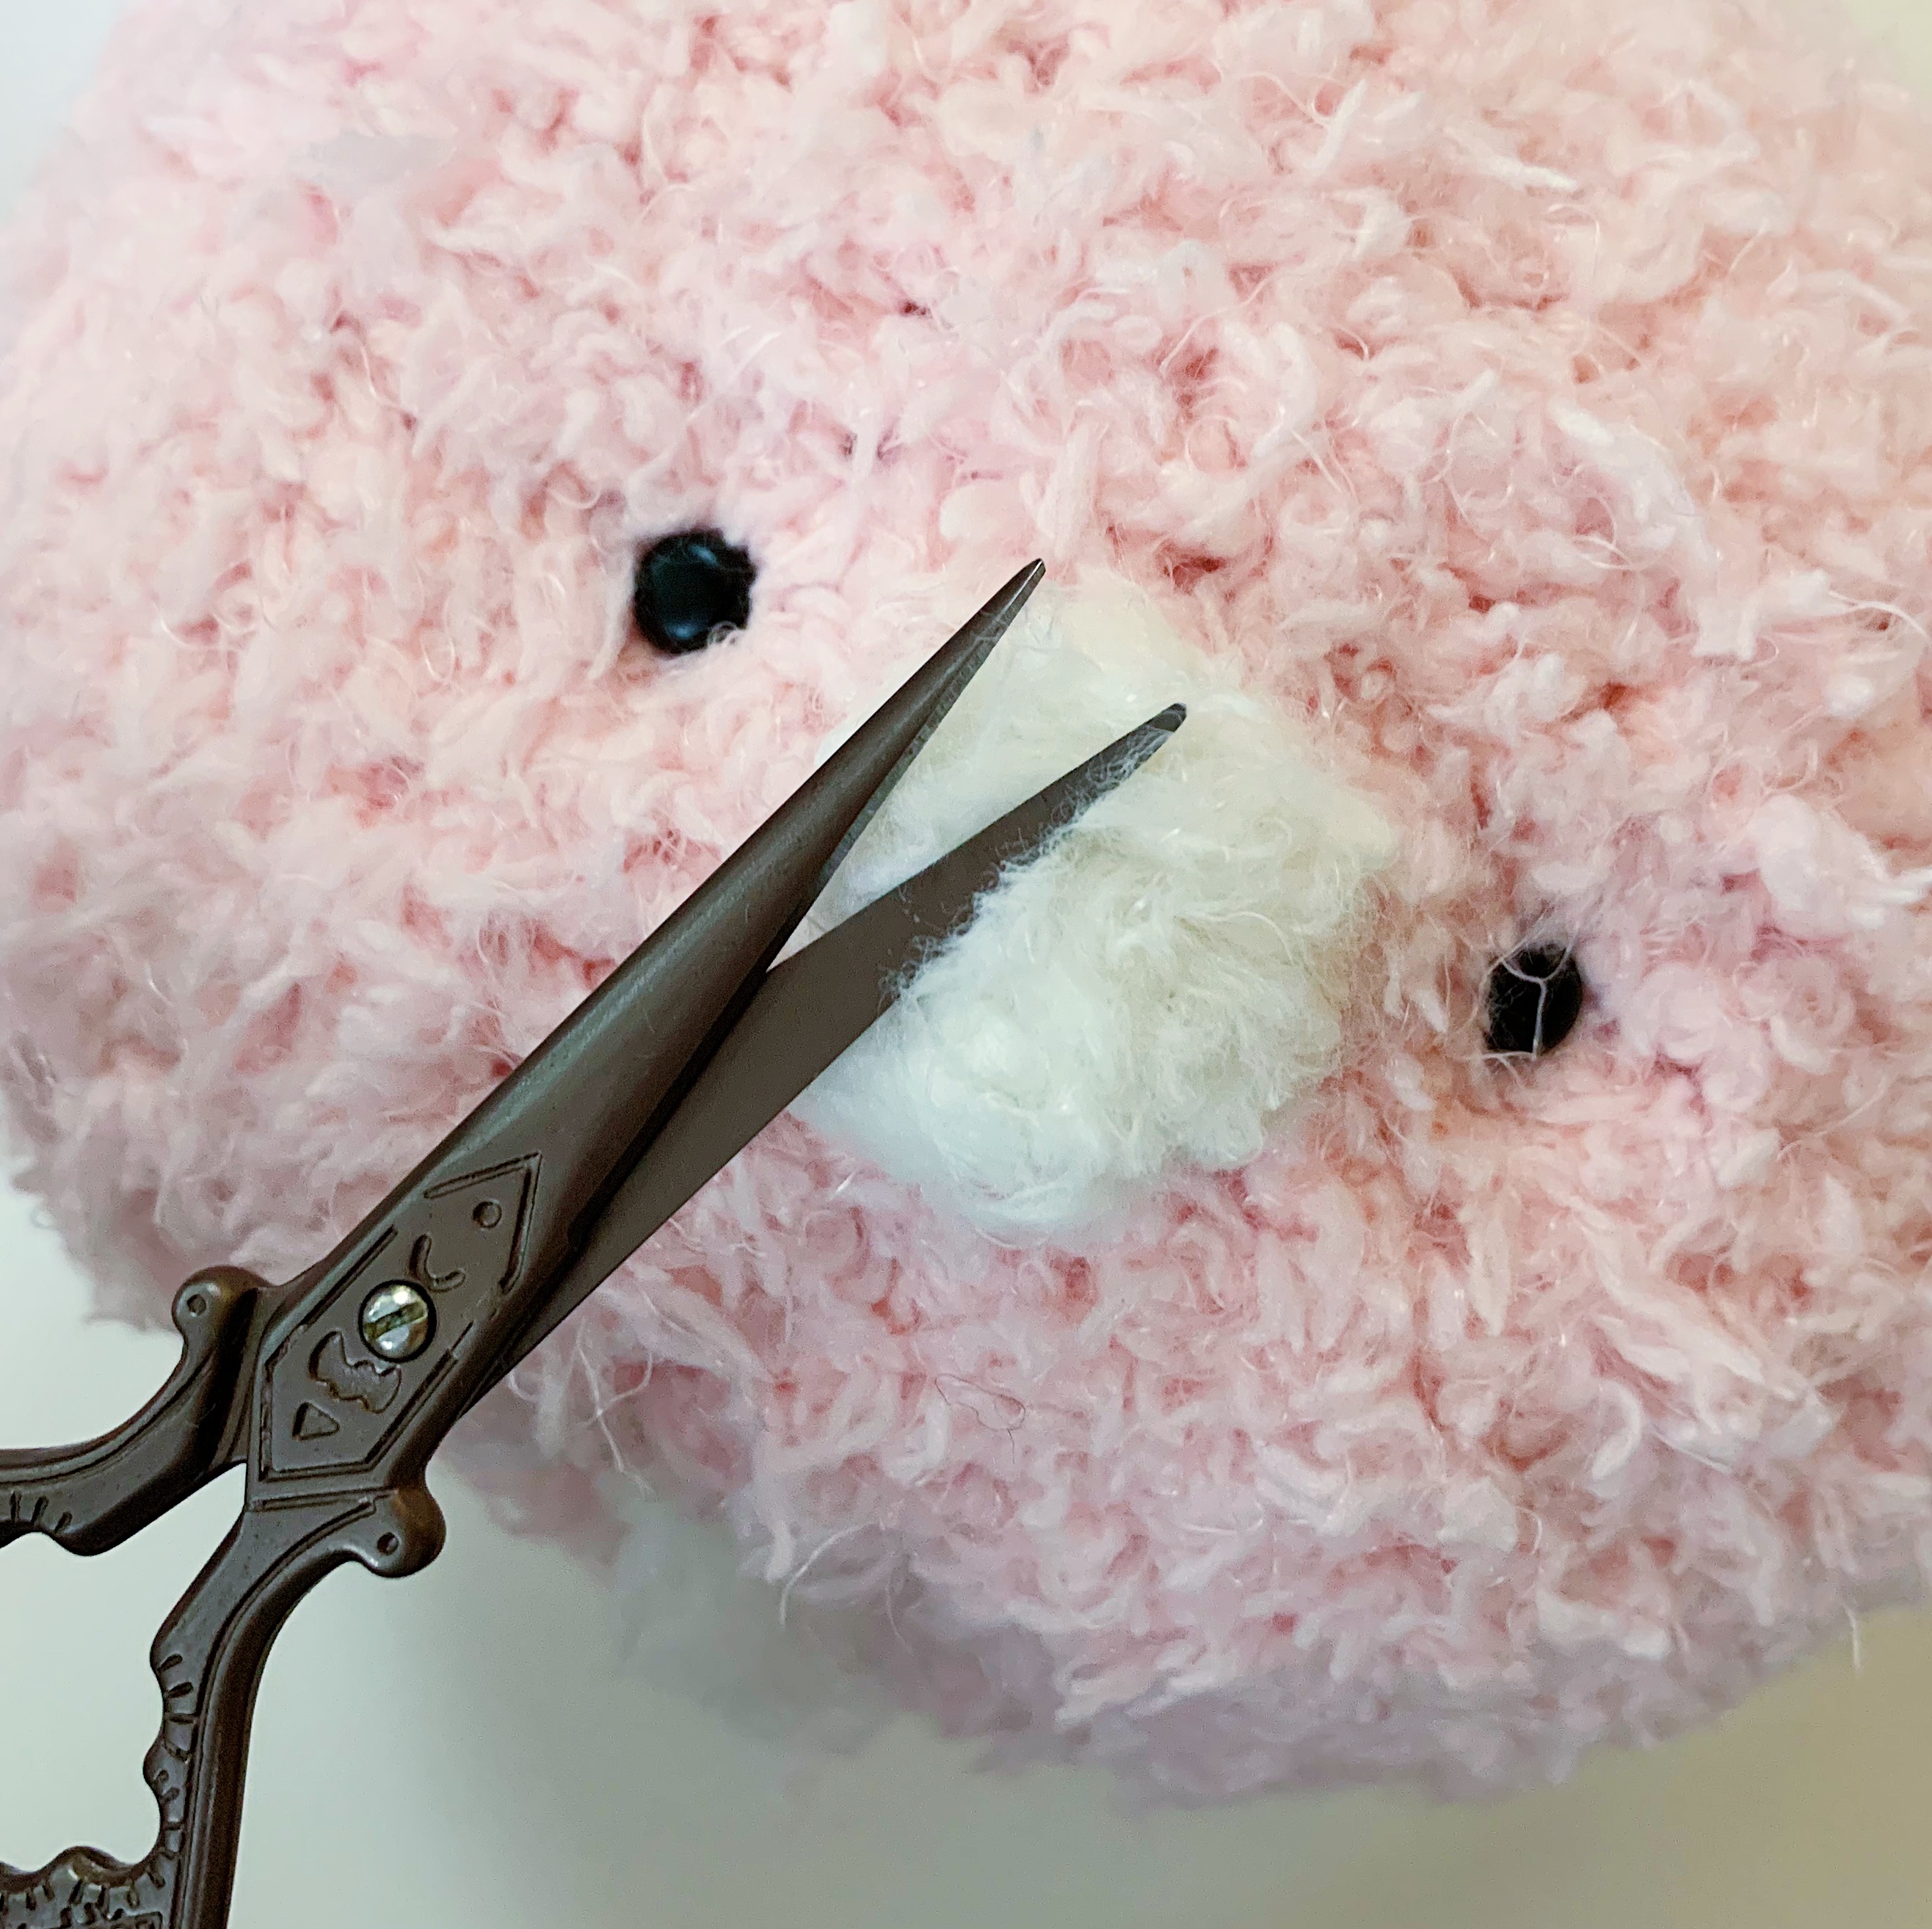
You may give the muzzle a little trim for a neater look.
Sew on the oval bead for the nose, on the top-center of the muzzle.
At this point, you may dab on some pink blush with Q tips 🙂
IN CASE YOU DIDN’T SEE THIS NOTE EARLIER: Please remember that when you’re working with fuzzy yarn paired up with a normal yarn, all subsequent rounds are worked in BACK LOOPS ONLY.
Body (5.5mm hook)
With 1 pink fuzzy yarn + 1 pink normal yarn:
Round 1: Ch 2, Sc 6 in second ch from hook {6}.
Round 2: [Inc] around {12}.
Round 3: [Inc, sc 1] around {18}.
Round 4: [Inc, sc 2] around {24}.
Round 5: [Inc, sc 3] around {30}.
Rounds 6-12 (7 rounds): Sc around {30}.
Round 13: [Inv dec, sc 3] around {24}.
Fasten off and leave a long end for sewing.
Stuff firmly.
Arms (3mm hook)
Make 2 with Dk-weight pink yarn:
Round 1: Sc 7 in magic ring {7}.
Round 2-10 (9 rounds): Sc around {7}.
Fasten off and leave a long end for sewing.
* No stuffing required.
Legs (3mm hook)
Make 2 with Dk-weight white yarn:
Round 1: Sc 6 in magic ring {6}.
Round 2: [Inc] around {12}.
Round 3: [Inc, sc 1] around {18}.
Change to Dk-weight pink yarn.
Round 4: In back loops only, sc around {18}.
Rounds 5-8 (4 rounds): Sc around {18}.
Round 9: [Inv dec, sc 1] around {12}.
Fasten off and leave a long end for sewing.
Stuff firmly.
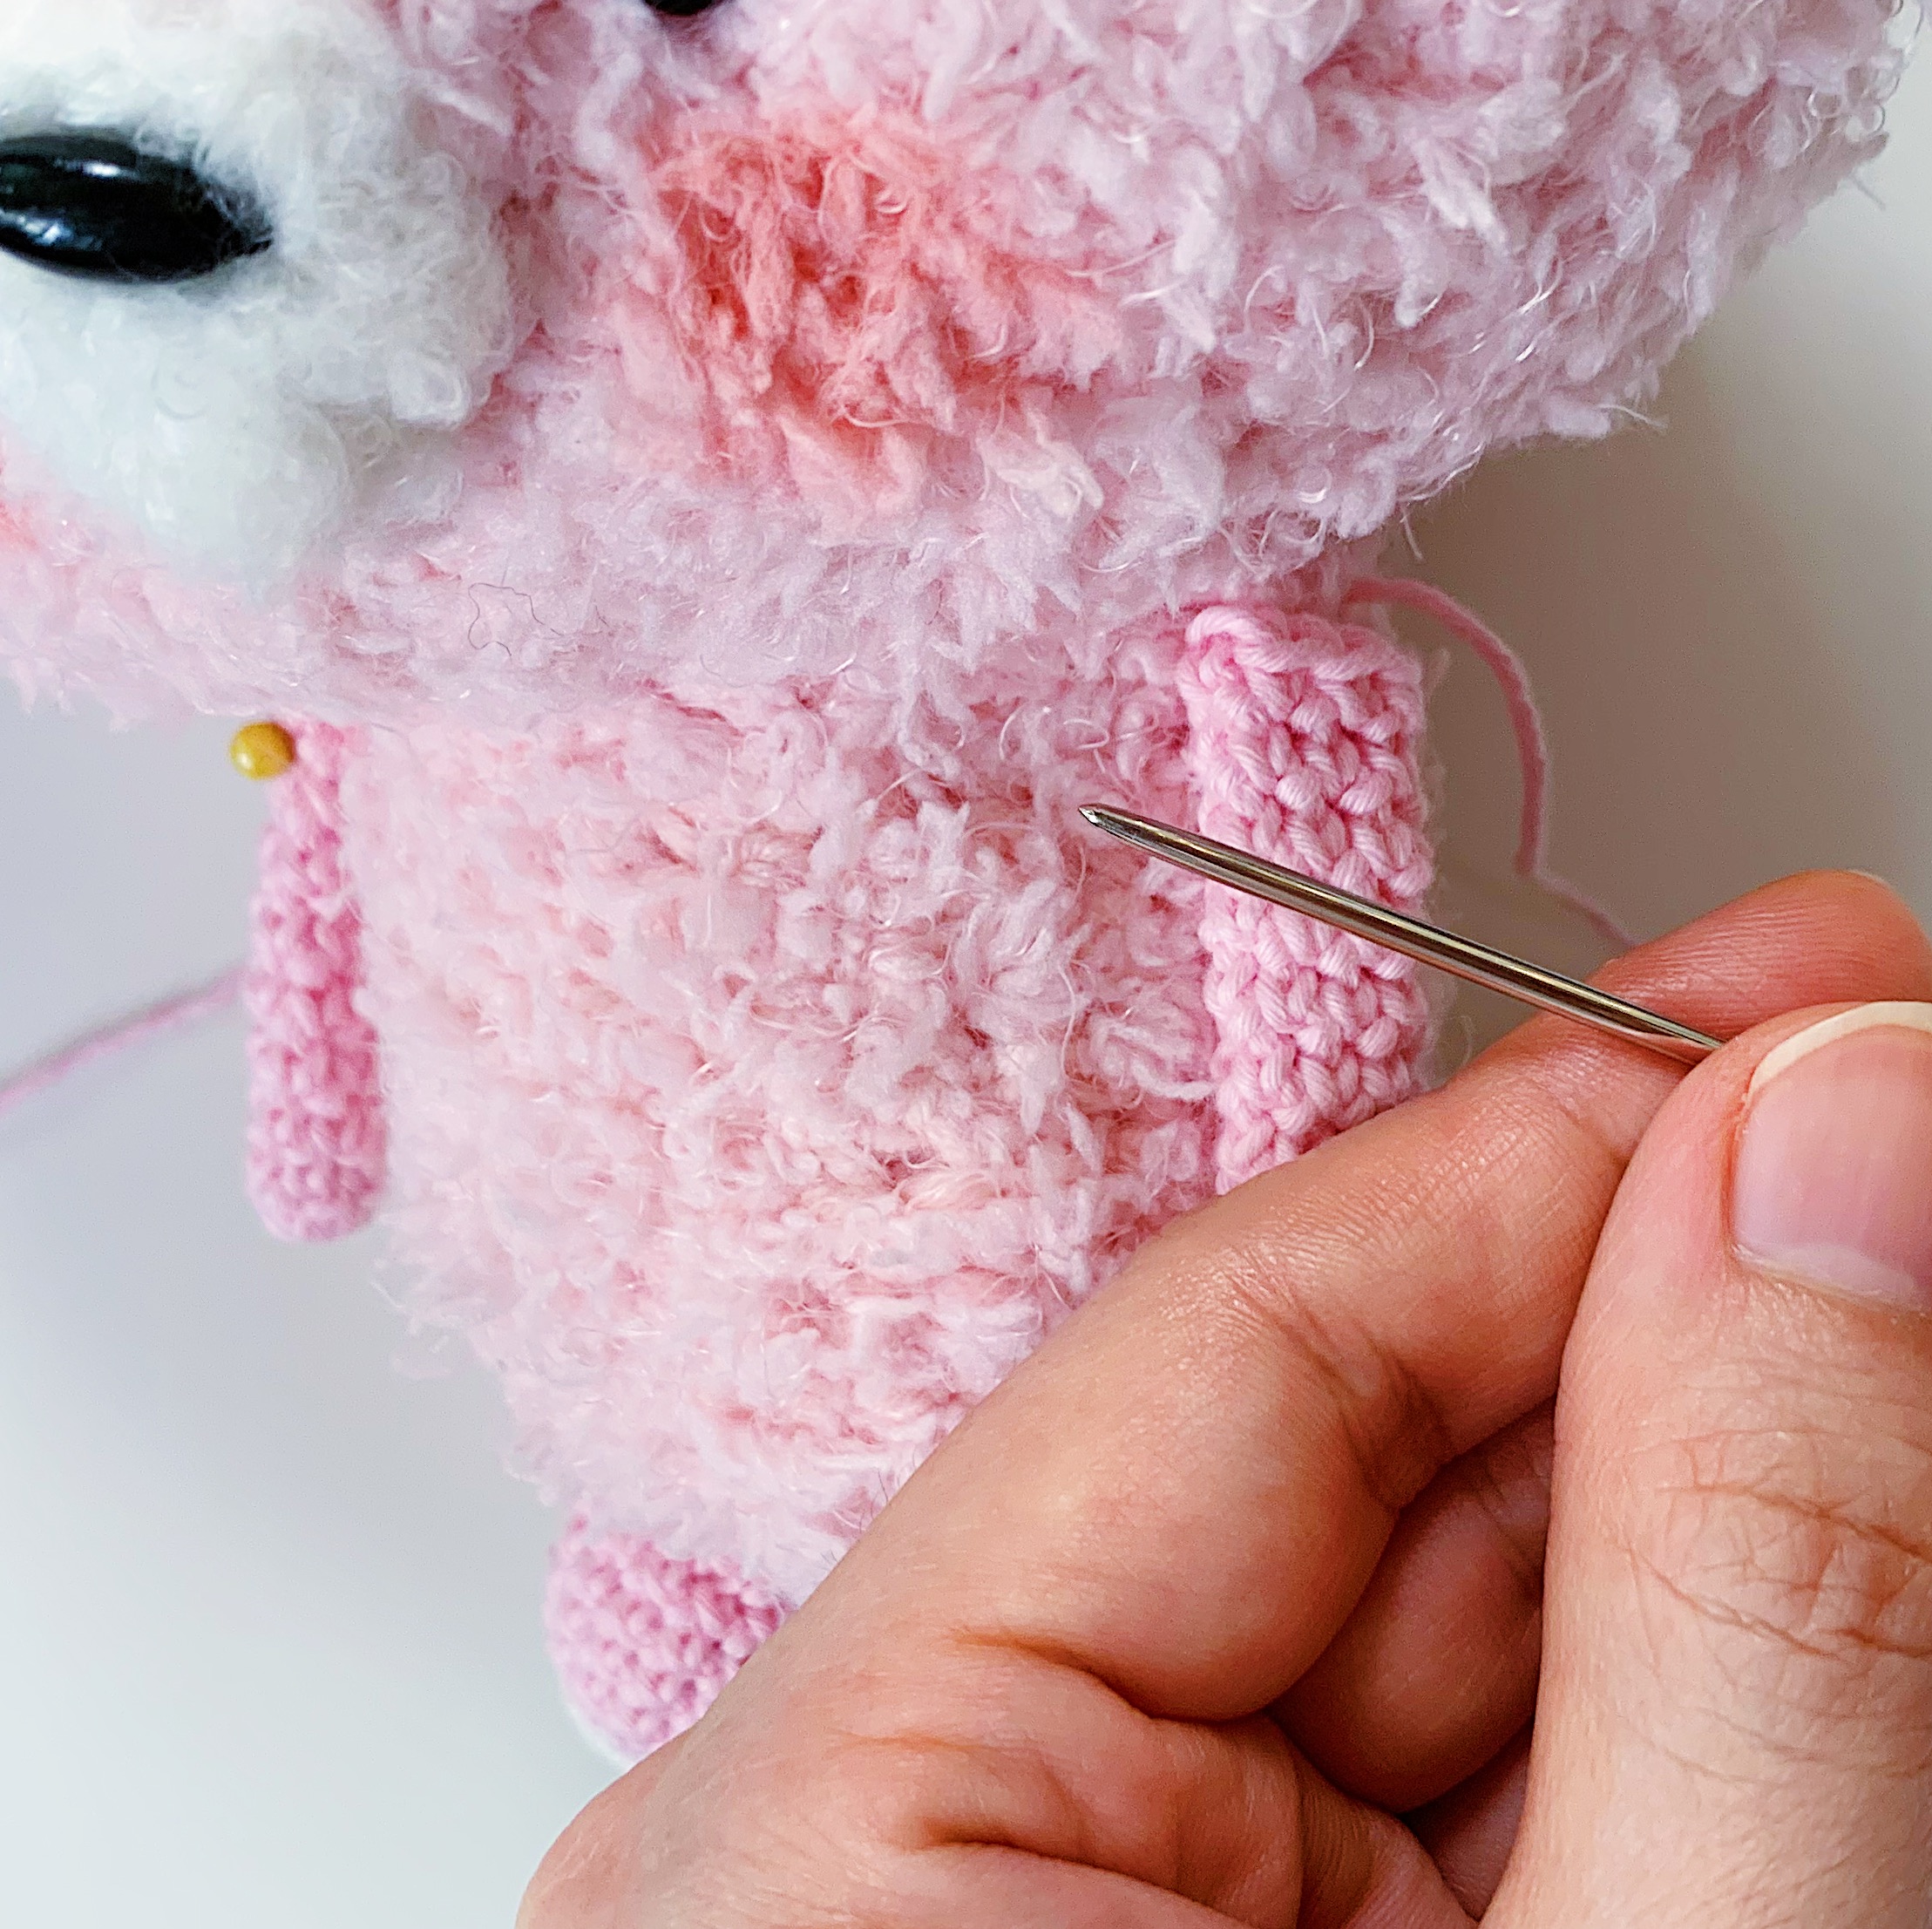
ASSEMBLING BODY PARTS
Sew body onto head.
Sew on arms.
Sew on legs.
Scarf (4mm hook)
With 1 pastel green fuzzy yarn + 1 pastel green normal yarn:
Row 1: Ch 4, hdc in second ch from hook across {3}.
*Remember to work in back loops only for fuzzy yarn paired up with normal yarn!
Subsequent rows: Hdc in each st across {3}.
Continue until your scarf measures about 34cm in length, then check if it can loop comfortably around Mei-chan’s neck.
Fasten off and weave in ends.
ANOTHER REMINDER: Please remember that when you’re working with fuzzy yarn paired up with a normal yarn, all subsequent rounds are worked in BACK LOOPS ONLY.
Hat (6mm hook)
With 1 grey fuzzy yarn + 1 grey normal yarn:
Round 1: Ch 2, Sc 6 in second ch from hook {6}.
Round 2: [Inc] around {12}.
Round 3: [Inc, sc 1] around {18}.
Round 4: [Inc, sc 2] around {24}.
Round 5: [Inc, sc 3] around {30}.
Round 6: [Inc, sc 4] around {36}.
Round 7: [Inc, sc 5] around {42}.
Round 8: [Inc, sc 6] around {48}.
Round 9: [Inc, sc 7] around {54}.
Round 10: [Inc, sc 8] around {60}.
Rounds 11-17 (7rounds): Sc around {60}.
You will now be making the first ear flap.
Row 18: Sc in the next 10 sts {10}.
Row 19: Ch 1, turn. Sc across {9}.
Row 20: Ch 1, turn, Dec, sc in the next 5, dec {7}.
Row 21: Ch 1, turn. Sc across {7}.
Row 22: Ch 1, turn, Dec, sc in the next 3, dec {5}.
Row 23: Ch 1, turn. Sc across {5}.
Row 24: Ch 1, turn, Dec, sc, dec {3}.
Row 25: Ch 1, turn. Sc across {3}.
Row 26: Ch 1, turn, Dec, sc {2}.
Fasten off and leave a long end to make the straps.
Left Ear Flap
Attach your paired-up yarn to your hook.
Skip approximately 22 sts from the other ear flap, then join your yarn.
Row 1: Sc in the next 10 sts {10}.
Row 2: Ch 1, turn. Sc across {9}.
Row 3: Ch 1, turn, Dec, sc in the next 5, dec {7}.
Row 4: Ch 1, turn. Sc across {7}.
Row 5: Ch 1, turn, Dec, sc in the next 3, dec {5}.
Row 6: Ch 1, turn. Sc across {5}.
Row 7: Ch 1, turn, Dec, sc, dec {3}.
Fasten off and leave a long end to make the straps.
Totoro Hat Ears (6mm hook)
Make 2 with 1 grey fuzzy yarn + 1 grey normal yarn:
Round 1: Ch 2, Sc 3in second ch from hook {3}.
Round 2: [Inc] around {6}.
Round 3: [Inc, sc 1] around {9}.
Rounds 4-7 (4 rounds): Sc around {9}.
Fasten off and leave a long end for sewing.
*No stuffing required.
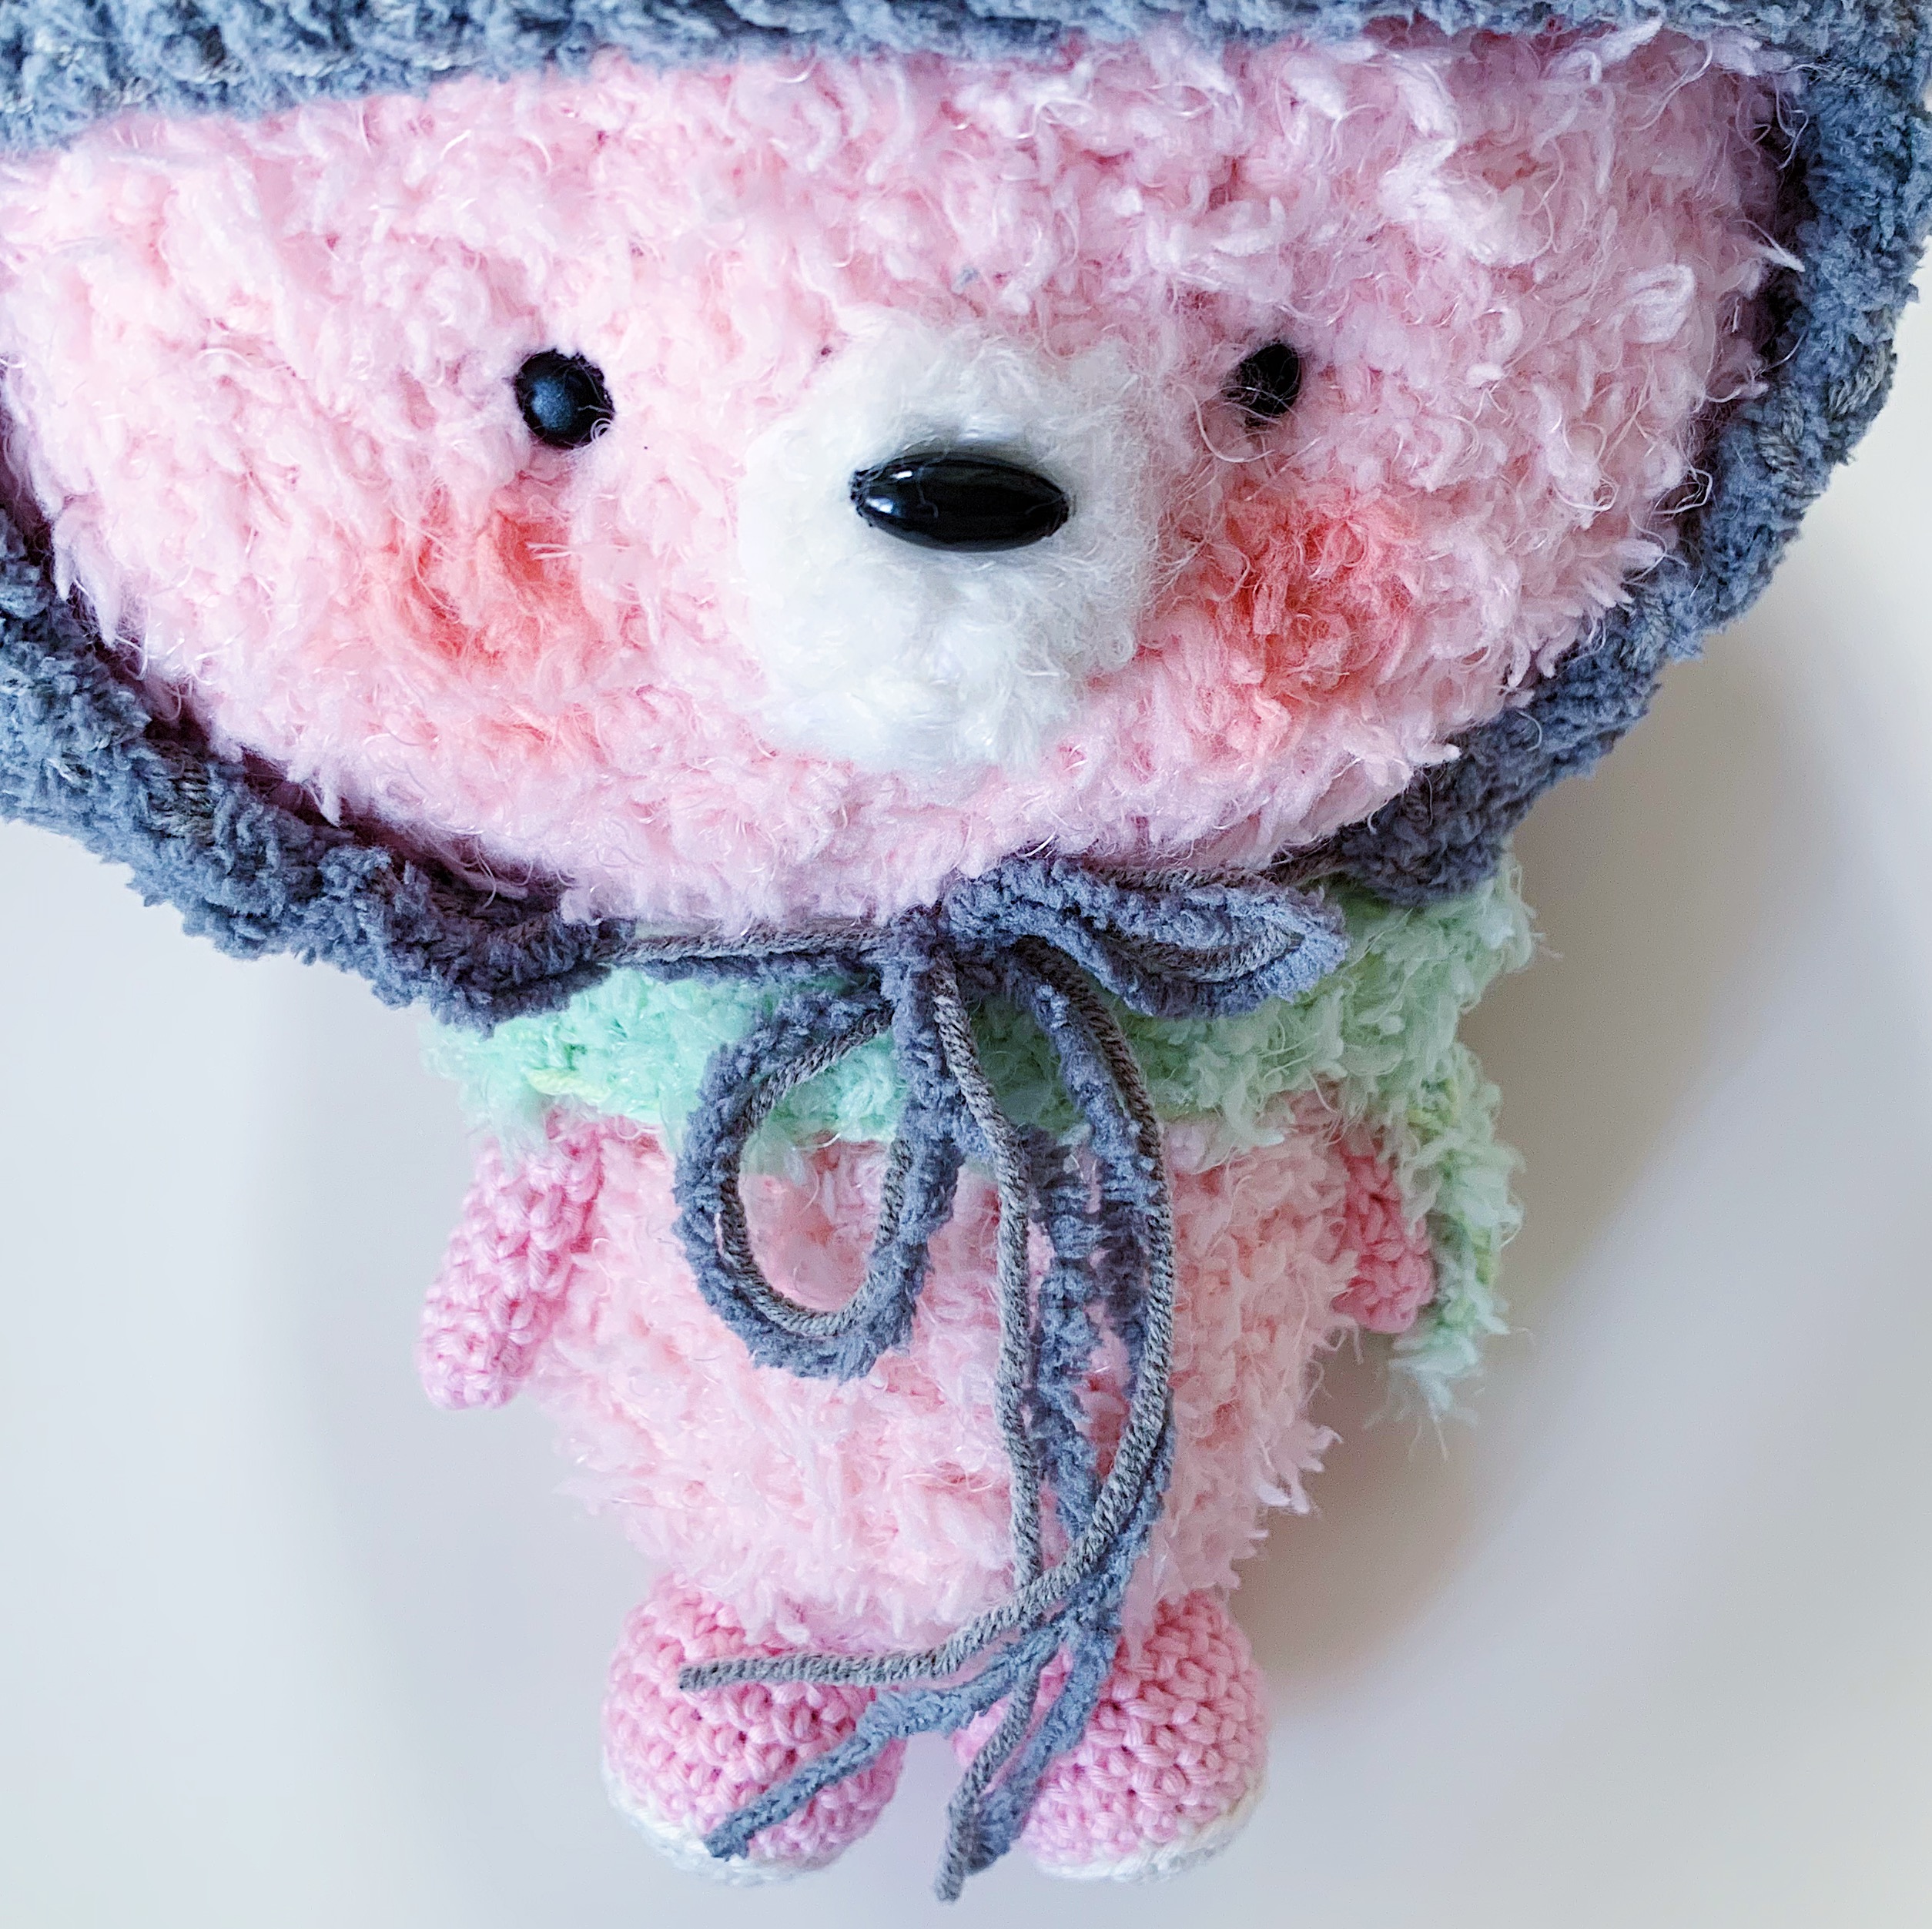
Whipstitch the ears onto the top of the hat.
Wear hat onto Mei-chan and tie the ends into a bow.
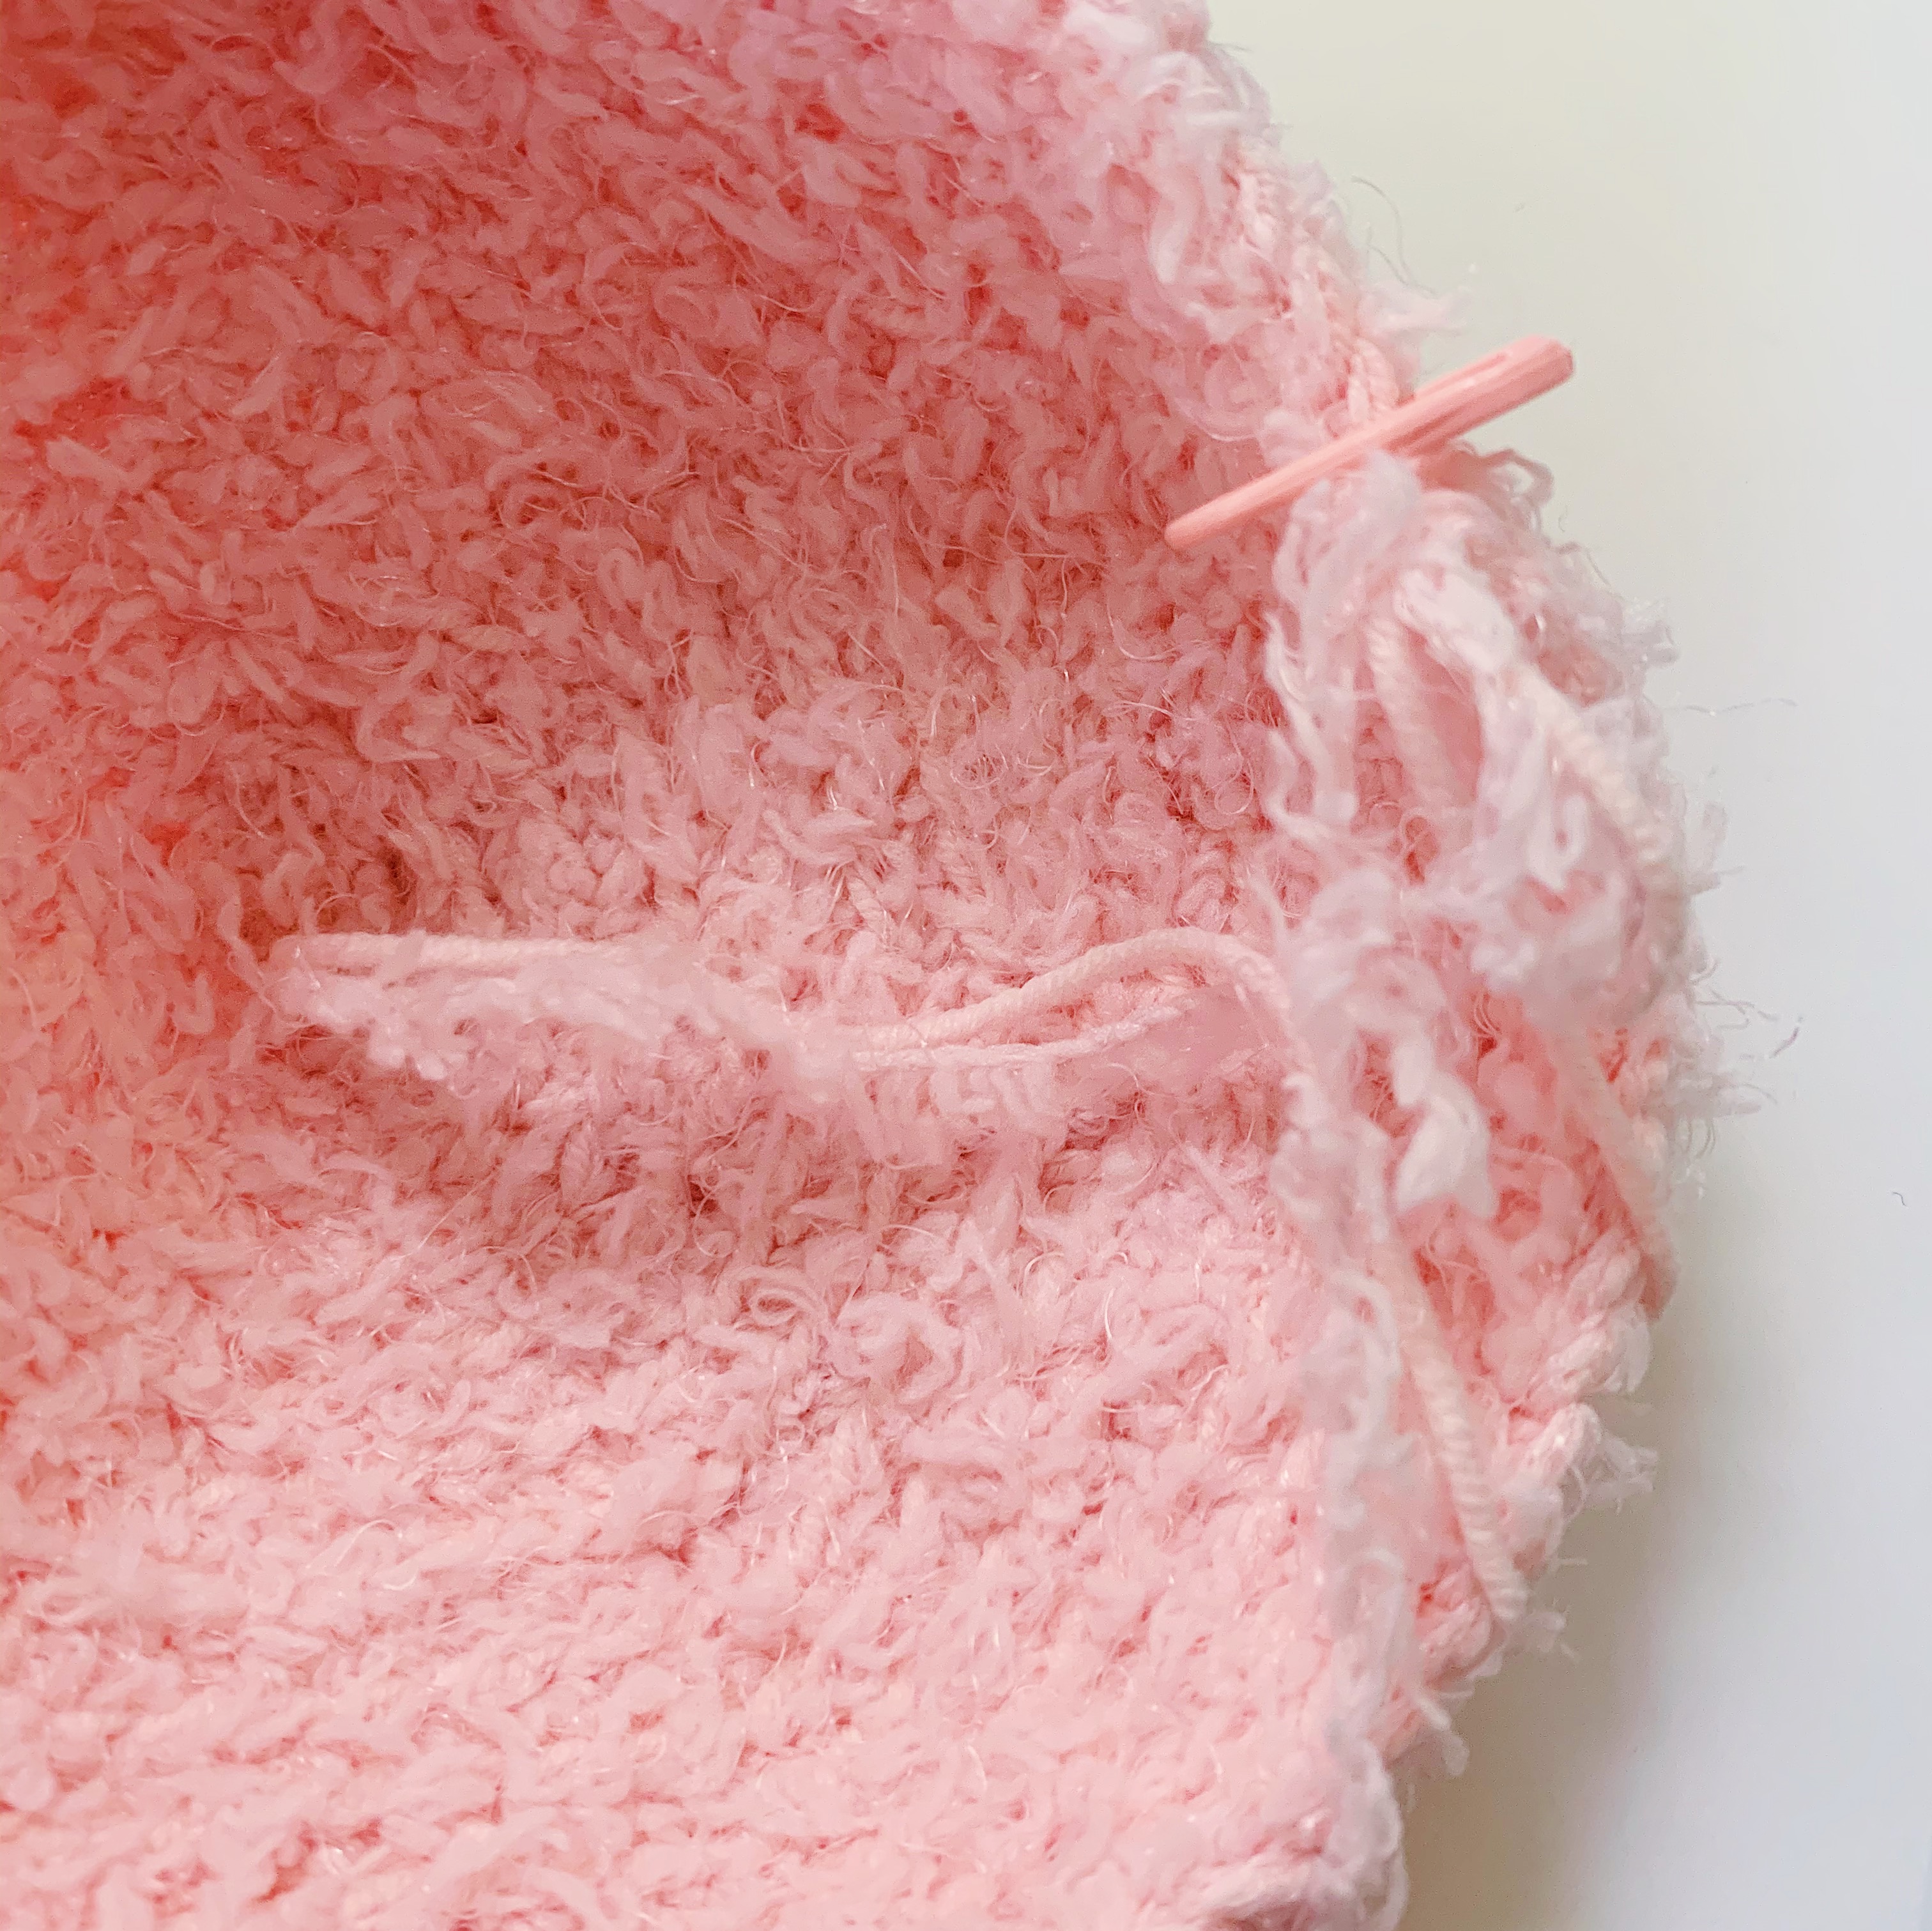
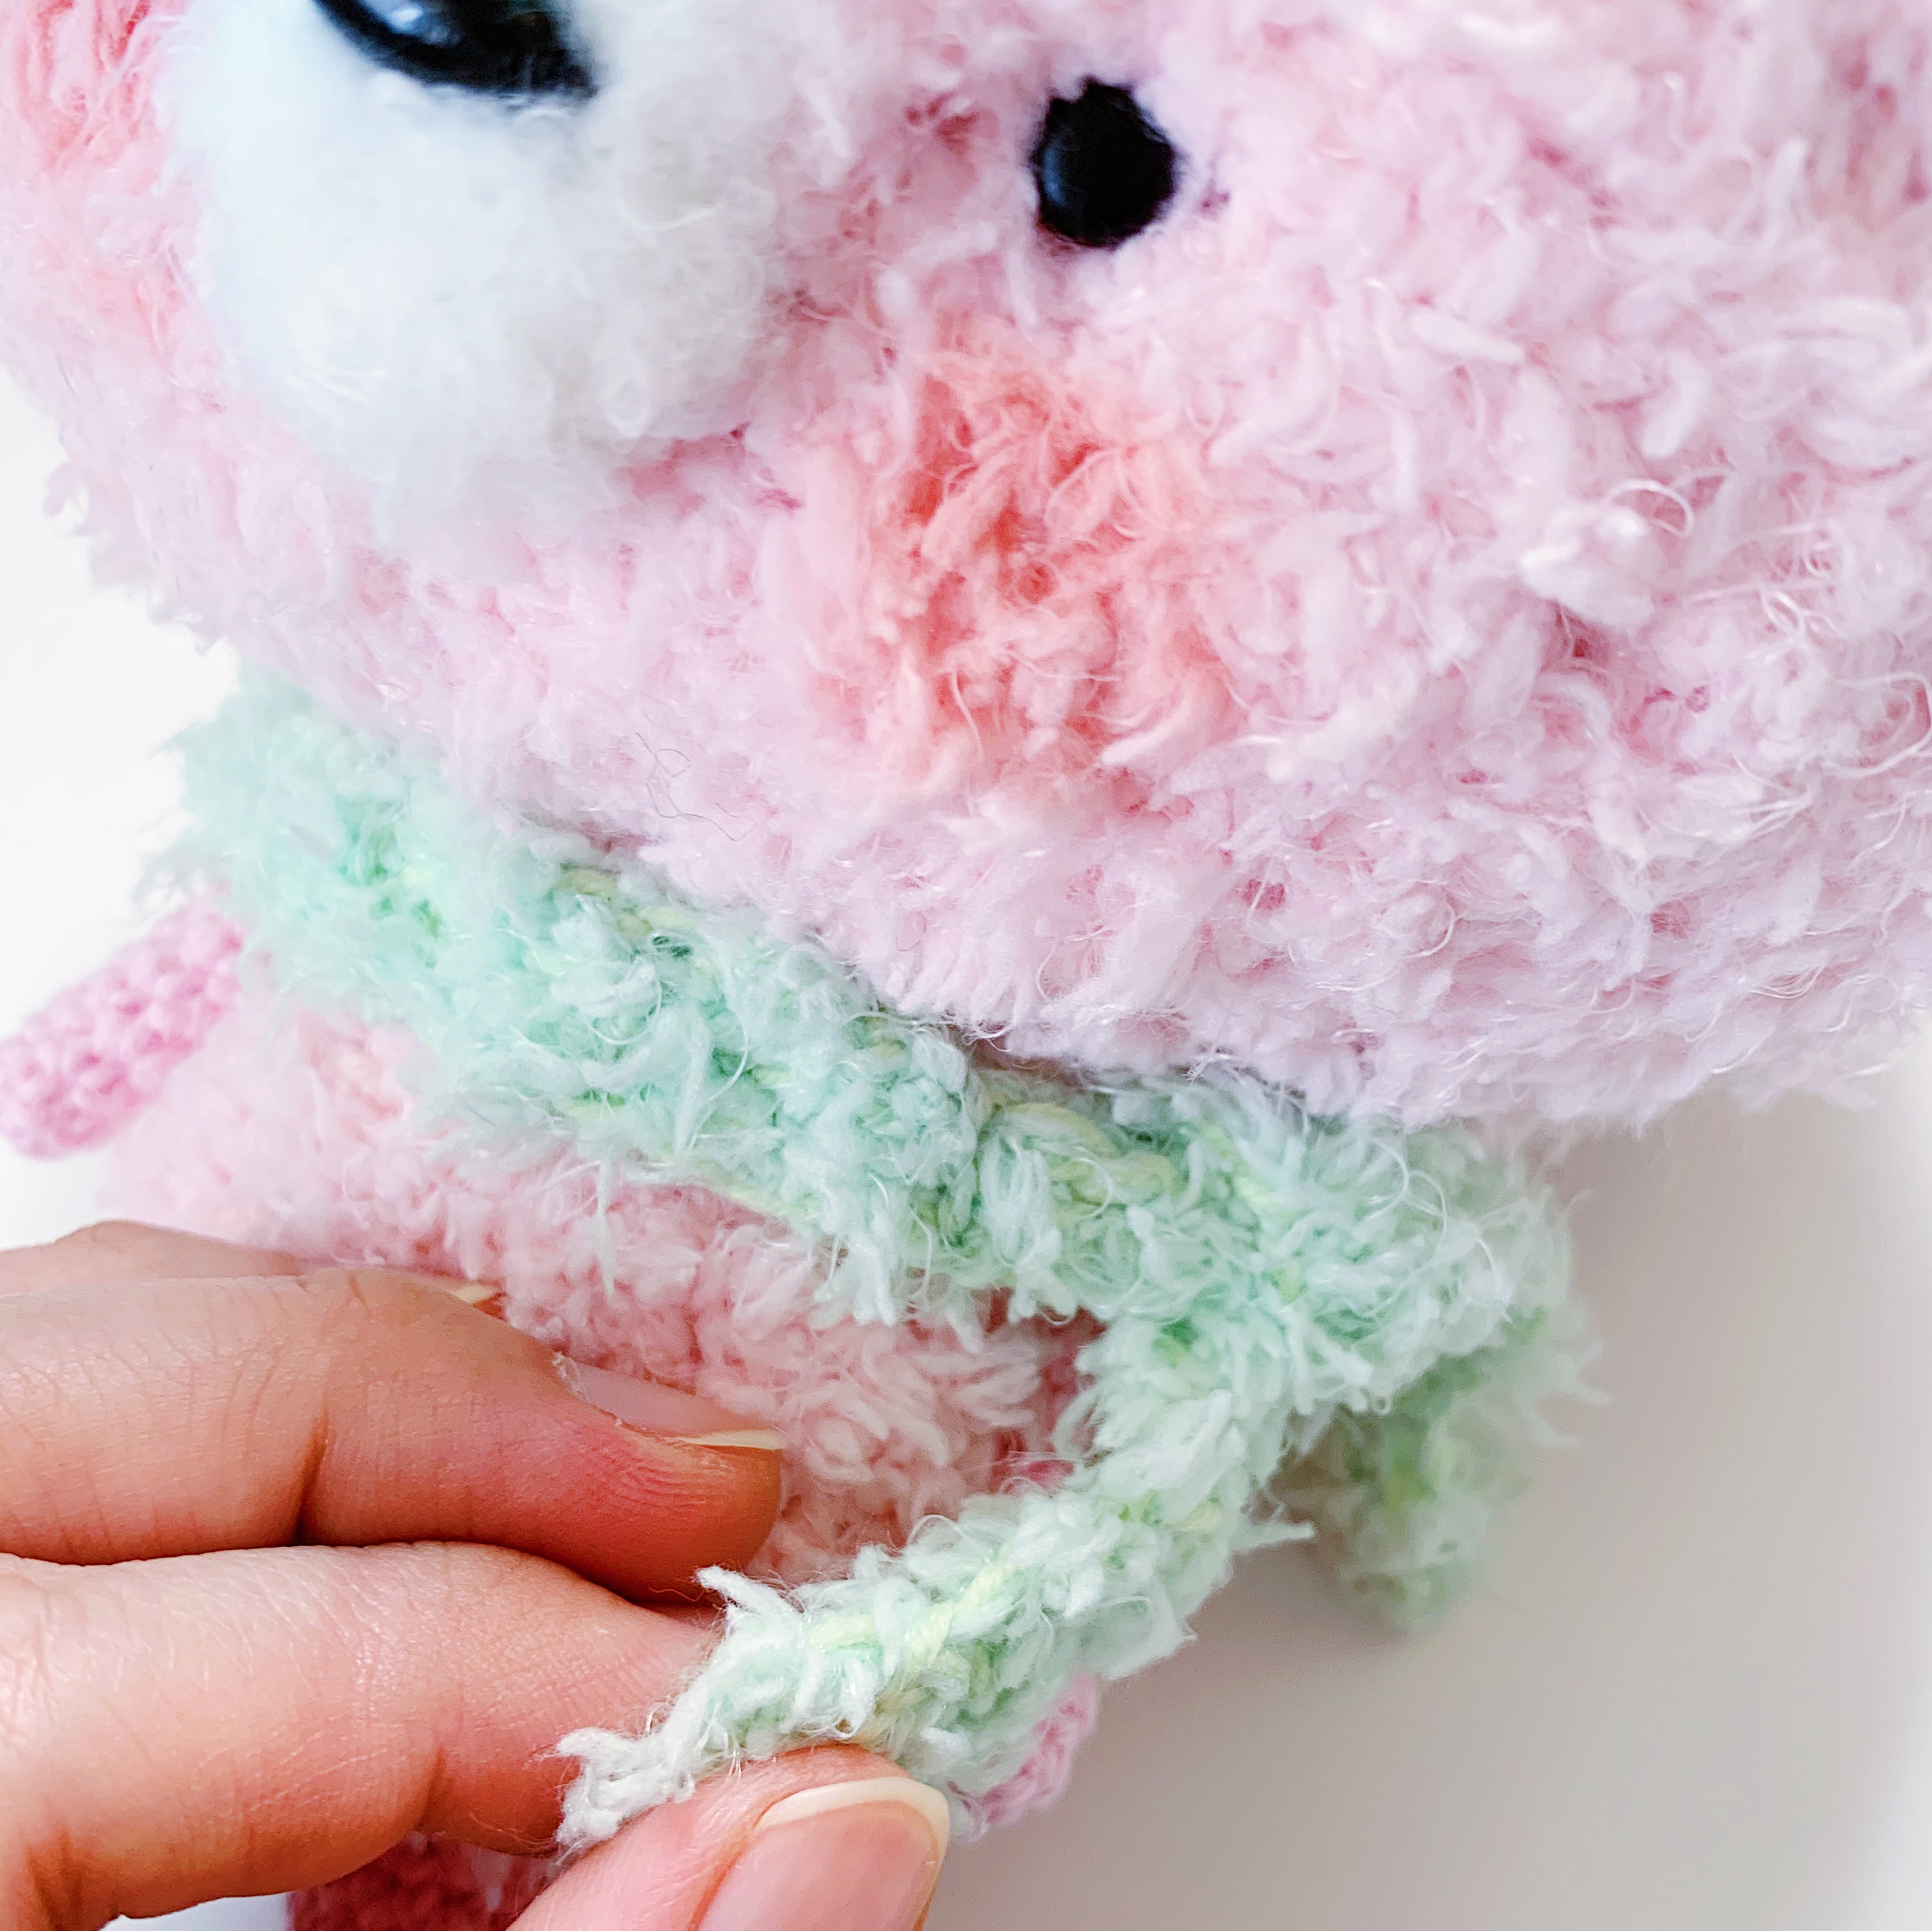
Whiskers
To make the whiskers, loop and sew on a strand of black yarn as shown in the pictures.
You may dab on some craft glue to help the whiskers stiffen up and stand out better.
I must admit, I was a curious child, a fairy-seeking type of child, if you must. Always on the lookout for a little tiny door etched ever so faintly on a tree trunk, or by the hidden side of the walls.
I believe in fairies, and I love bringing the magic of fairies to “life”.
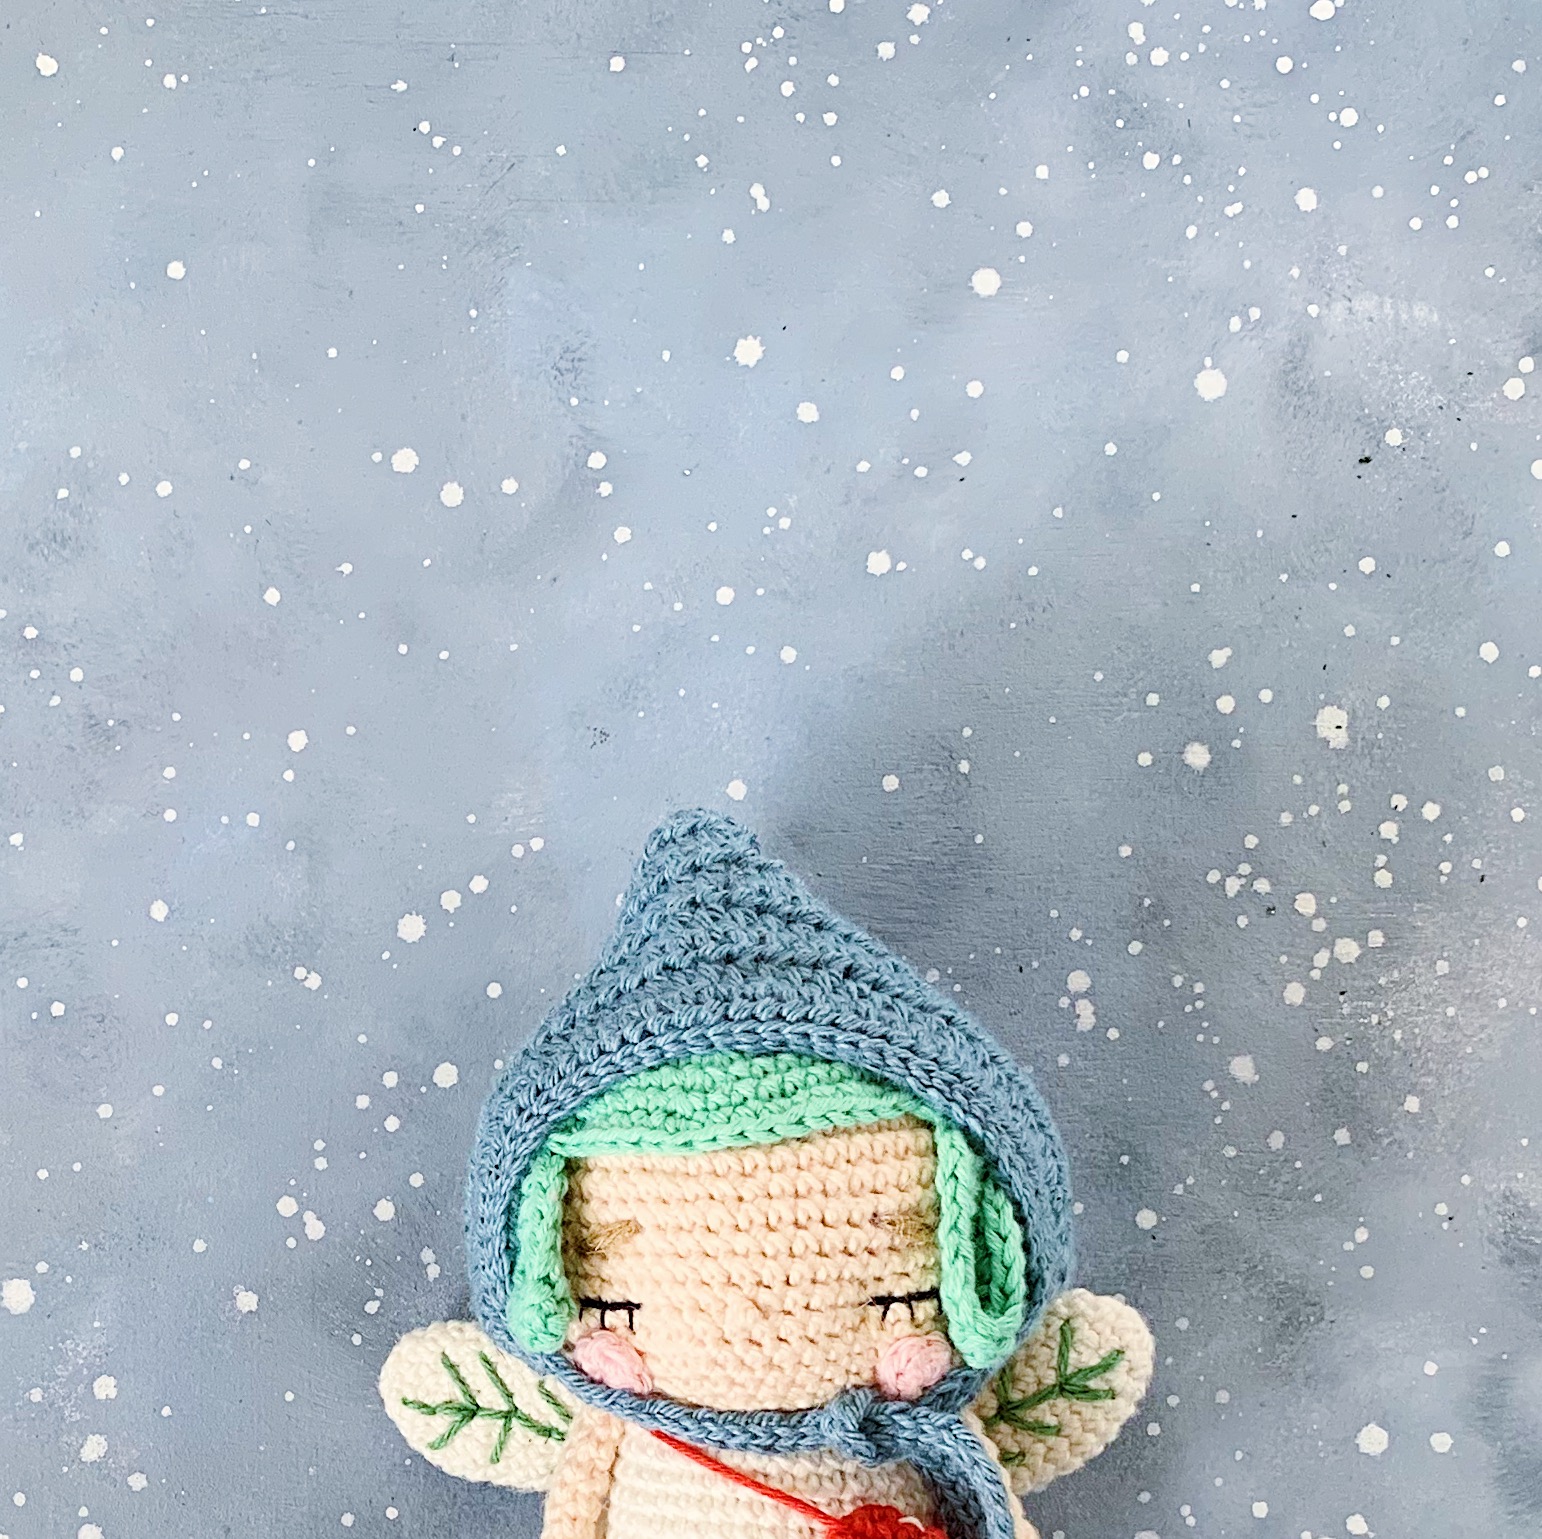
If you’re anything like me, perhaps you might be delighted to meet my newest friend, Maja the Forest Fairy.
For the first time this year, the magazine is bringing together all my favourite designers from around the world, and together we’ve each worked on a pattern to be included in the Festival Amigurumi digital pattern bundle.
This very special bundle is now on sale, and will only be available for purchase from July 5th till July 10th.
One price, over 30 patterns all in one go. For a limited time only.
If you believe in fairies, I would like to invite you along on a magical journey…a path that leads to the realm of Maja the forest fairy. Along the way you will come across talking cats (@anniegurumi), a penguin with a hat (@lemonyarncreations , a girl with the heart of a cherry (@kurumitoys) and so many more!
I am so excited to be a part of this amazing event! For more details, you can see my Instagram stories and my Instagram posts. I will be sharing more on what other exciting patterns are included in the bundle.
A warm thank you to my friends at Hobium Yarns for sponsoring the lovely La Mia Linen Cotton for this project!
*A portion of the price paid for the bundle will go back to all the designers who participated in this event. Thank you so much for your love and support!