Who would’ve thought, after all this time, that amigurumi had yet to have its very own special day?
The thought never even crossed my mind until I saw a message in my Facebook inbox from fellow crafters Marcia Scarpelli of Ami Arts and Bianca of Two Bee, inviting me to join them on this special adventure to mark April 25th as International Amigurumi Day! How wonderful and so, so exciting!
I immediately went on to pass the message on to some of my favourite crochet friends, (Annie of @anniegurumi, being the first), and I think we have more than enough people to be seriously excited about this event!
I hope you can celebrate this day with me too as the word “amigurumi” brings together so many memories and emotions — it has really changed my life ever since I started, I think almost 8 years ago!
And of course, I have to have a free pattern for you!
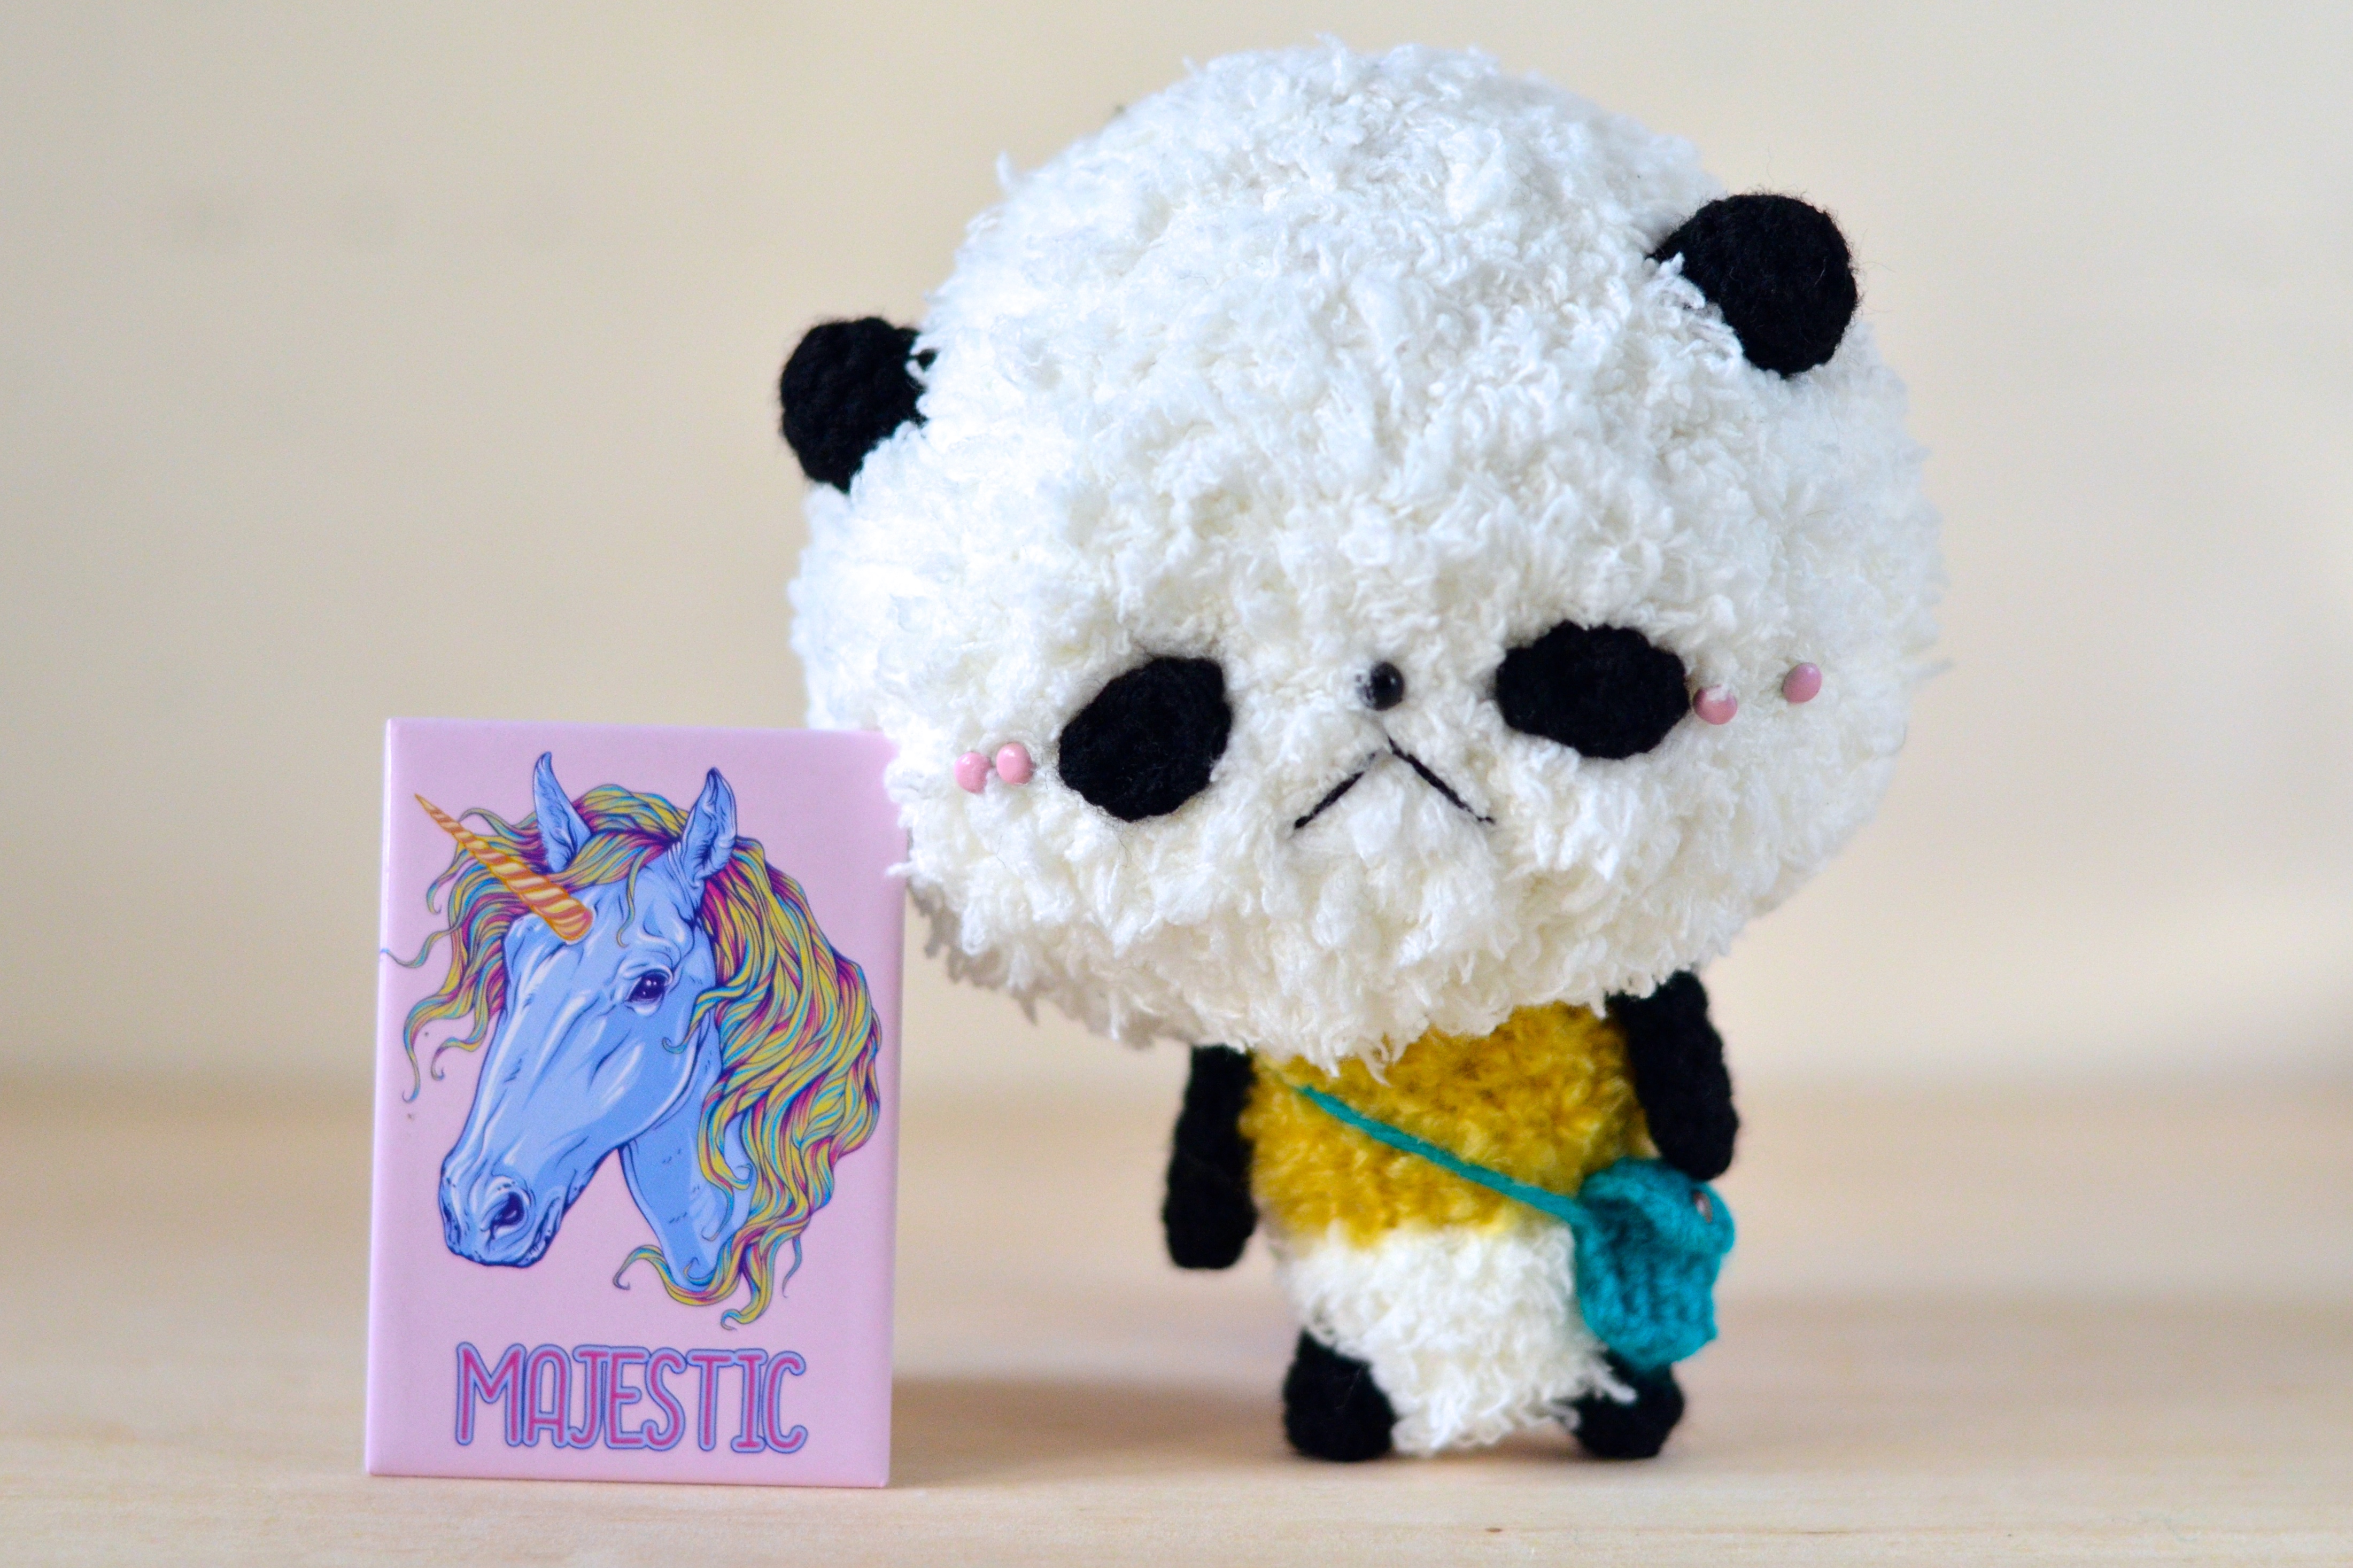
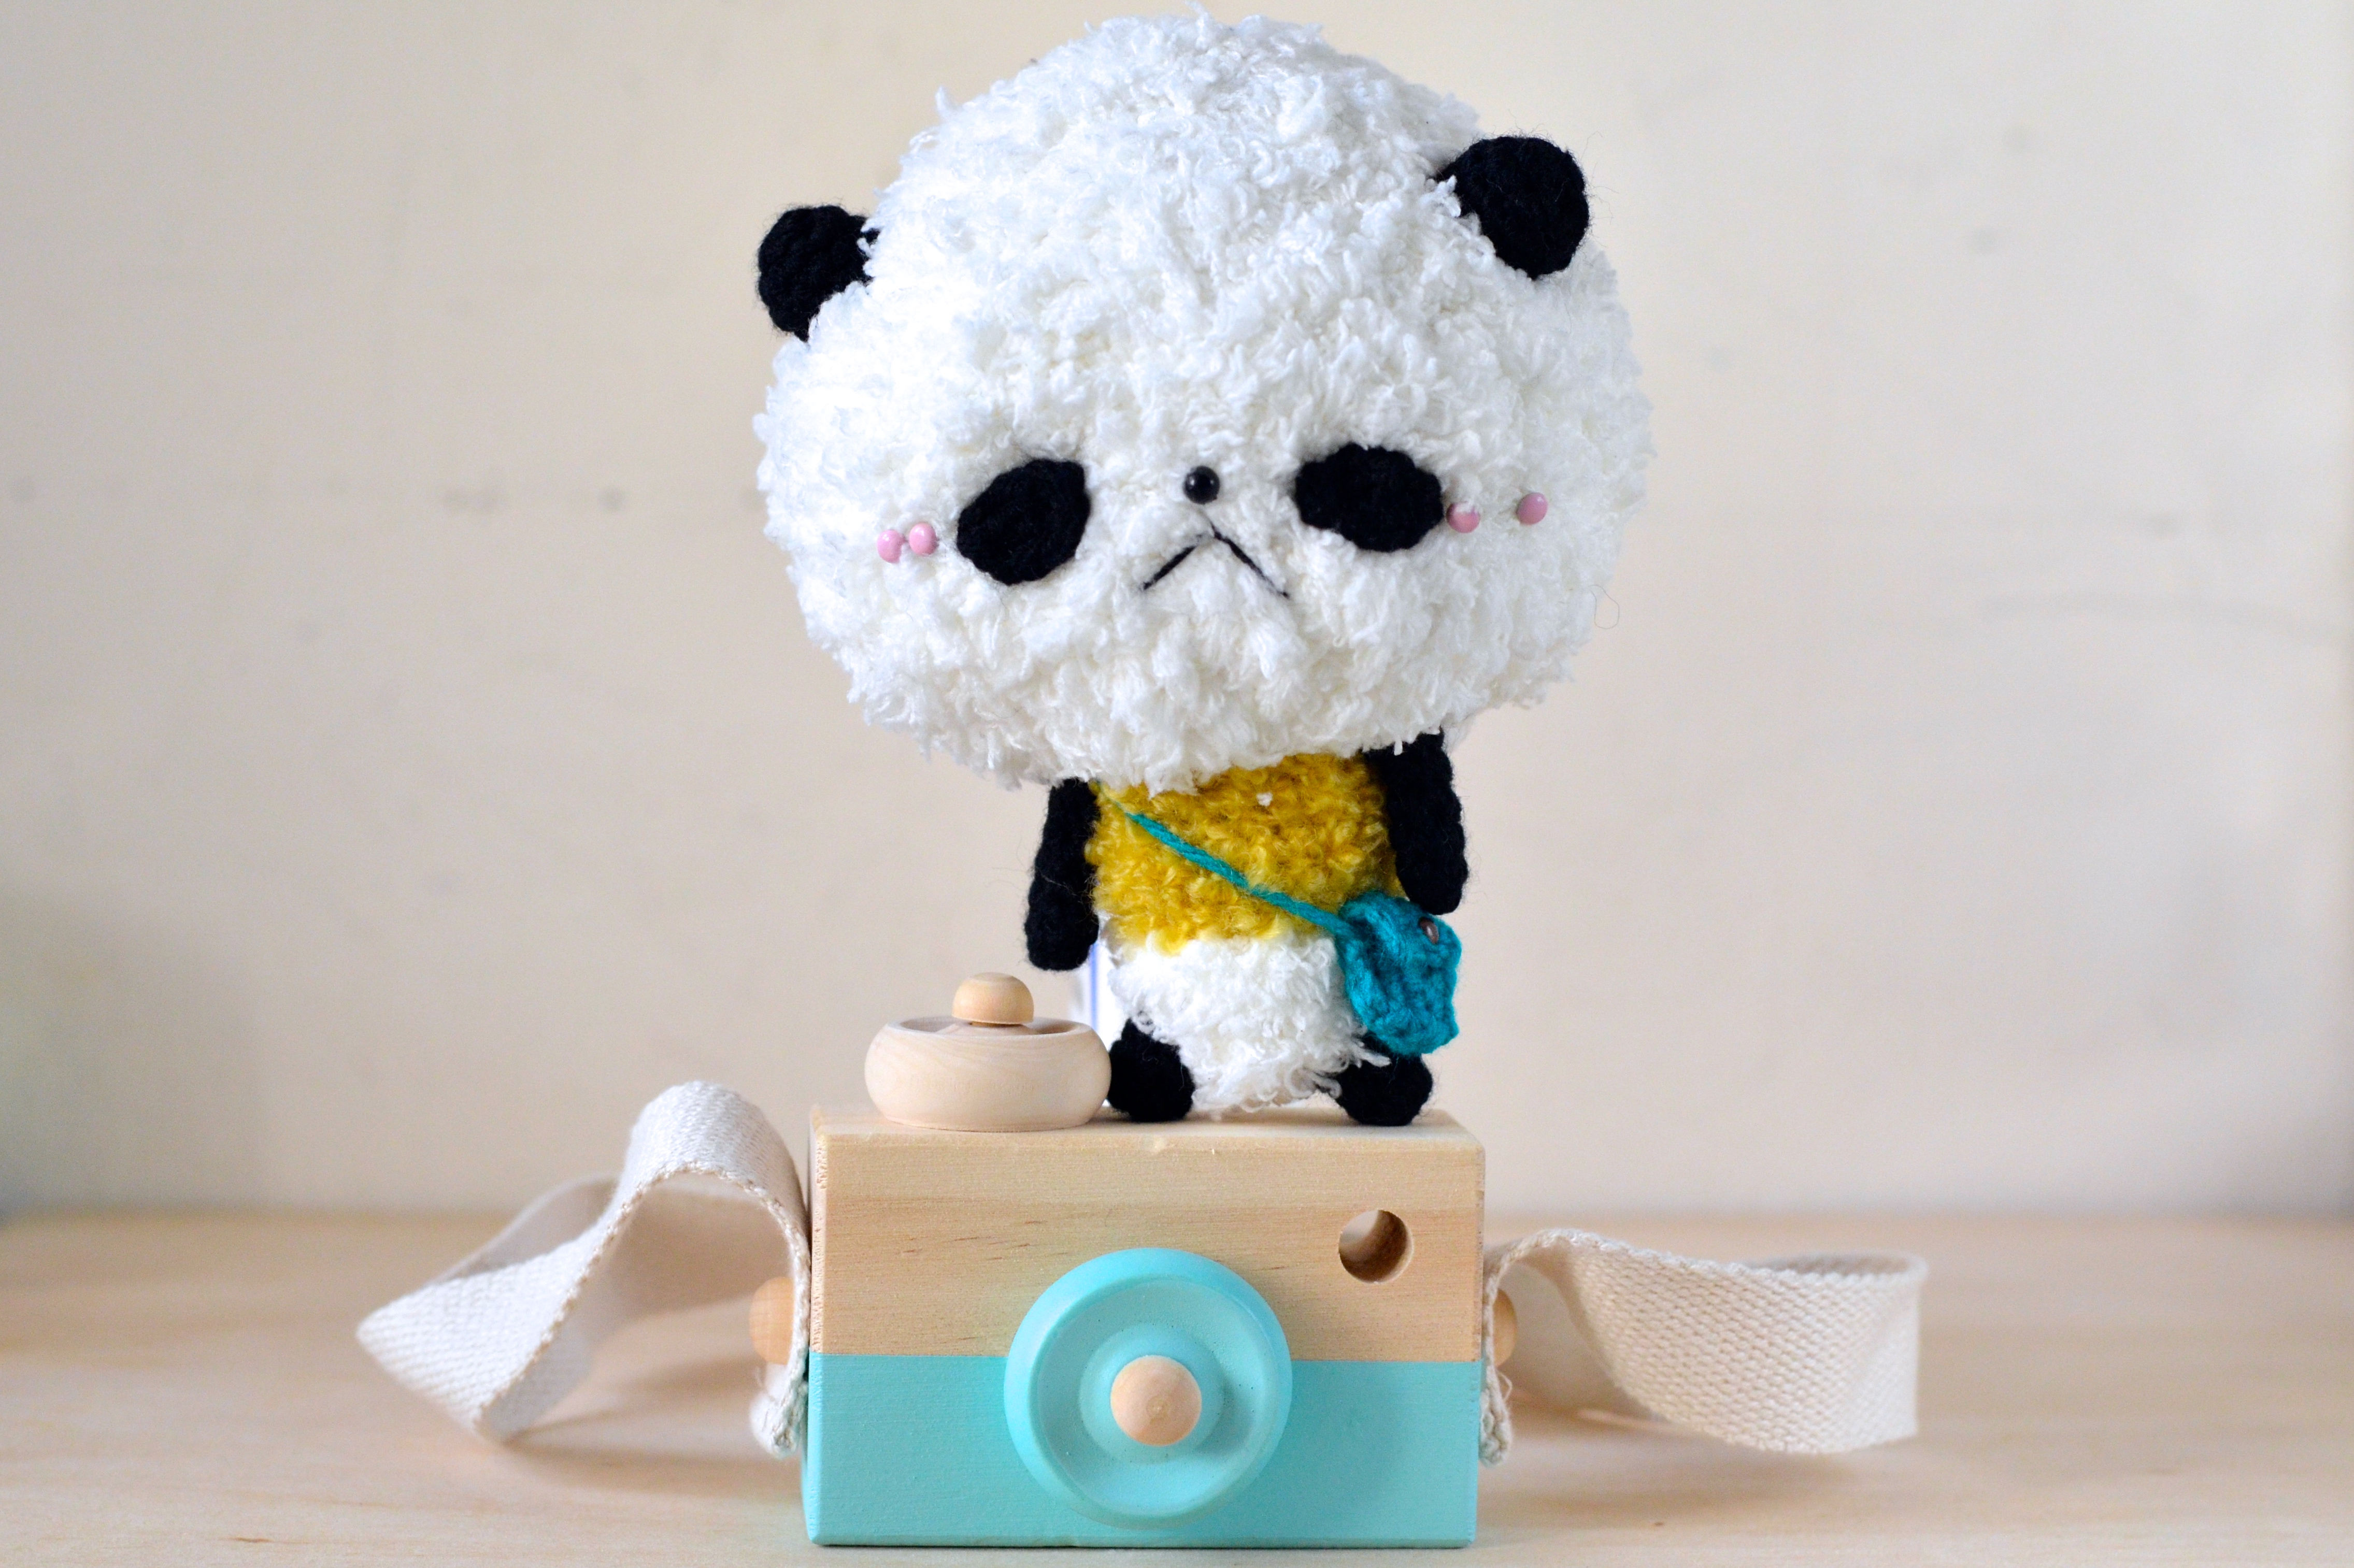
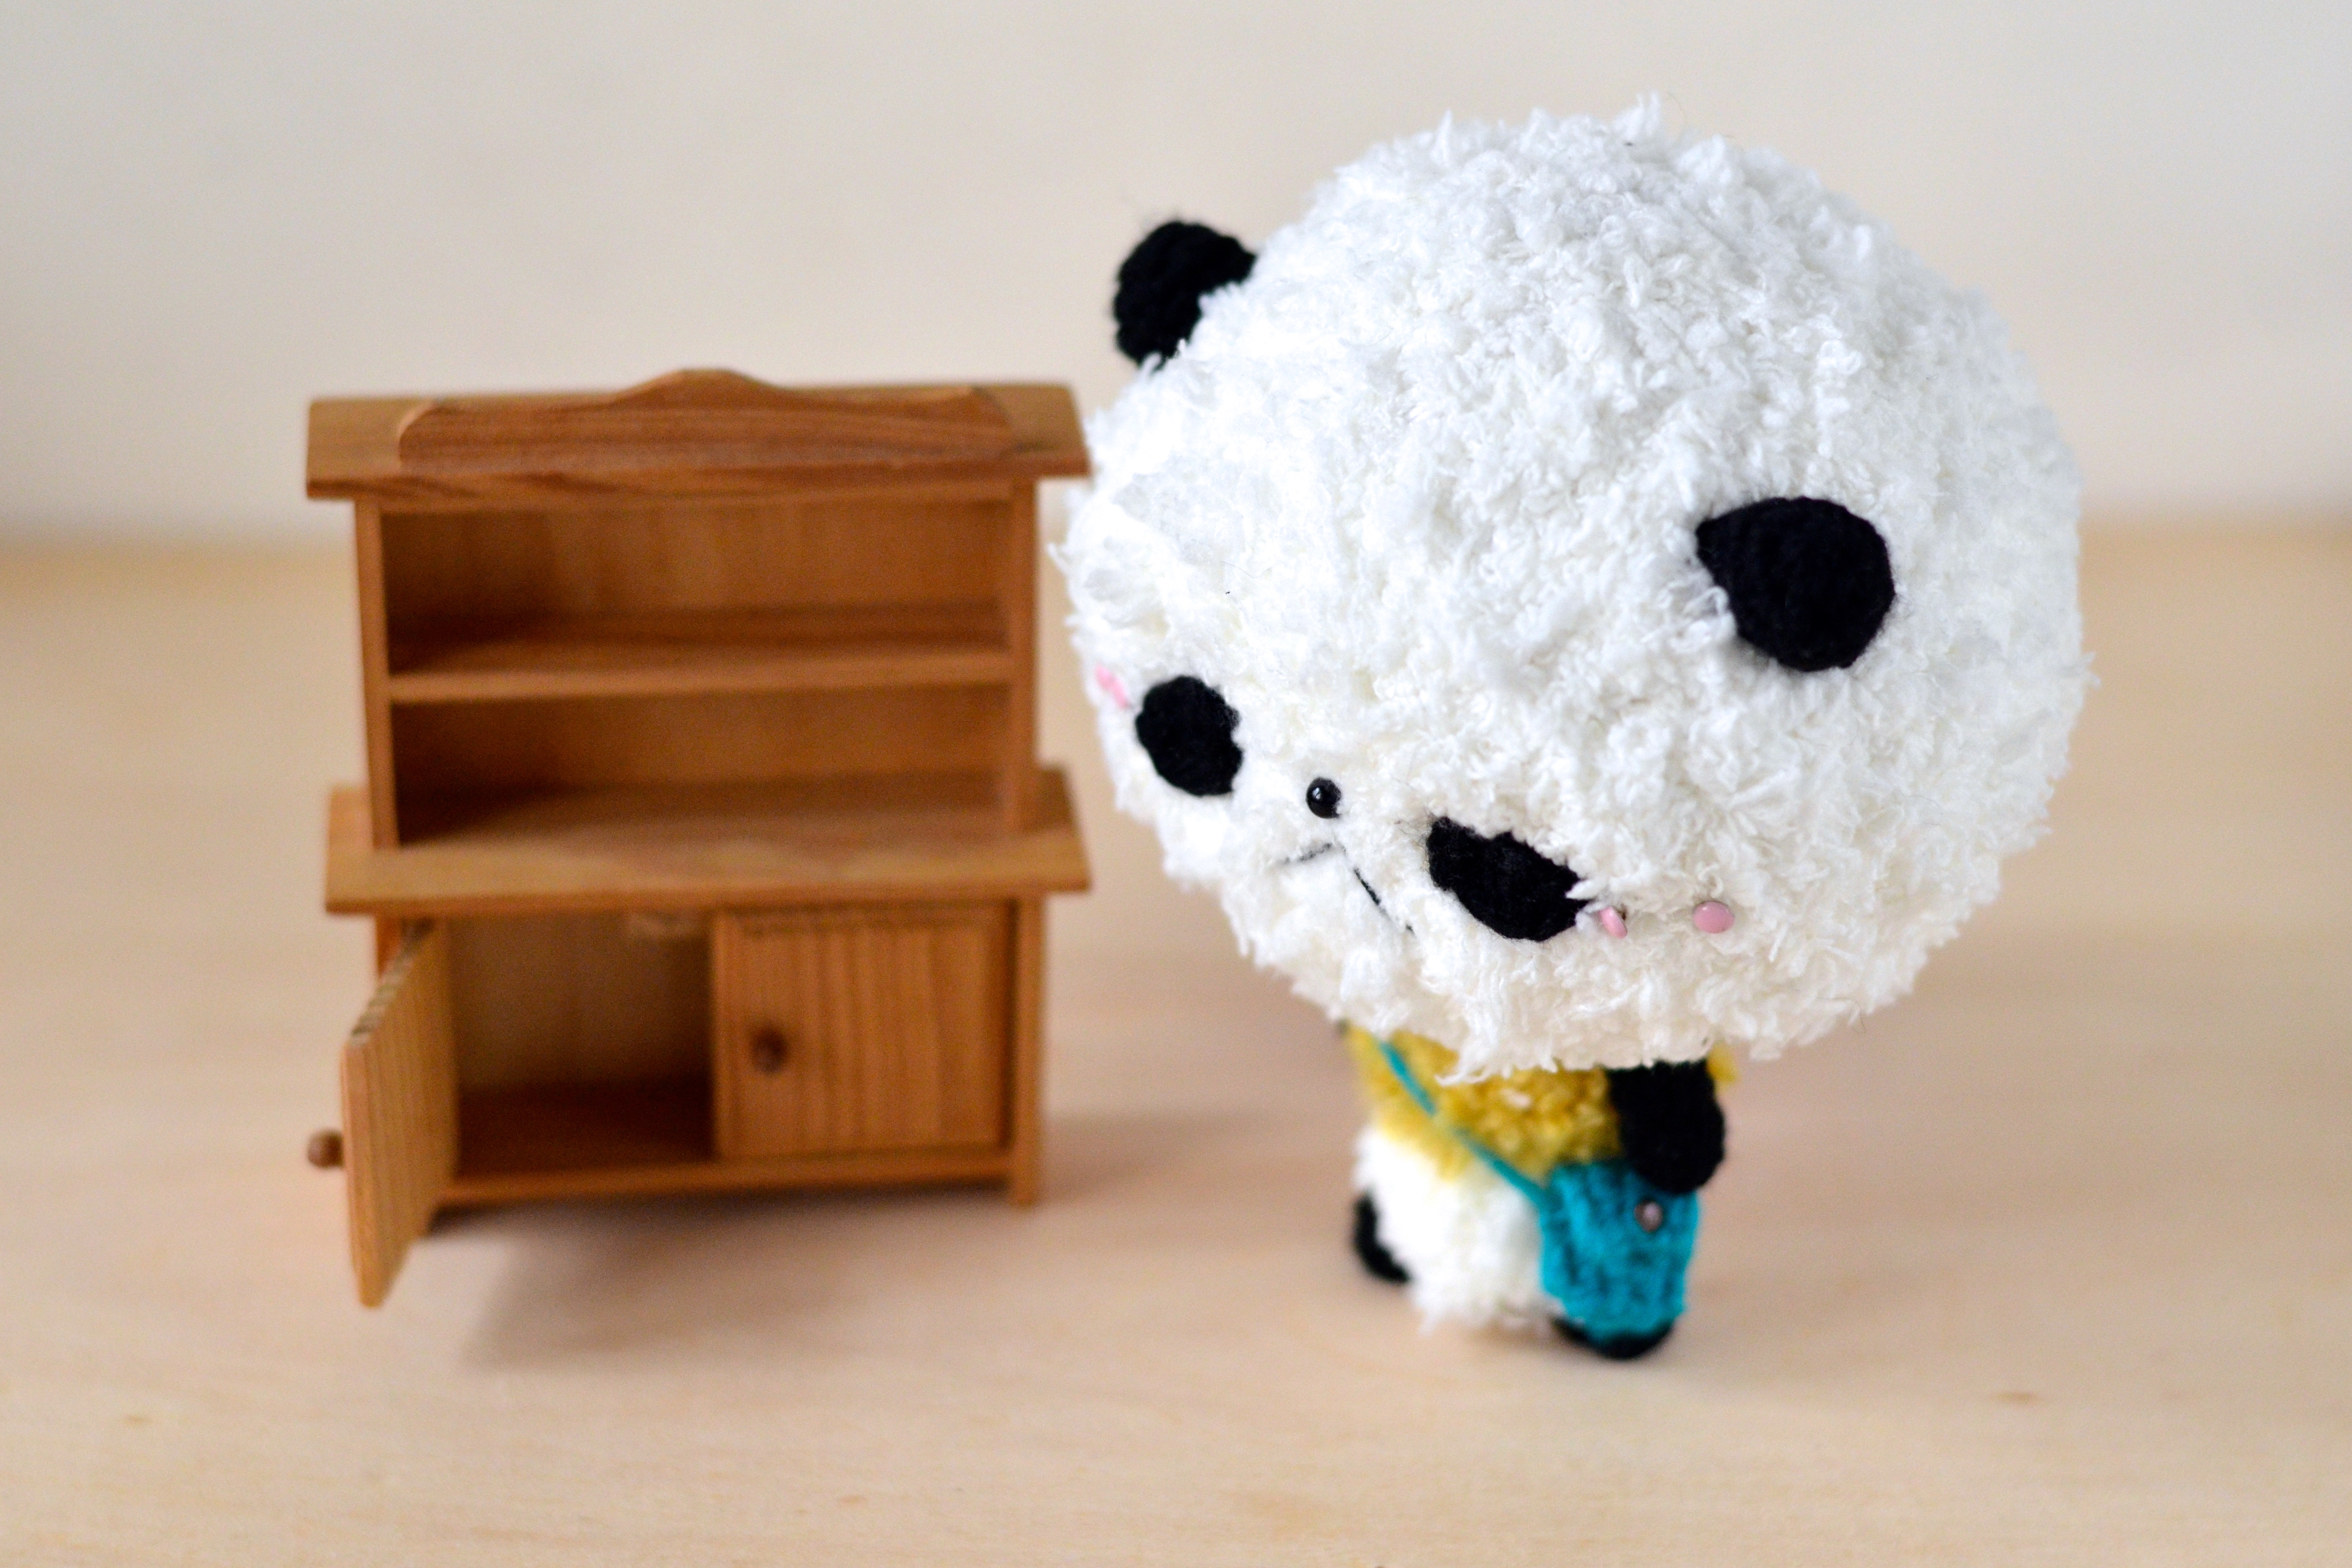
Please meet Strawberry-san, the berry-special girl with a surprise center that belies her squishiness!
The pattern will be shared for FREE on the Hobium blog, so please head over HERE to taste the cuteness!
The anthropomorphism feature in amigurumi has always kept me enthralled with the art and so I had to make my favourite fruit complete with a cute face!
I can’t quite remember now, but I’m pretty sure one of the main reasons I stuck with learning how to crochet and making amigurumi because I wanted to make a bunch of happy food plushies with cute faces and have them all sit on my desk. That, and a bunch of other Ghibli characters, of course (which I still haven’t gotten around to making, apart from Totoro and Kaonashi).
One of my favourite parts of making amigurumi is actually the “adrenaline-rush” I always feel whenever I get inspired and am about to start on a project. The yarn-choosing, the colour-picking — those give me the fuzziest feelings and it’s so, so addictive!
I wish to give a shout out also to all my fellow crafters and friends who have supported me so much over the years with your sweet words and encouragement, without you guys, I wouldn’t even dream of writing patterns and curating an instagram account dedicated just to the amigurumi craft!
Indeed, this is a very special day for me and I hope it is for you too! Happy 1st ever International Amigurumi Day!
And don’t forget to adopt little Miss Strawberry-san into your home to meet your other amazing amigurumi!
To mark this as my first post of the year, I have a special surprise for everyone!
Yes, you guessed it right: a free pattern, of course!
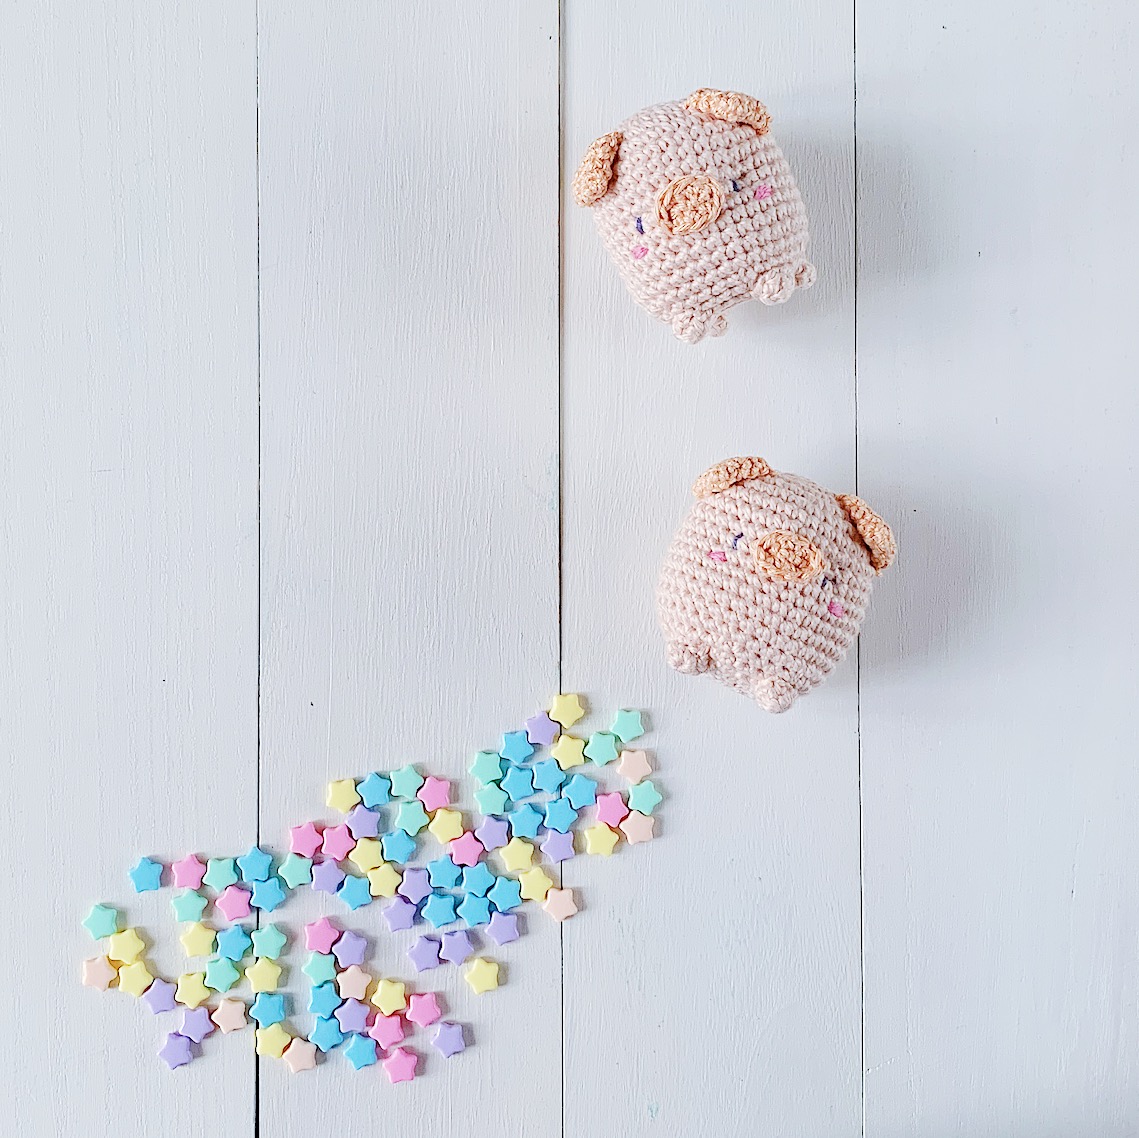
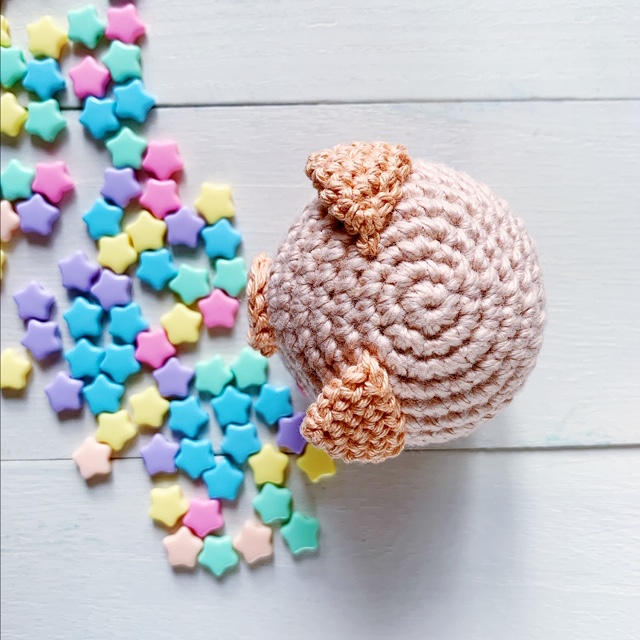
And since I was born in the year of the pig, I had to make a cute little piggy just for the lunar New Year.
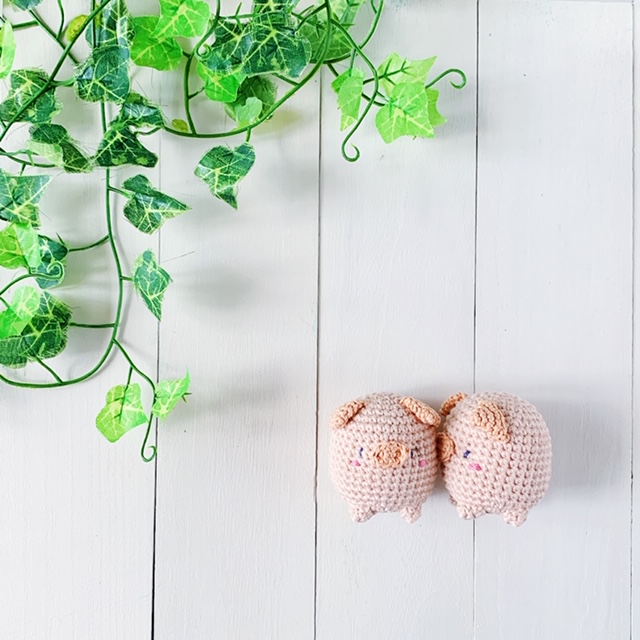
Please meet my pocket piglet, Nobu — the cutest and easiest amigurumi piglet that you’ll make all year!
You can make a few of them and stack them up.
Or just have them kiss each other for fun.
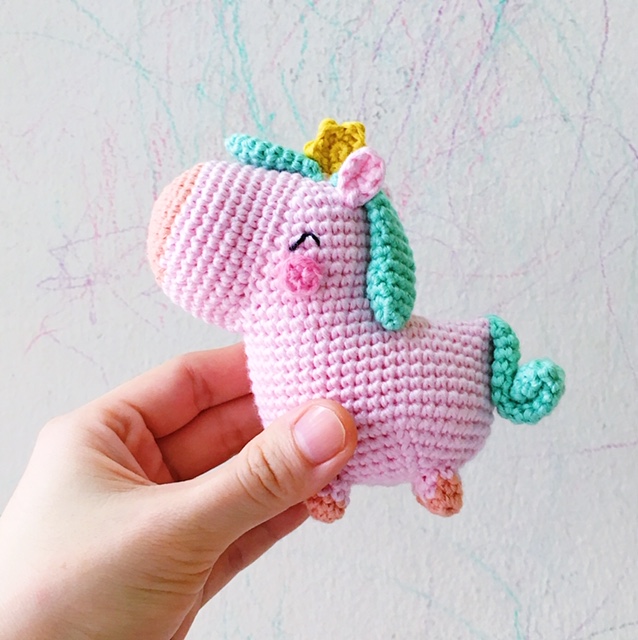
And if you like making tiny little pocket amigurumis, you must check out my Kirika the pocket unicorn pattern, available for FREE on the Hobium Yarns blog.
But let’s not get sidetracked now 🙂 Chinese new year is barely a week away and if you’re like me, you’ll want to hurry and make a few of these pocket piglets as a heartwarming gift for someone extra special whom you’re visiting then!
Please tag me on Instagram @amigurumei #amigurumei #pocketpiglet and let me know how your pocket piglets turned out!
Happy Chinese New Year to all my dearest friends! (I’m actually a little nervous about this year as we’ll be bringing the boys to a trip back to our hometown for the very first time! It’ll be their first time on an airplane and a no-cots sleeping arrangement. Wish me luck!)
Nobu the pocket piglet amigurumi pattern
by amiguruMEI
Skill level: Easy
Materials & Tools 2.5mm hook
3mm hook
Dk weight cotton yarn in flesh, peach-orange, pink and dark blue.
Darning needle
Polyester fiberfill
Craft glue (Important: use one that dries clear)
Yarn note: I used Kartopu Love Cotton in pink K1873, Schachenmayr Catania in Light Pink, Kartopu Organica in Blue, La Mia Pastel Cotton in Flamingo. All available at Hobium Yarns with 2-day DHL delivery worldwide! Hobium sends me a box of yarn monthly as a part of their Hobium Yarns Ambassador Programme and I’m still swooning that I’m a part of it at all! So far, I’ve been in love with all of the cotton yarn that they’ve sent. For this project, the cotton yarn is a bit on the mercerized side (shiny) and they didn’t split up at all — perfect
Head /Body
With flesh yarn and 3mm hook:
Round 1: Sc 6 in magic ring {6}.
Round 2: [Inc] around {12}.
Round 3: [Inc, sc 1] around {18}.
Round 4: [Inc, sc 2] around {24}.
Round 5: [Inc, sc 3] around {30}.
Round 6: [Inc, sc 4] around {36}.
Round 7-16 (10 rounds altogether): Sc around {36}.
Round 17: [Inv dec, sc 4] around {30}.
Round 18: [Inv dec, sc 3] around {24}.
Round 19: [Inv dec, sc 2] around {18}.
Stuff piece firmly.
Round 20: [Inv dec, sc 1] around {12}.
Round 21: [Inv dec] around {6}.
Fasten off and weave in ends. Leave a long end for making eye indentations.
Eye Indentations 1. With a darning needle, bring the remaining yarn from the bottom of the head/body through to the left side of the piece, positioning it at a stitch on Round 10. 2. Make one horizontal stitch and bring the thread back down to the bottom of the head. Gently tug on the yarn to create a slight indentation.
3. Now repeat the above on the right side of the head — there should be about 5 stitches in between the indentations. Trim off excess yarn.
Nose
For this, you will be crocheting in an oval around both sides of the foundation chain.
With peace-orange yarn and 2.5mm hook:
Row 1: Ch 6. Starting from the second ch from hook, sc in the next 4 ch then make 2sc in the final ch {6}.
You will now be crocheting on the other side of the chain, and continuing till the end in an oval.
Round 2: Sc in the next 8 sts {8}.
Clean fasten off and leave a long end for sewing.
Ears
Make 2 with peach-orange yarn and 2.5mm hook:
Round 1: Sc 3 in magic ring {3}.
Round 2: [Inc] around {6}.
Round 3: [Inc, sc 1] around {9}.
Round 4: [Inc, sc 2] around {12}.
Round 5: Sc around {12}.
Fasten off and leave a long end for sewing.
Flatten piece.
Legs
Make 4 with flesh yarn and 3mm hook:
Round 1: Sc 6 in magic ring {6}.
Rounds 2: Sc around {6}.
Fasten off and leave a long end for
sewing. * No stuffing required for the legs.
Assembly
1. Sew nose at the center (between the eye indentations) below Round 8 of the head/body.
2. Sew ears onto the left and right top-side of the head, near Round 5.
3. With dark blue yarn and your darning needle, make a vertical backstitch for the eyes, on Round 10 near the eye indentations. If you prefer to have thicker-looking eyes, you may repeat the backstitches several more times.
4. For the cheeks, use pink yarn and darning needle and make a horizontal backstitch below Round 11, to the sides of the eyes.
5. Attach all four legs below the body piece. Do pin them together first to see if the position of the legs will help your piglet stand well on its own.
6. Important!** When you’re sewing on the final leg, don’t trim the excess yarn. Instead, bring it out to below Round 15 at the back-center of your piglet to make the tail. All you have to do is apply some craft glue (that dries clear), make the yarn curl up into a curly tail and leave to dry.
If you’ve been following me on instagram @amigurumei, you’d remember that I made some shark bags for my boys using this amazing pattern by The Cookie Snob. My boys loved it to bits and would wear it whenever we took them out. Which also meant it got worn out very quickly because they would sometimes step on it and grab it with their grease-filled hands after a meal :> I also used acrylic yarn, so it fuzzed up quite a bit.
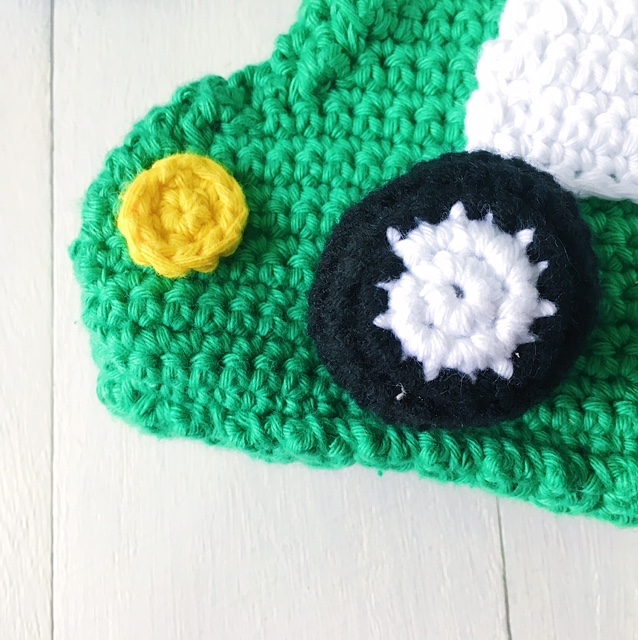
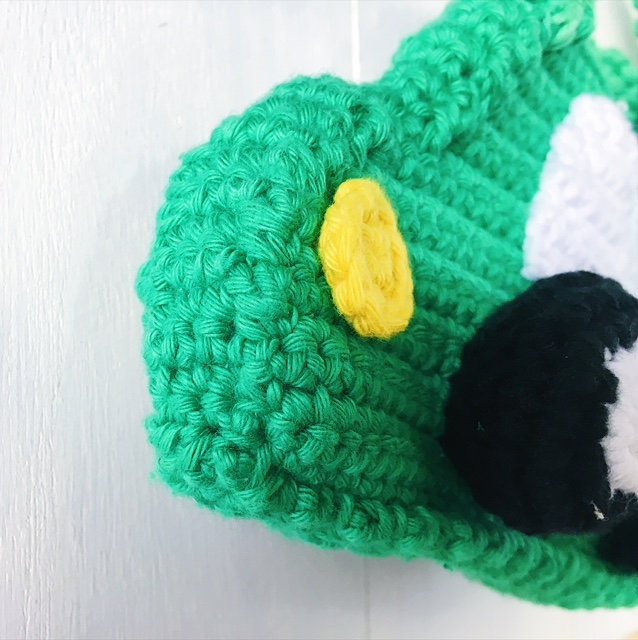
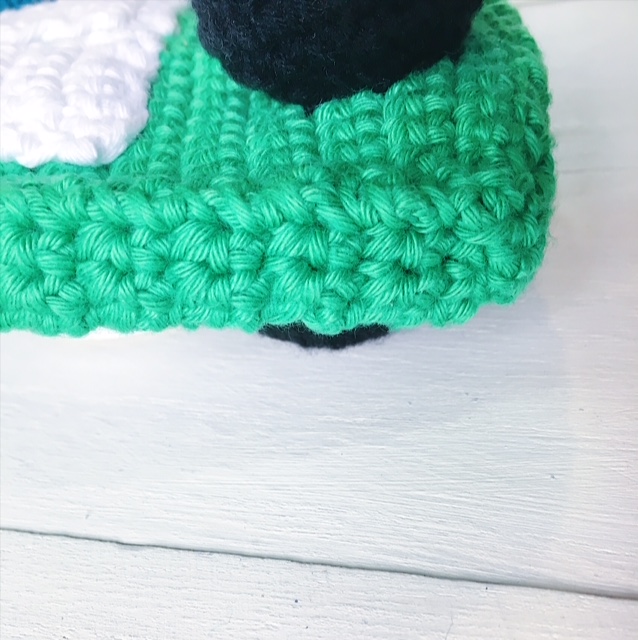
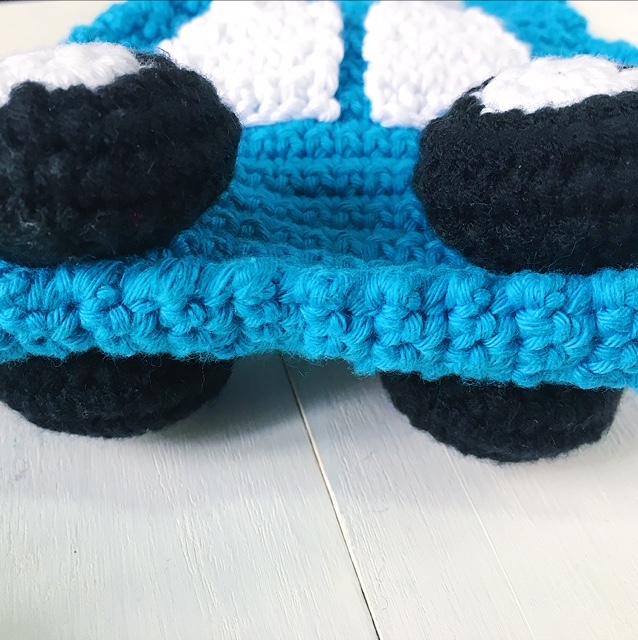
And so I decided to make them new bags and I thought, oh wow, why not bags in the shape of a car since they loved cars so much. And I came across this amazing amigurumi car pattern by Nephithyrion!
And here are the results!
I absolutely love how cute these turned out — almost like a child’s drawing!
I made some modifications to the pattern to turn them into bags. And I know you’d maybe want to make one too for a car-crazy kid you know, so here’s a pattern reference for you!
xxxxxxxxxxxxxxxxxxxxxxxxxx
CROCHET CAR BAG PATTERN (based on the Crochet Toy Car pattern by Nephithyrion)
Materials:
1.5 skeins of main colour yarn for one toddler-sized bag (I used Paintbox cotton aran in grass green and kingfisher blue)
**Do note that there are certain rows that do not require a CH 1 before turning so watch out for those. I’m not sure if it was a mistake but I chained 29 at the start.
Windows (Make 4) With white yarn: Ch 8. Rows 1-2: Sc across, ch 1, turn {7}.
Row 3: Sc2together, sc in the next 5, ch 1, turn {6}.
Row 4: Sc across, ch 1, turn {6}.
Row 5: Sc2together, sc in the next 4, ch 1, turn {5}.
Row 6: Sc across, ch 1, turn {6}.
Row 7: Sc2together, sc in the next 3, ch 1, turn {4}. Fasten off and leave a long end for sewing.
Bottom of the car
With main colour yarn:
Ch 4.
Rows 1-29: Sc across, ch 1, turn {3}.
Fasten off and leave a long end for sewing.
Side (back) of the car
With main colour yarn:
Ch 4.
Rows 1-18: Sc across, ch 1, turn {3}.
Fasten off and leave a long end for sewing.
Side (front) of the car
With main colour yarn:
Ch 4.
Rows 1-22: Sc across, ch 1, turn {3}.
Fasten off and leave a long end for sewing.
Wheels (slight modifications from Nephithyrion’s pattern) Make 4 with white yarn: Round 1: Sc 7 in magic ring {7}.
Round 2: [Inc] around {14}. Change to black yarn.
Round 3: [Inc, sc 1] around {21}.
Round 4: [Inc, sc 2] around {28}.
Round 5: Sc around {28}.
Round 6: [Inv dec, sc 2] around {21}.
Round 7: [Inv dec, sc 1] around {14}.
Fasten off and leave a long end for sewing.
Stuff lightly.
Lights
Make 2 with yellow yarn:
Round 1: Sc 5 in magic ring {5}.
Round 2: [Inc] around {10}.
Fasten off and leave a long end for sewing.
Strap
Ch 5.
Rows 1-122: Sc across, Ch 1, turn {4}.
Fasten off and leave a long end for sewing.
** You can definitely add more rows if you need the strap to be longer, or change the colour too.
Assembly
1. Sew on the windows and lights on the car body piece.
2. I had windows, lights and wheels on both sides of the bags, but you can choose to only do them on one side.
3. Start sewing on the bottom panel and the front side panel onto one of the car body pieces (with whipstitch).
4. Then connect the other car body piece to the panels. I found myself using different yarn ends to attach the pieces — if you find that the yarn ends are too short, you can definitely use a new strand of yarn and whipstitch them together.
5. Before sewing on the back side strip of the car, it would be easier to start attaching your wheels first onto the main body pieces.
6. Once that’s done you can attach on the back side strip of the car.
7. Then attach on the strap.
8. I knotted all my ends inside the bag so it can look a little messy.
9. I plan to sew on a zip and inner lining (but have yet found time to buy some zippers!) So definitely add those and the bags would look seamless 🙂
**Important: If you find that the bottom and side panels of the cars are a tad short/long, you can definitely adjust it or adjust it while you’re whipstitching it together, tug at it to make it fit etc 🙂 This pattern is quite forgiving!
Here are some tutorial photos for your reference:
And there you have it! I hope you’ll enjoy making this crochet car bag pattern for your little ones! My boys are absolutely in love with them and it doubles up as a toy as well.
Thank you Nephithyrion for inspiring me to make this cute little car bag!
Do tag me and let me see how your car bags turned out! @amigurumei #amigurumei
Have a lovely rest of the week ahead my dearest friends!
P/S I almost forgot! I also found this lovely crochet car bag picture on Pinterest while doing my research and it played a big part in inspiring the modifications! It seems like a pattern from a Japanese craft book (the pattern in chart is included in this page!) but since I’m just so bad with crochet charts I had to just forego the pattern and come up with my own! I had initially showed this picture to my boys and asked them if they wanted car bags like these and they want crayyyyzy :’)
Hello my dear friends! It’s been so long since I’ve updated my blog with a free amigurumi pattern and since Christmas is just around the corner, I thought you might like a little gift from me to you!
Sarah and Duck has been a family favourite ever since my boys started paying special attention to the cartoon when it came on TV. I knew I wouldn’t be able to resist making a Sarah and Duck doll…I’m so glad I did!
I wish I could’ve been there to catch the Sarah and Duck live stage show this year. I guess having their dolls with me would have to be the second best thing!
It has taken me a long time to sit down and write this pattern (it’s quite a difficult pattern to write!), I hope you will enjoy it!
Merry Christmas and a Happy New Year!
Please do follow me on instagram @amigurumei for weekly updates!
Sarah amigurumi pattern
by amiguruMEI
Skill level: Intermediate
Materials & Tools 2mm hook
2.3mm hook
2.5mm hook
Dk weight cotton yarn in flesh, white, blush pink, candyfloss pink, red, dark brown, black and spearmint green.
Black crochet thread
6mm black brads x 2
Darning needle
Polyester fiberfill
Craft glue (Important: use one that dries clear)
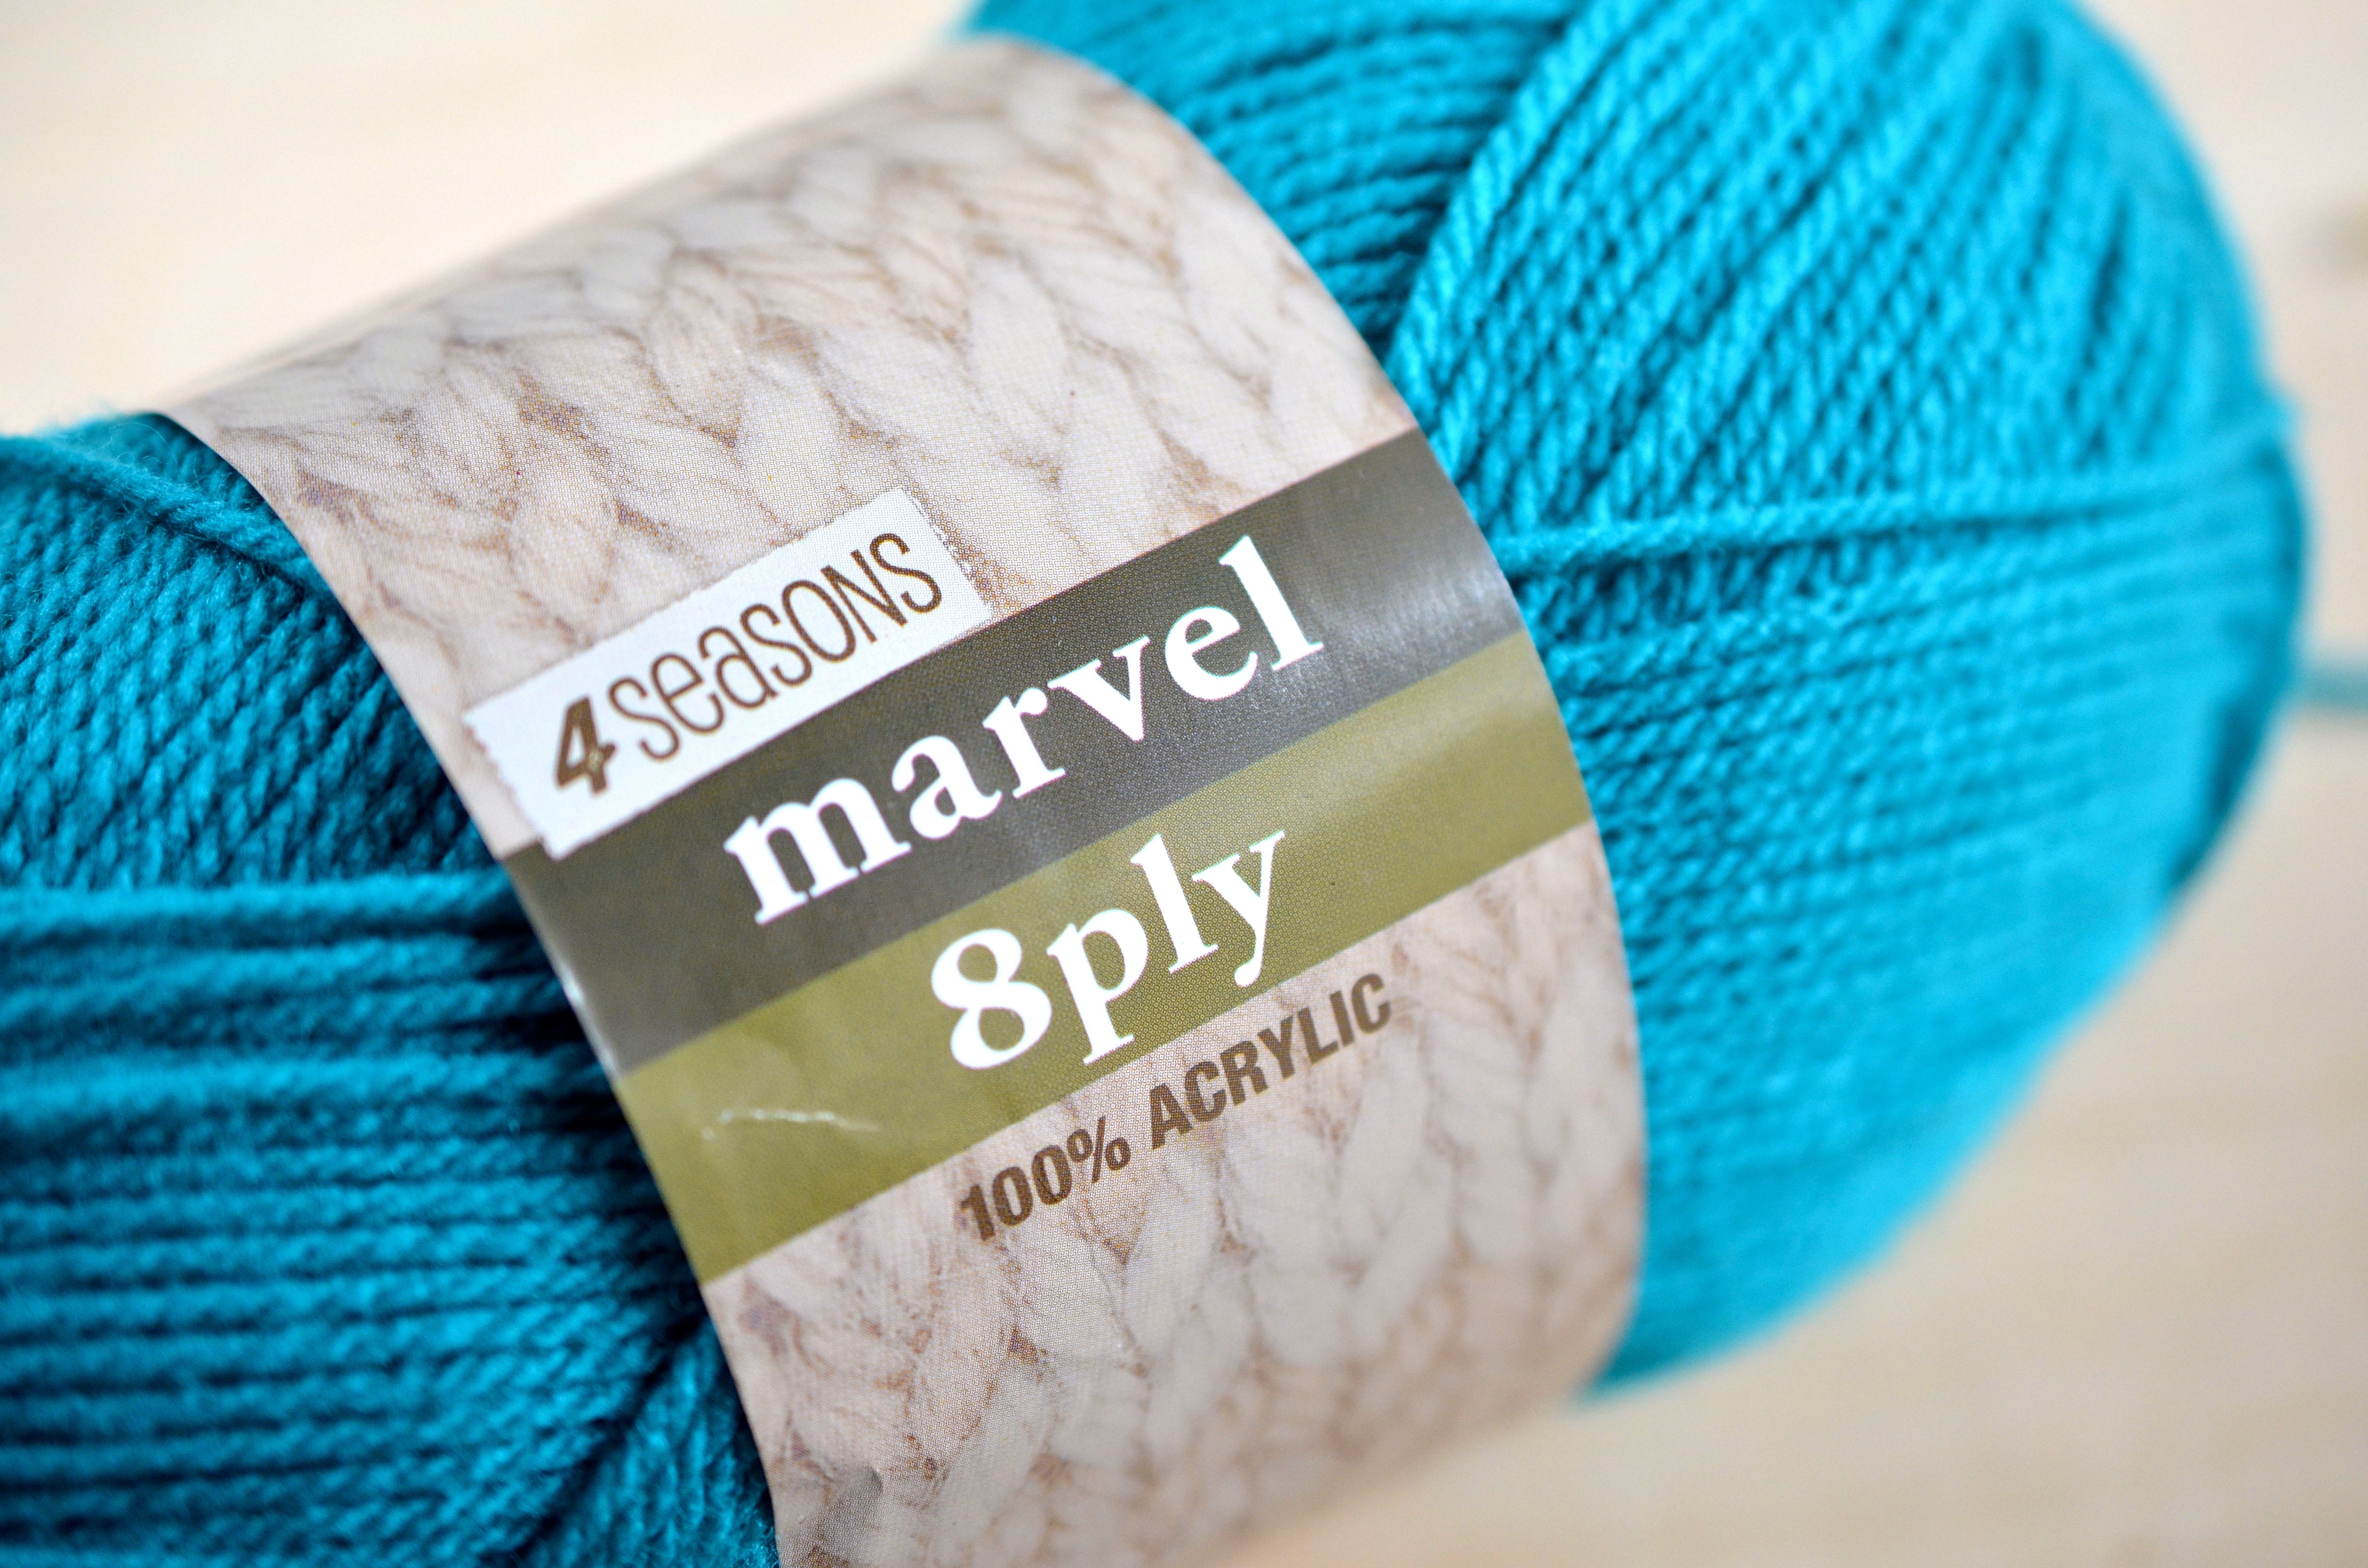
Yarn note: I used Paintbox yarns Cotton DK and Marvel 4 Seasons for this project.
Head
With flesh yarn and 2.5mm hook:
Round 1: Sc 6 in magic ring {6}.
Round 2: [Inc] around {12}.
Round 3: [Inc, sc 1] around {18}.
Round 4: [Inc, sc 2] around {24}.
Round 5: [Inc, sc 3] around {30}.
Round 6: [Inc, sc 4] around {36}.
Round 7: [Inc, sc 5] around {42}.
Round 8: [Inc, sc 6] around {48}.
Round 9: [Inc, sc 7] around {54}.
Rounds 10-19 (10 rounds altogether): Sc around {54}.
Round 20: [Inv dec, sc 7] around {48}.
Round 21: [Inv dec, sc 6] around {42}.
Round 22: [Inv dec, sc 5] around {36}.
Round 23: [Inv dec, sc 4] around {30}.
Round 24: [Inv dec, sc 3] around {24}.
Round 25: [Inv dec, sc 2] around {18}.
Stuff head.
Round 26: [Inv dec, sc 1] around {12}.
Round 27: [Inv dec] around {6}.
Fasten off and weave in ends.
Hair (Make 2) With black yarn and 2.5mm hook:
Row 1: Ch 10, turn work.
Rows 2-5 (4 rows altogether): Sc in each st across, ch1 and turn {9}.
Fasten off and leave a long end for sewing.
Eyes (Make 2) With white yarn and 2.5mm hook:
Round 1: Sc 9 in magic ring {9}.
Round 2: [Inc] around {18}.
Round 3: Inc in next 4 sts, leave the rest unworked {22}.
Clean fasten off and leave a long end for sewing.
Outlining the eyes: With black crochet thread and a darning needle, bring the thread up near the edge of the eyes and make a loose loop circling the eye, then bring the thread back down. Dab on some craft glue to secure the shape in place. You may use some pins to hold it in place first while it dries.
Cheeks (make 2)
With blush pink yarn and 2.3mm hook:
Round 1: Sc 6 in magic ring {6}.
Fasten off and leave a long end for sewing.
Beanie
With spearmint green yarn and 2.3mm hook:
Round 1: Sc 6 in magic ring {6}.
Round 2: [Inc] around {12}.
Round 3: [Inc, sc 1] around {18}.
Round 4: [Inc, sc 2] around {24}.
Round 5: [Inc, sc 3] around {30}.
Round 6: [Inc, sc 4] around {36}.
Round 7: [Inc, sc 5] around {42}.
Round 8: [Inc, sc 6] around {48}.
Round 9: [Inc, sc 7] around {54}.
Round 10: [Inc, sc 8] around {60}.
Rounds 11-26 (16 rounds altogether): Sc around {60}.
Fasten off and weave in ends.
The beanie should fit over Sarah’s head with a little left over to be folded up.
Body
With blush pink yarn and 2.5mm hook:
Round 1: Sc 6 in magic ring {6}.
Round 2: [Inc] around {12}.
Round 3: [Inc, sc 1] around {18}.
Round 4: [Inc, sc 2] around {24}.
Rounds 5-12 (8 rounds altogether): Sc around {24}.
Round 13: [Inv dec, sc 2] around {18}.
Fasten off and weave in ends.
Dress
With blush pink yarn, you will surface crochet Round 1 (counter-clockwise) onto the body.
To start, turn the body upside down.
Round 1: Sc 18. Ss to first stitch {19}.
From the next round onwards, you will be crocheting only on the dress (as opposed to on the body).
Change to candyfloss pink yarn.
Round 2: [Inc, sc 1] around {29}. (You may have an inc in the last st but that’s ok)
Change to blush pink yarn.
Round 3: Sc around {29}.
Change to candyfloss pink yarn.
Round 4: Sc around {29}.
Change to blush pink yarn.
Round 5: Sc around {29}.
Change to candyfloss pink yarn.
Round 6: Sc around {29}.
Change to blush pink yarn.
Round 7: Sc around {29}.
Change to candyfloss pink yarn.
Round 8: Sc around {29}.
Change to blush pink yarn.
Round 9: Sc around {29}.
Change to candyfloss pink yarn.
Round 10: Sc around {29}.
Change to blush pink yarn.
Round 11: Sc around {29}.
Clean fasten off and weave in ends.
Leave a long end for sewing. Thread the tail back up to the body’s opening.
Zip
With red yarn and 2.5mm hook:
Row 1: Ch 4, turn work.
Row 2: Sc in each st across {3}.
Fasten off and leave a long end for sewing.
Arms (Make 2)
With flesh yarn and 2.5mm hook:
Round 1: Sc 7 in magic ring {7}.
Round 2: Sc around {7}.
Change to blush pink yarn.
Round 3: Sc around {7}.
Change to candyfloss pink yarn.
Round 4: Sc around {7}.
Change to blush pink yarn.
Round 5: Sc around {7}.
Change to candyfloss pink yarn.
Round 6: Sc around {7}.
Change to blush pink yarn.
Round 7: Sc around {7}.
Change to candyfloss pink yarn.
Round 8: Sc around {7}.
Fasten off and leave a long end for sewing.
Legs (Make 2)
With black crochet thread and 2mm hook:
Round 1: Sc 6 in magic ring {6}.
Rounds 2-7 (6 rounds altogether): Sc around {6}.
Fasten off and leave a long end for sewing.
Shoes (Make 2)
With dark brown yarn and 2.3mm hook:
Round 1: Sc 6 in magic ring {6}.
Round 2: Sc around {6}.
Fasten off and leave a long end for sewing.
Assembly
Sew the eyes below Round 12 of the head. There should be about 6 sts in between each eye. Pop in the black brads.
Use black crochet thread to make a loose backstitch for the lips, below Round 20 of the head. It should be centred between the eyes.
Sew on the cheeks.
Attach the hair pieces onto the head — sew only at the top.
Fit on the beanie and roll up the edges.
Sew body/dress onto head.
Sew on the zip.
Sew on the arms.
Sew on the legs
Add the shoes (they should be sewn on horizontally.
xxxxxxxxxxxxxxx
Duck amigurumi pattern
by amiguruMEI
Skill level: Intermediate
Materials & Tools
2.3mm hook
3 mm hook
DK weight cotton yarn in spearmint green, daffodil yellow, blush pink, light caramel and white.
Aran weight yarn in white (for the body)
Black crochet thread
6mm black brads x 2
Darning needle
Polyester fiberfill
Craft glue (Important: use one that dries clear)
Head
With spearmint green yarn and 2.3mm hook:
Round 1: Sc 6 in magic ring {6}.
Round 2: [Inc] around {12}.
Round 3: [Inc, sc 1] around {18}.
Round 4: [Inc, sc 2] around {24}.
Round 5: [Inc, sc 3] around {30}.
Round 6: [Inc, sc 4] around {36}.
Rounds 7-15 (9 rounds altogether): Sc around {36}.
Fasten off and leave a long end for sewing.
Body With aran weight white yarn and 3mm hook:
Round 1: Sc 6 in magic ring {6}.
Round 2: [Inc] around {12}.
Round 3: [Inc, sc 1] around {18}.
Round 4: [Inc, sc 2] around {24}.
Round 5: [Inc, sc 3] around {30}.
Round 6: [Inc, sc 4] around {36}.
Round 7: [Inc, sc 5] around {42}.
Round 8: [Inc, sc 6] around {48}.
Round 9: [Inc, sc 7] around {54}.
Rounds 10-16 (7 rounds altogether): Sc around {54}.
Fasten off and leave a long end for sewing.
Assembling the head and body:
1. Flatten the body piece.
2. Whipstitch the head onto one end of the body’s opening, matching stitch to stitch.
3. Pinch the remaining body together to form Duck’s tail part of the body and whipstitch to close.
Eyes (Make 2)
With Dk weight white yarn and 2.3mm hook:
Row 1: Ch 6, turn work.
Row 2: Sc in next 4 sts, 3 sc in the last {7}.
Rotate work (as you would to crochet an oval piece).
Row 3: Sc in next 10 sts, 2 sc in the last {12}.
Rotate work.
Row 4: Sc in next 12 sts {12}.
Fasten off and leave a long end for sewing.
Beak
With daffodil yellow yarn and 2.3mm hook:
Round 1: Sc 6 in magic ring {6}.
Round 2: [Inc] around {12}.
Rounds 3-5 (3 rounds altogether): Sc around {12}.
Fasten off and leave a long end for sewing.
Cheeks (make 2)
With blush pink yarn and 2.3mm hook:
Round 1: Sc 5 in magic ring {5}.
Fasten off and leave a long end for sewing.
Feet (Make 2)
With light caramel yarn and 2.3mm hook:
Round 1: Sc 8 in magic ring {8}.
Rounds 2-3: Sc around {8}.
Round 3: Inv dec in next 2 sts, sc in remaining sts {6}.
Rounds 4-5: Sc around {6}.
Fasten off and leave a long end for sewing. Final Assembly
1. Pop the brads into the eyes.
2. Sew the eyes on the sides of the head. They should fall below Round 6.
3. Outlining the eyes: With black crochet thread and a darning needle, bring the thread up near the edge of the eyes and make a loose loop circling the eye, then bring the thread back down. Dab on some craft glue to secure the shape in place. You may use some pins to hold it in place first while it dries.
4. Sew on the beak below Round 10 of the head.
5. Sew on the cheeks.
6. Sew on the feet near Rounds 3 and 4 of the body.
As this is an original amiguruMEI pattern, kindly do not claim it as your own. You may place a link to this pattern from your site, but please do not repost it onto your page. Send me a picture or tag me on Instagram @amigurumei when you’ve made your own Sarah and Duck and I’ll share it here! 🙂
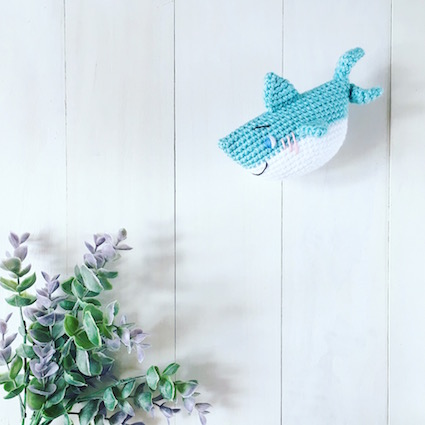
I didn’t realise it was Shark Week over at Super Simple Songs, and am super honoured that they featured Master Aoi in their Instagram! Thank you so much Super Simple!
The tune is too catchy so I’ll leave you with the song — you’ll probably be singing it all day too!
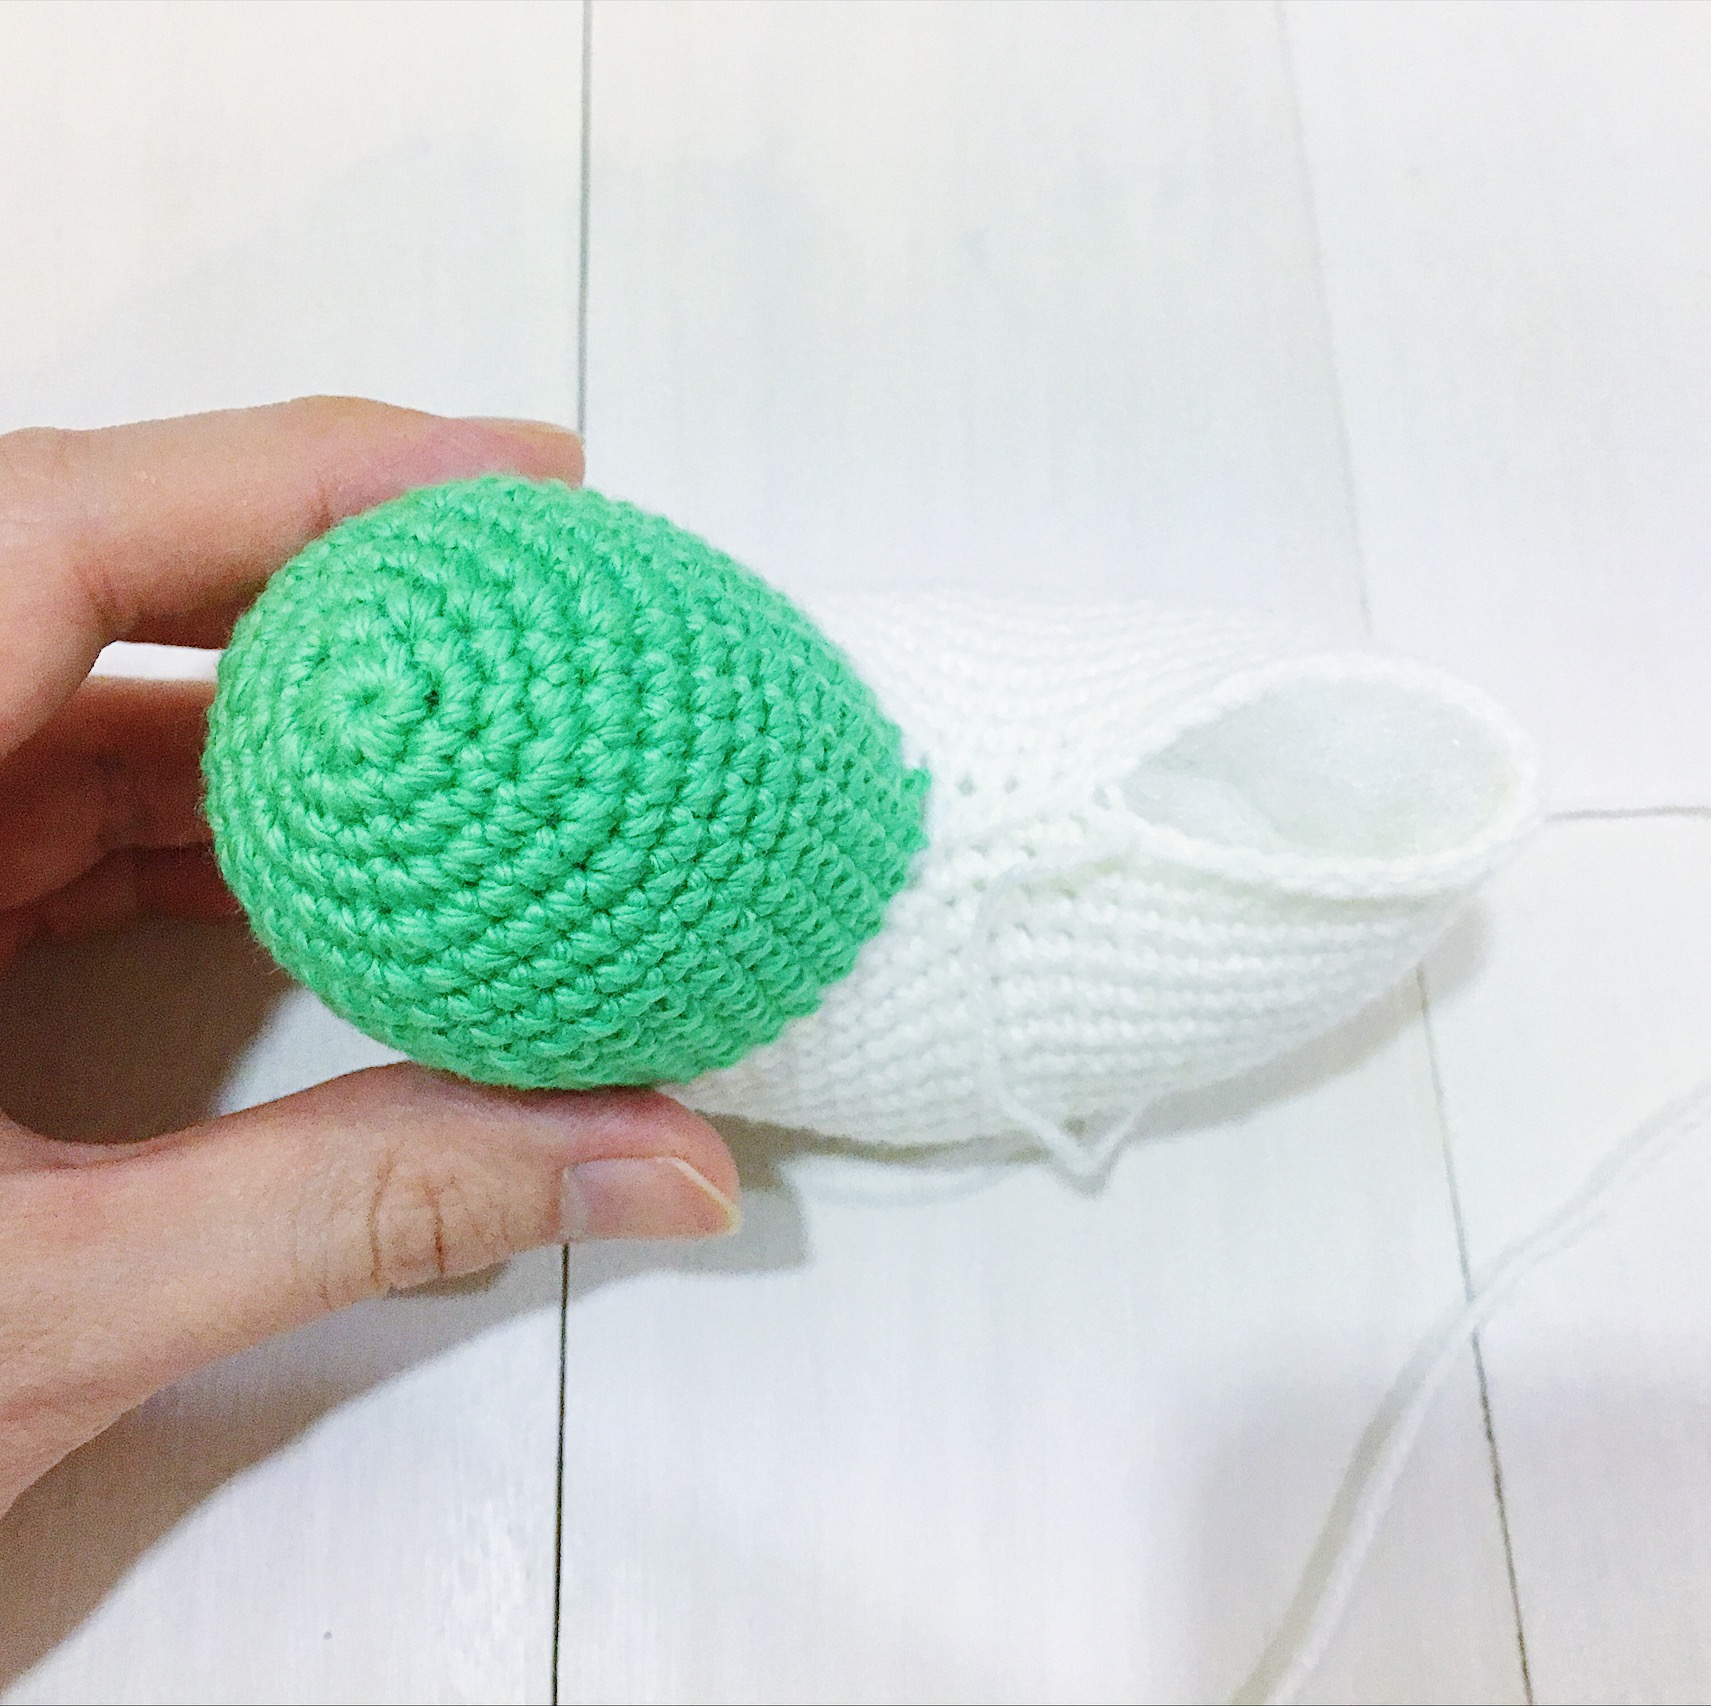
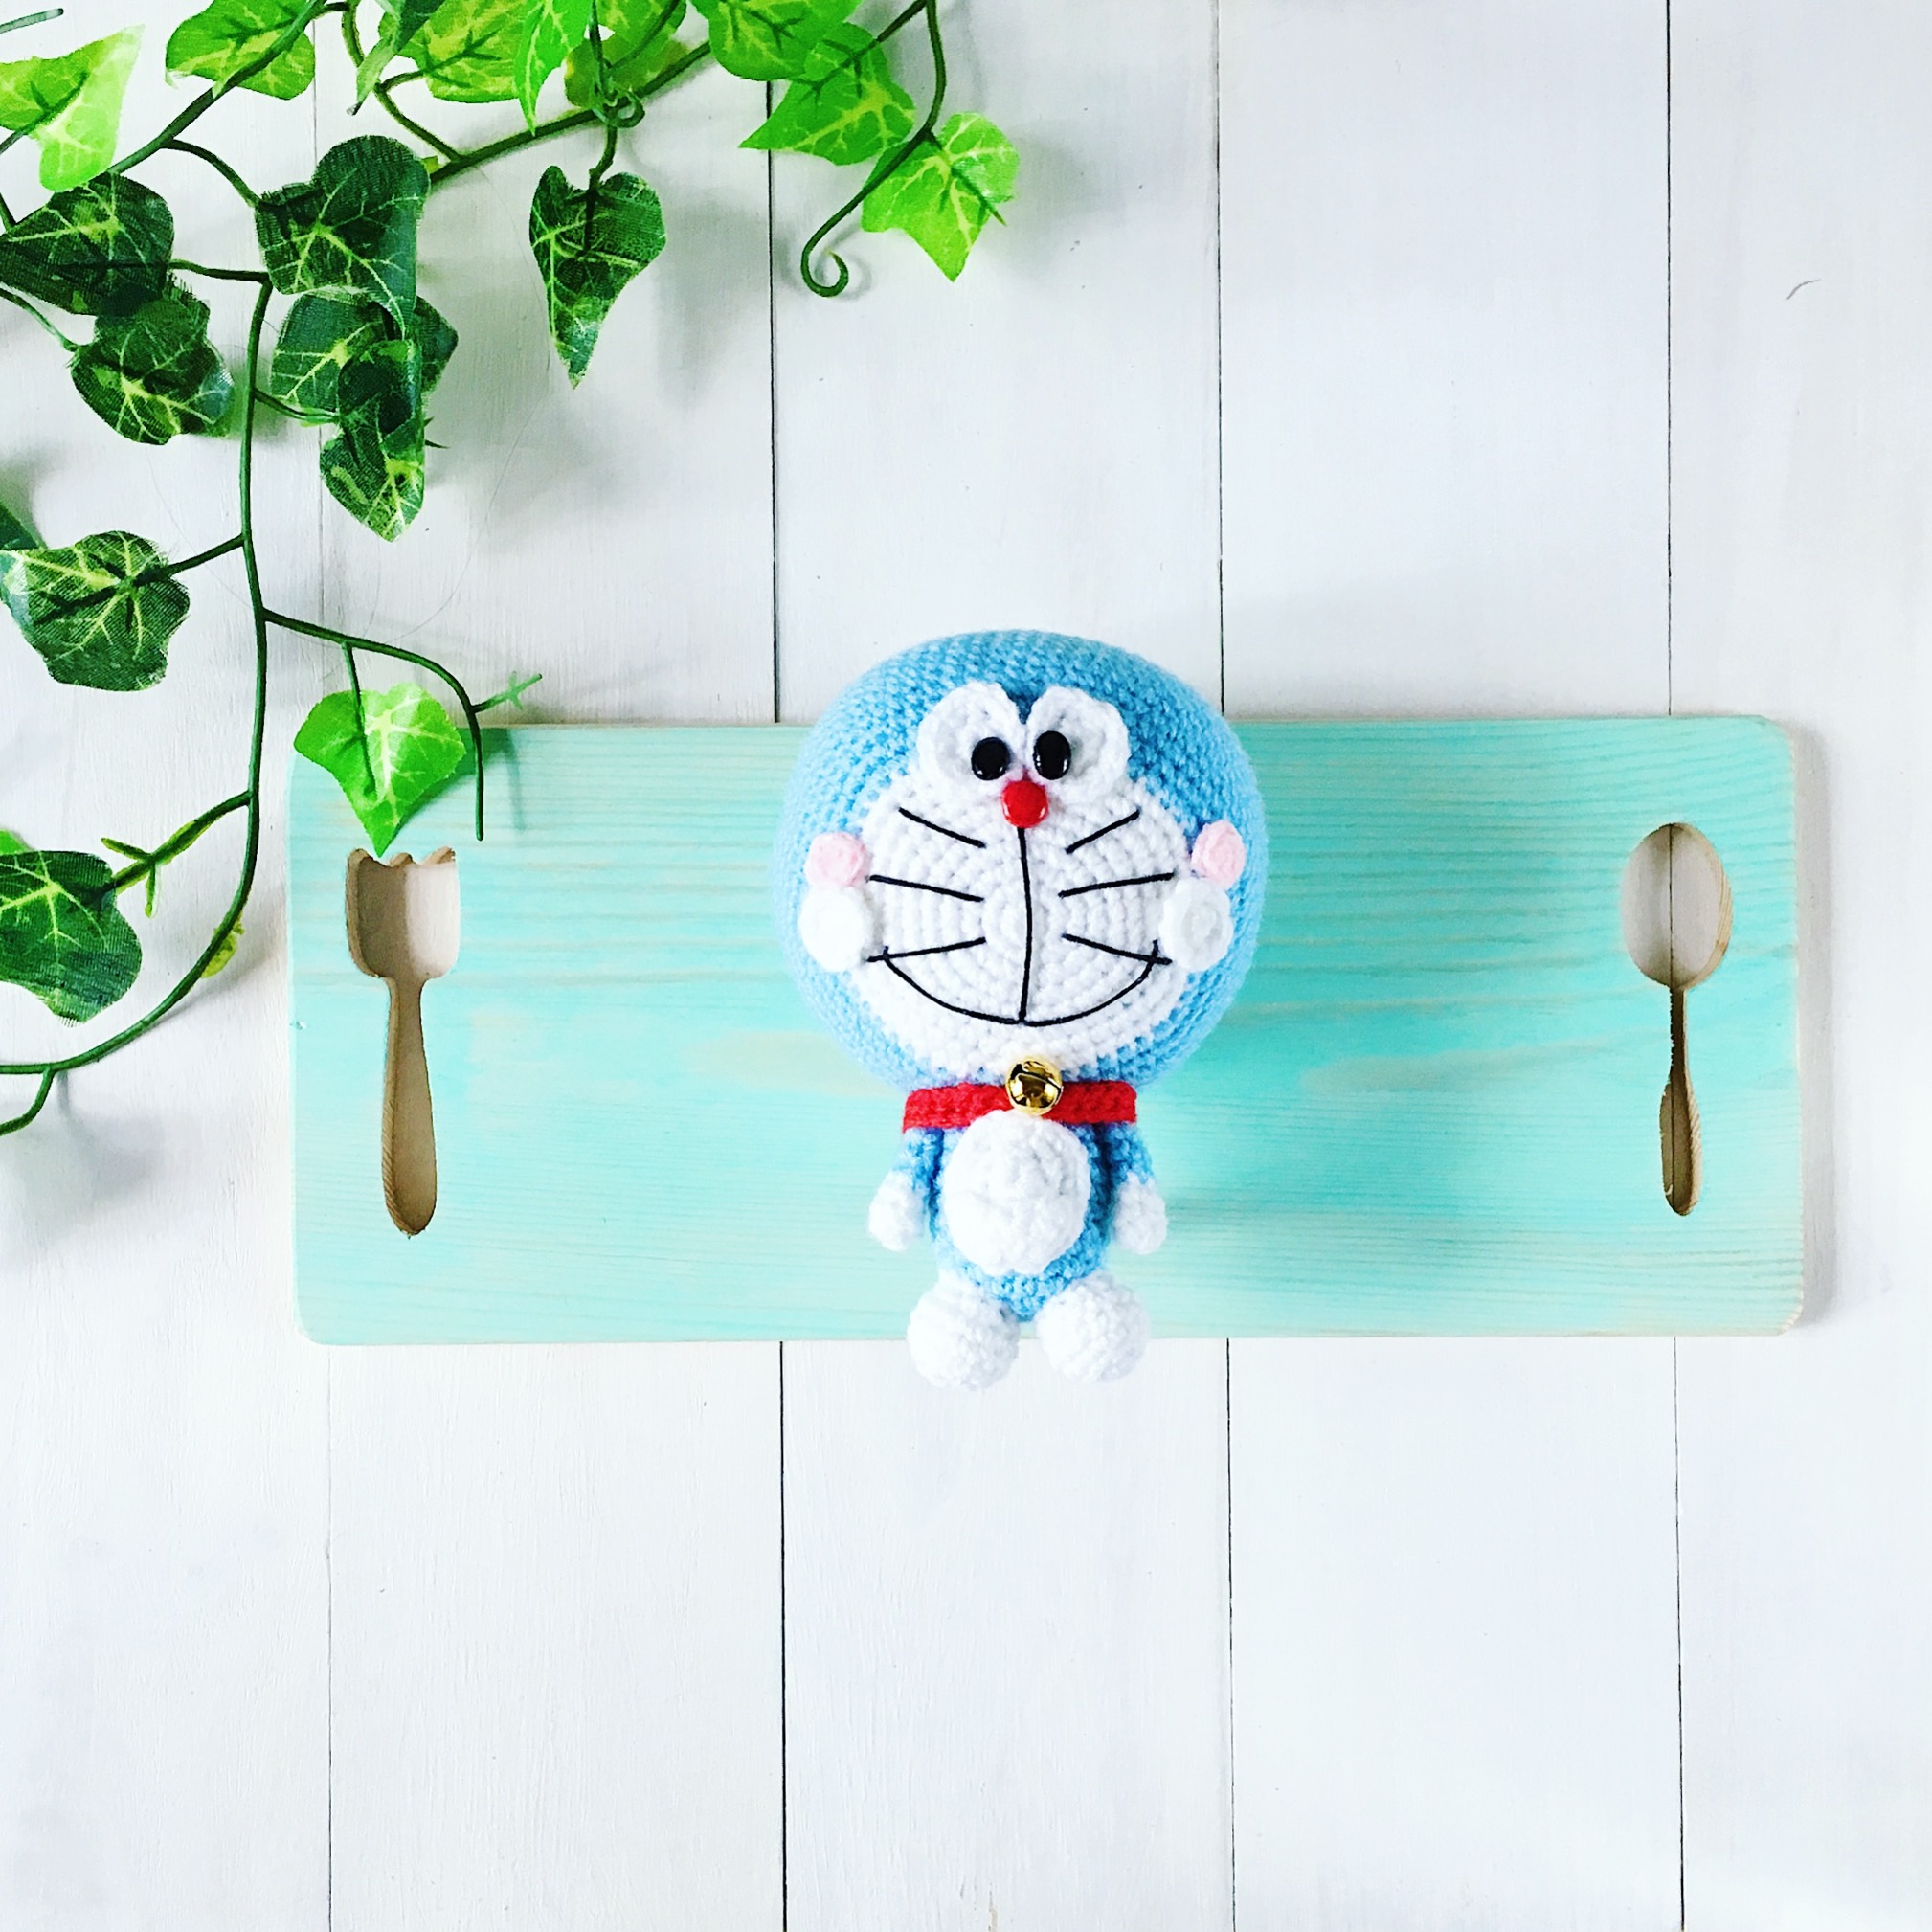
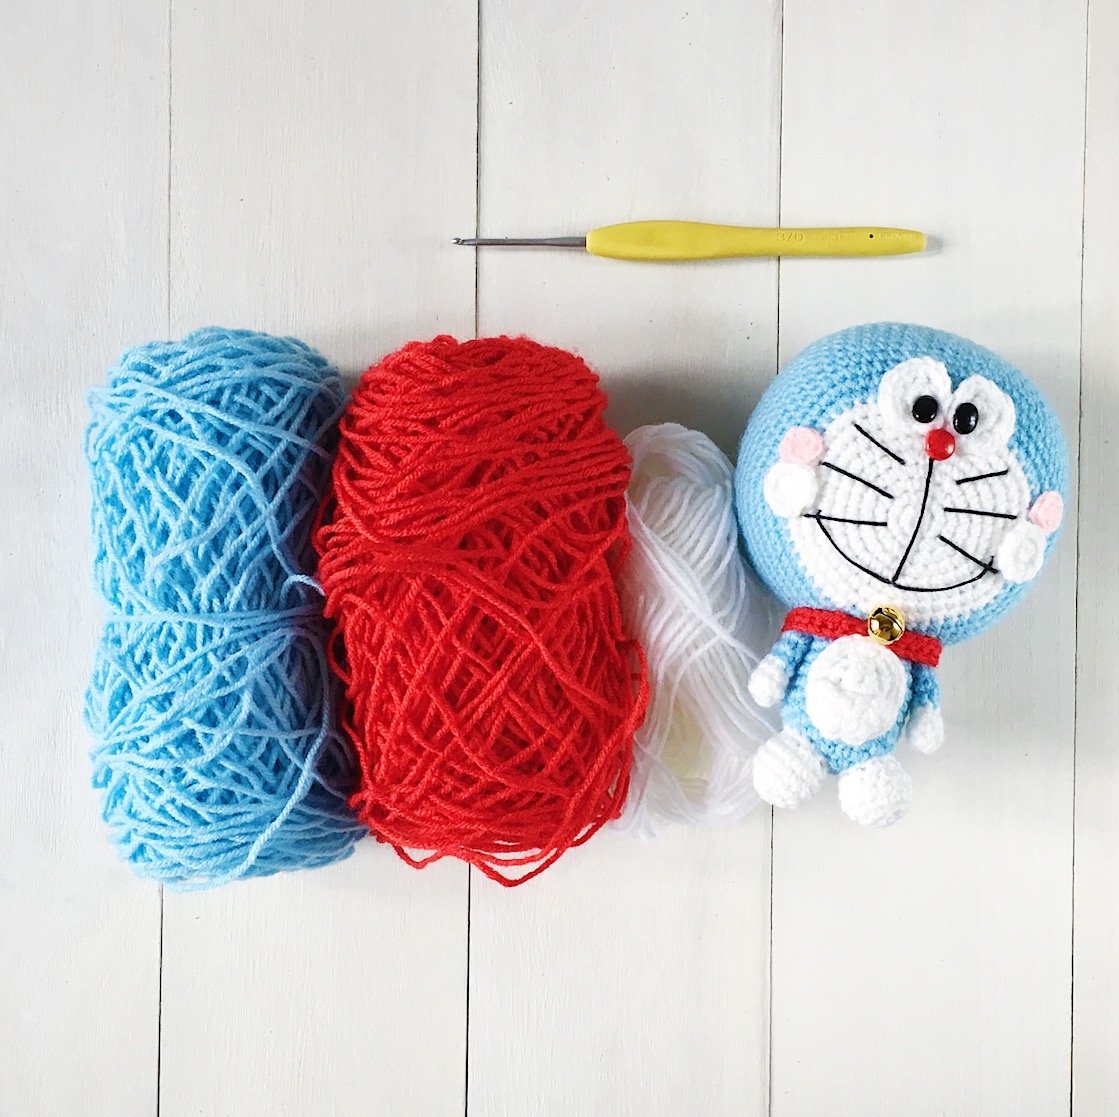
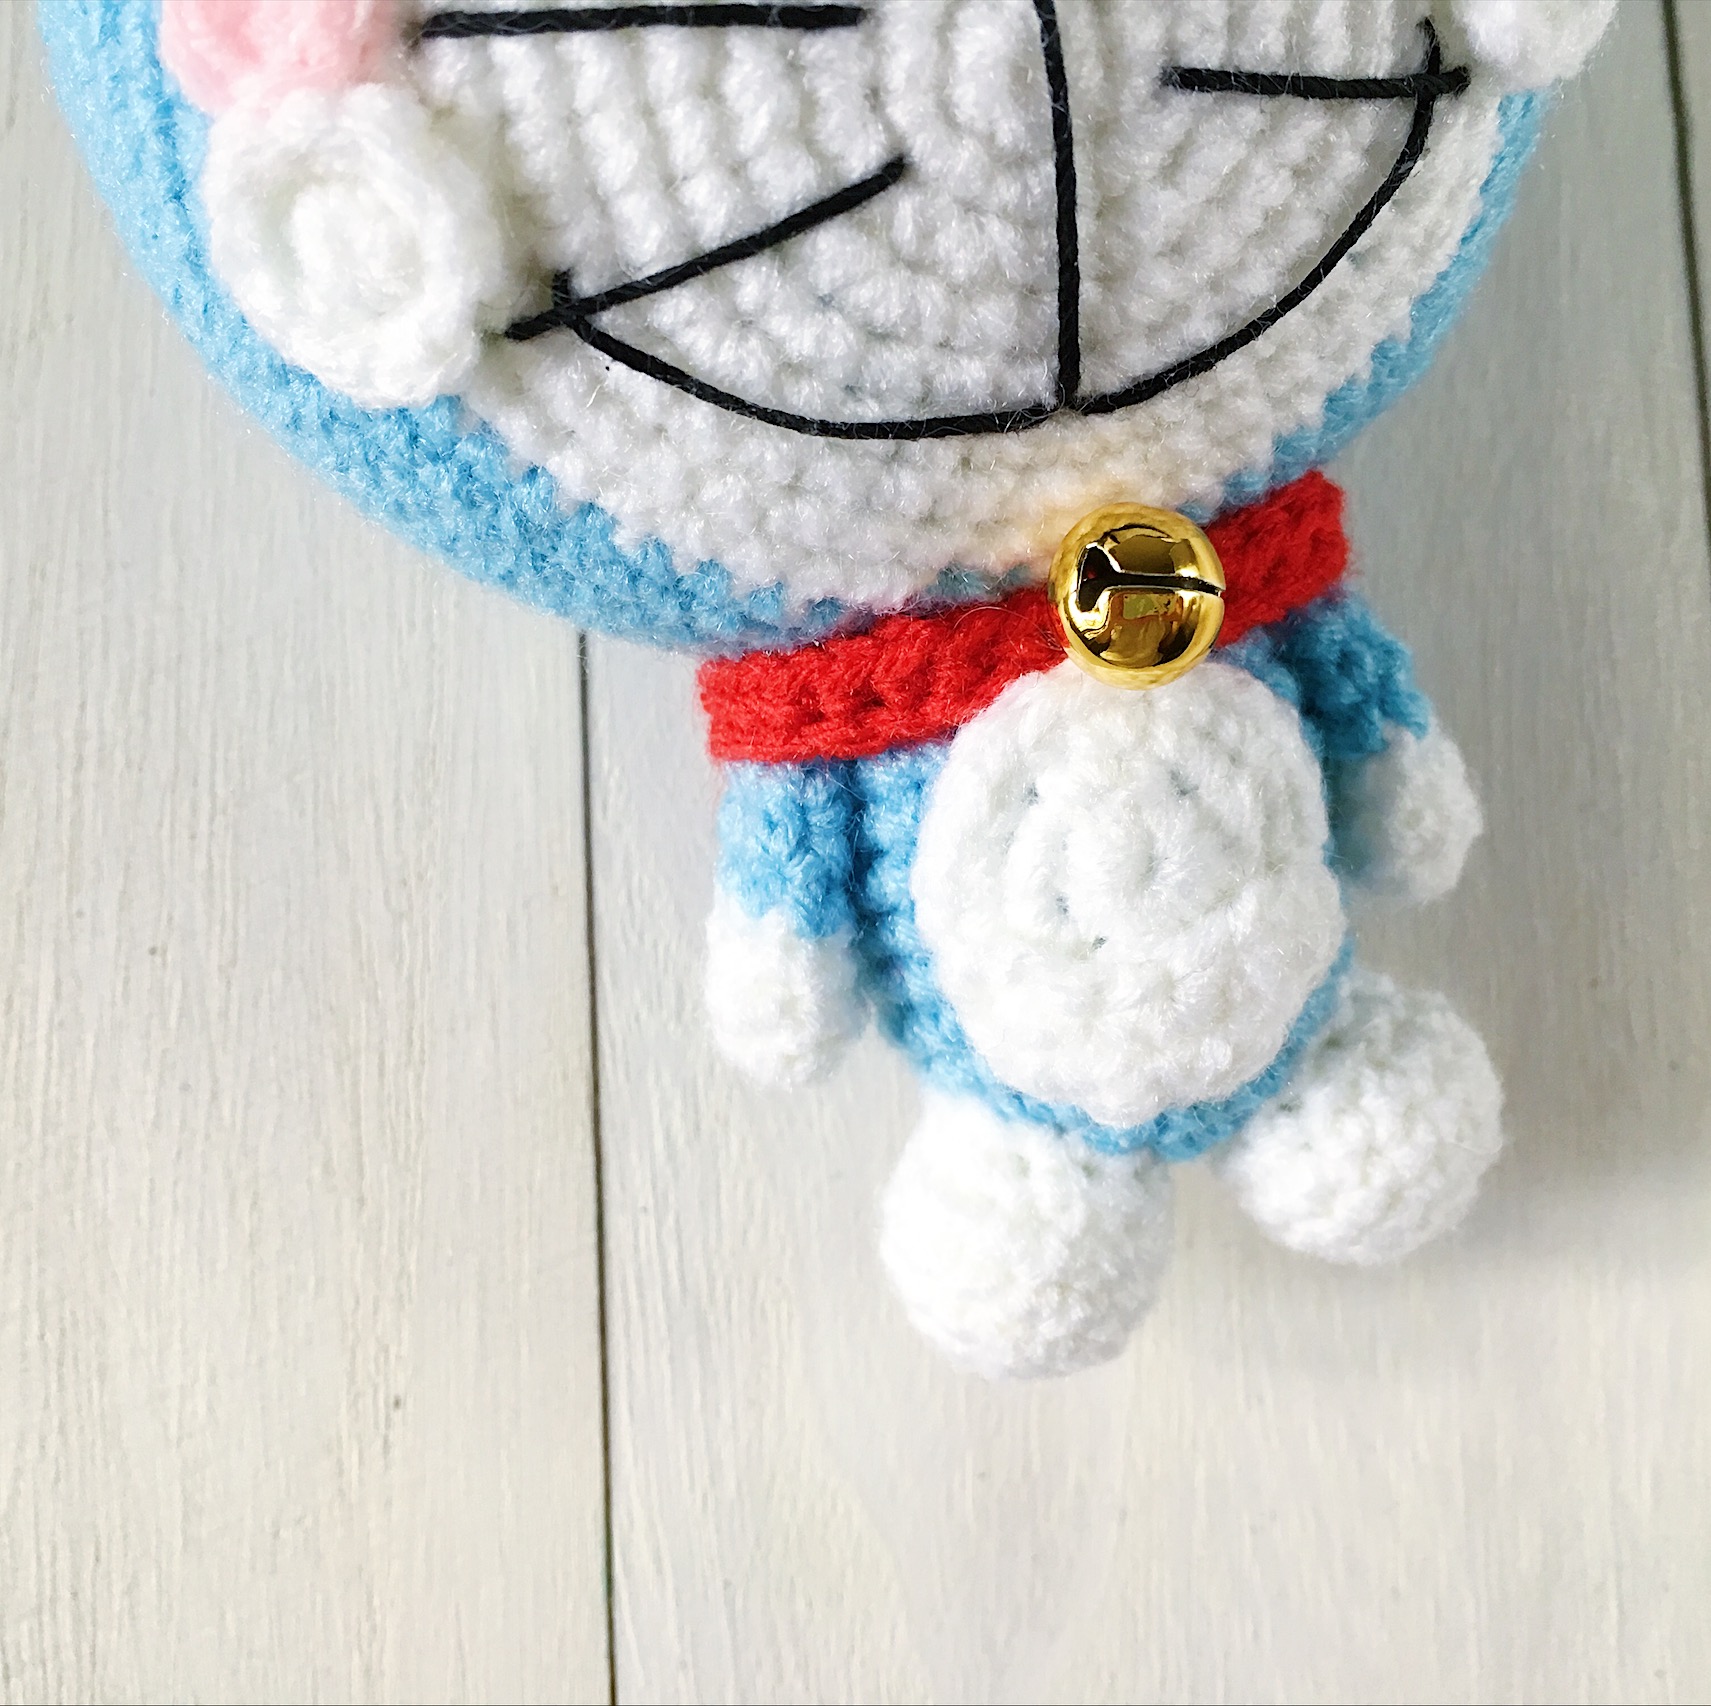
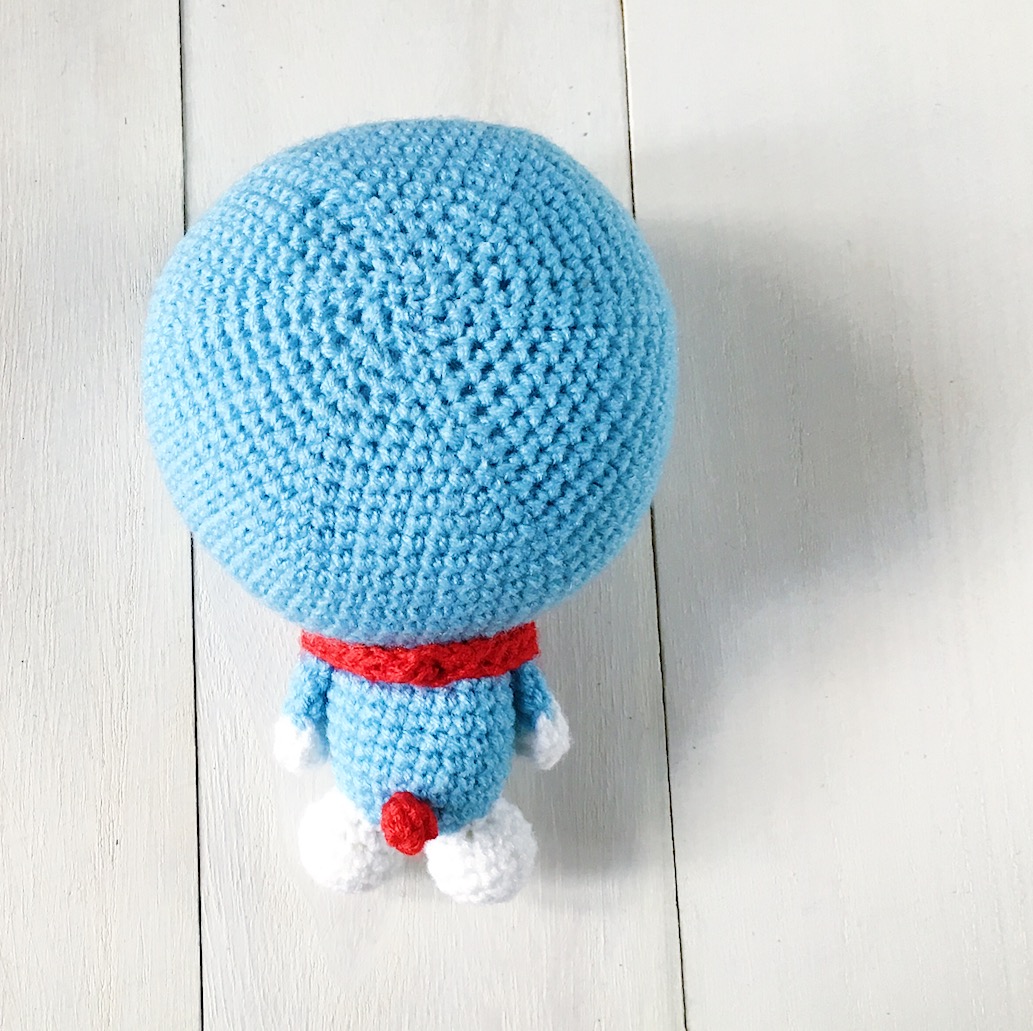
I’m back again with another brand new amigurumi pattern. Behold, the mystical blue cat with an infinity pocket: Doraemon!
I had to re-do the head a few times as I was using a darker blue earlier but ran out of yarn before I could finish! And I thought I had it covered 😉
I never thought that I would make Doraemon so soon (it has always been in my to-do list!) but a family member hinted at wanting one and I just couldn’t resist!
I must be honest: I don’t own anything Doraemon so this doll is really the only thing I have and eeps! I’ll have to give it away soon! I grew up watching bits and pieces of the show — never really a full episode I think! Making this doll has really made me wonder why I never did! (Catch-up time now!)
I really hope you’ll enjoy this pattern!
Let’s get started, shall we?
Doraemon amigurumi pattern
by amiguruMEI
Skill level: Easy
Duration: About 6 hours
Materials & Tools
2.3mm hook
Acrylic yarn in white, light blue, red and pink
Black crochet thread/embroidery floss
8mm oval doll’s eyes x 2
7mm red brad x 1
Small gold bell
Darning needle
Polyester fiberfill
Craft glue
Head
With white yarn:
Round 1: Sc 6 in magic ring {6}.
Round 2: [Inc] around {12}.
Round 3: [Inc, sc 1] around {18}.
Round 4: [Inc, sc 2] around {24}.
Round 5: [Inc, sc 3] around {30}.
Round 6: [Inc, sc 4] around {36}.
Round 7: [Inc, sc 5] around {42}.
Round 8: [Inc, sc 6] around {48}.
Round 9: [Inc, sc 7] around {54}.
Change to light blue yarn.
Round 10: [Inc, sc 8] around {60}.
Round 11: [Inc, sc 9] around {66}.
Round 12: [Inc, sc 10] around {72}.
Rounds 12-23 (12 rounds altogether): Sc around {72}.
Round 24: [Inv dec, sc 10] around {66}.
Round 25: [Inv dec, sc 9] around {60}.
Round 26: [Inv dec, sc 8] around {54}.
Round 27: [Inv dec, sc 7] around {48}.
Round 28: [Inv dec, sc 6] around {42}.
Round 29: [Inv dec, sc 5] around {36}.
Round 30: [Inv dec, sc 4] around {30}.
Round 31: [Inv dec, sc 3] around {24}.
Round 32: [Inv dec, sc 2] around {18}. Stuff head. Mould and shape the piece to ensure that the front of the head (the white part) is flat.
Round 33: [Inv dec, sc 1] around {12}.
Round 34: [Inv dec] around {6}.
Fasten off and weave in ends.
(The side view of the head turned out a little flatter than I would’ve liked. If you want a rounder version, you can definitely add a few more rounds after Round 23).
Body
With light blue yarn:
Round 1: Sc 6 in magic ring {6}.
Round 2: [Inc] around {12}.
Round 3: [Inc, sc 1] around {18}.
Round 4: [Inc, sc 2] around {24}.
Rounds 5-12 (8 rounds altogether): Sc around {24}.
Fasten off and leave a long end for sewing. Stuff body.
Eyes (Make 2)
With white yarn:
Round 1: Sc 8 in magic ring {8}.
Round 2: [Inc] around {16}.
Fasten off and leave a long end for sewing. Pull on the piece to stretch it into an oval shape.
Arms (Make 2)
With white yarn:
Round 1: Sc 7 in magic ring {7}.
Rounds 2-3: Sc around {7}.
Change to light blue yarn.
Rounds 4-7: Sc around {7}.
Fasten off and leave a long end for sewing. You can shape the white end by pressing on it to give it a balled-up look.
Feet (Make 2)
With white yarn:
Round 1: Sc 5 in magic ring {5}.
Round 2: [Inc] around {10}.
Round 3: [Inc, sc 1] around {15}. Rounds 4-5: Sc around {15}.
Round 6: [Inv dec, sc 1] around {10}.
Fasten off and leave a long end for sewing. Stuff feet.
Tummy
With white yarn:
Round 1: Sc 8 in magic ring {8}.
Round 2: [Inc] around {16}.
Round 3: [Inc, sc 1] around {24}.
Fasten off and leave a long end for sewing. Pull on the piece to stretch it into an oval shape.
Pocket
With white yarn:
Row 1: Sc 4 in magic ring {4}. Ch 1, turn work.
Row 2: [Inc] around {8}. Ch 1, turn work.
Row 3: [Inc, sc 1] around {12}.
Fasten off and leave a long end for sewing.
Tail
With red yarn:
Round 1: Sc 5 in magic ring {5}.
Round 2: Sc around {5}.
Fasten off, weave in ends and leave a long end for sewing.
Collar
With red yarn:
Row 1: Ch 30, turn work.
Row 2: Sc in each st across. {29}.
Fasten off and leave a long end for sewing. (You can add or reduce stitches; just check to see if the collar fits all the way around Doraemon’s body + arms).
Cheeks (White, make 2)
With white yarn:
Round 1: Sc 5 in magic ring {5}.
Round 2: [Inc] around {10}.
Fasten off and leave a long end for sewing.
Cheeks (Pink, make 2)
With white yarn:
Round 1: Sc 5 in magic ring {5}.
Fasten off and leave a long end for sewing.
Designing the face
1. Pop the oval doll’s eyes into the white crochet eye pieces.
2. Deciding where Doraemon’s face is: The white part of the head should be facing towards you. Make sure the colour jog that happened during the colour switch is positioned at the bottom of the head. Stitch the eyes in the centre, approximately onto Round 7 to 11 of the head.
3. Pop in the red brad for the nose (mine falls on Round 6).
4. I used black crochet thread to sew on the whiskers and lips: the nose line should extend from Round 6 (at the bottom of the nose) vertically all the way to Round 5 at the bottom. I used a little craft glue to hold the lips in shape.
5. Sew on the white and pink cheeks.
Assembly
1. Stitch head and body together.
2. Stitch tummy onto the body.
3. Stitch pocket onto the tummy.
4. Stitch arms onto the sides of the body.
5. Stitch on the collar.
6. Attach the bell.
7. Stitch on the feet.
8. End with the tail at the back.
As this is an original amiguruMEI pattern, kindly do not claim it as your own. You may place a link to this pattern from your site, but please do not repost it onto your page. Send me a picture or tag me on Instagram @amigurumei when you’ve made your own Doraemon and I’ll share it here! 🙂
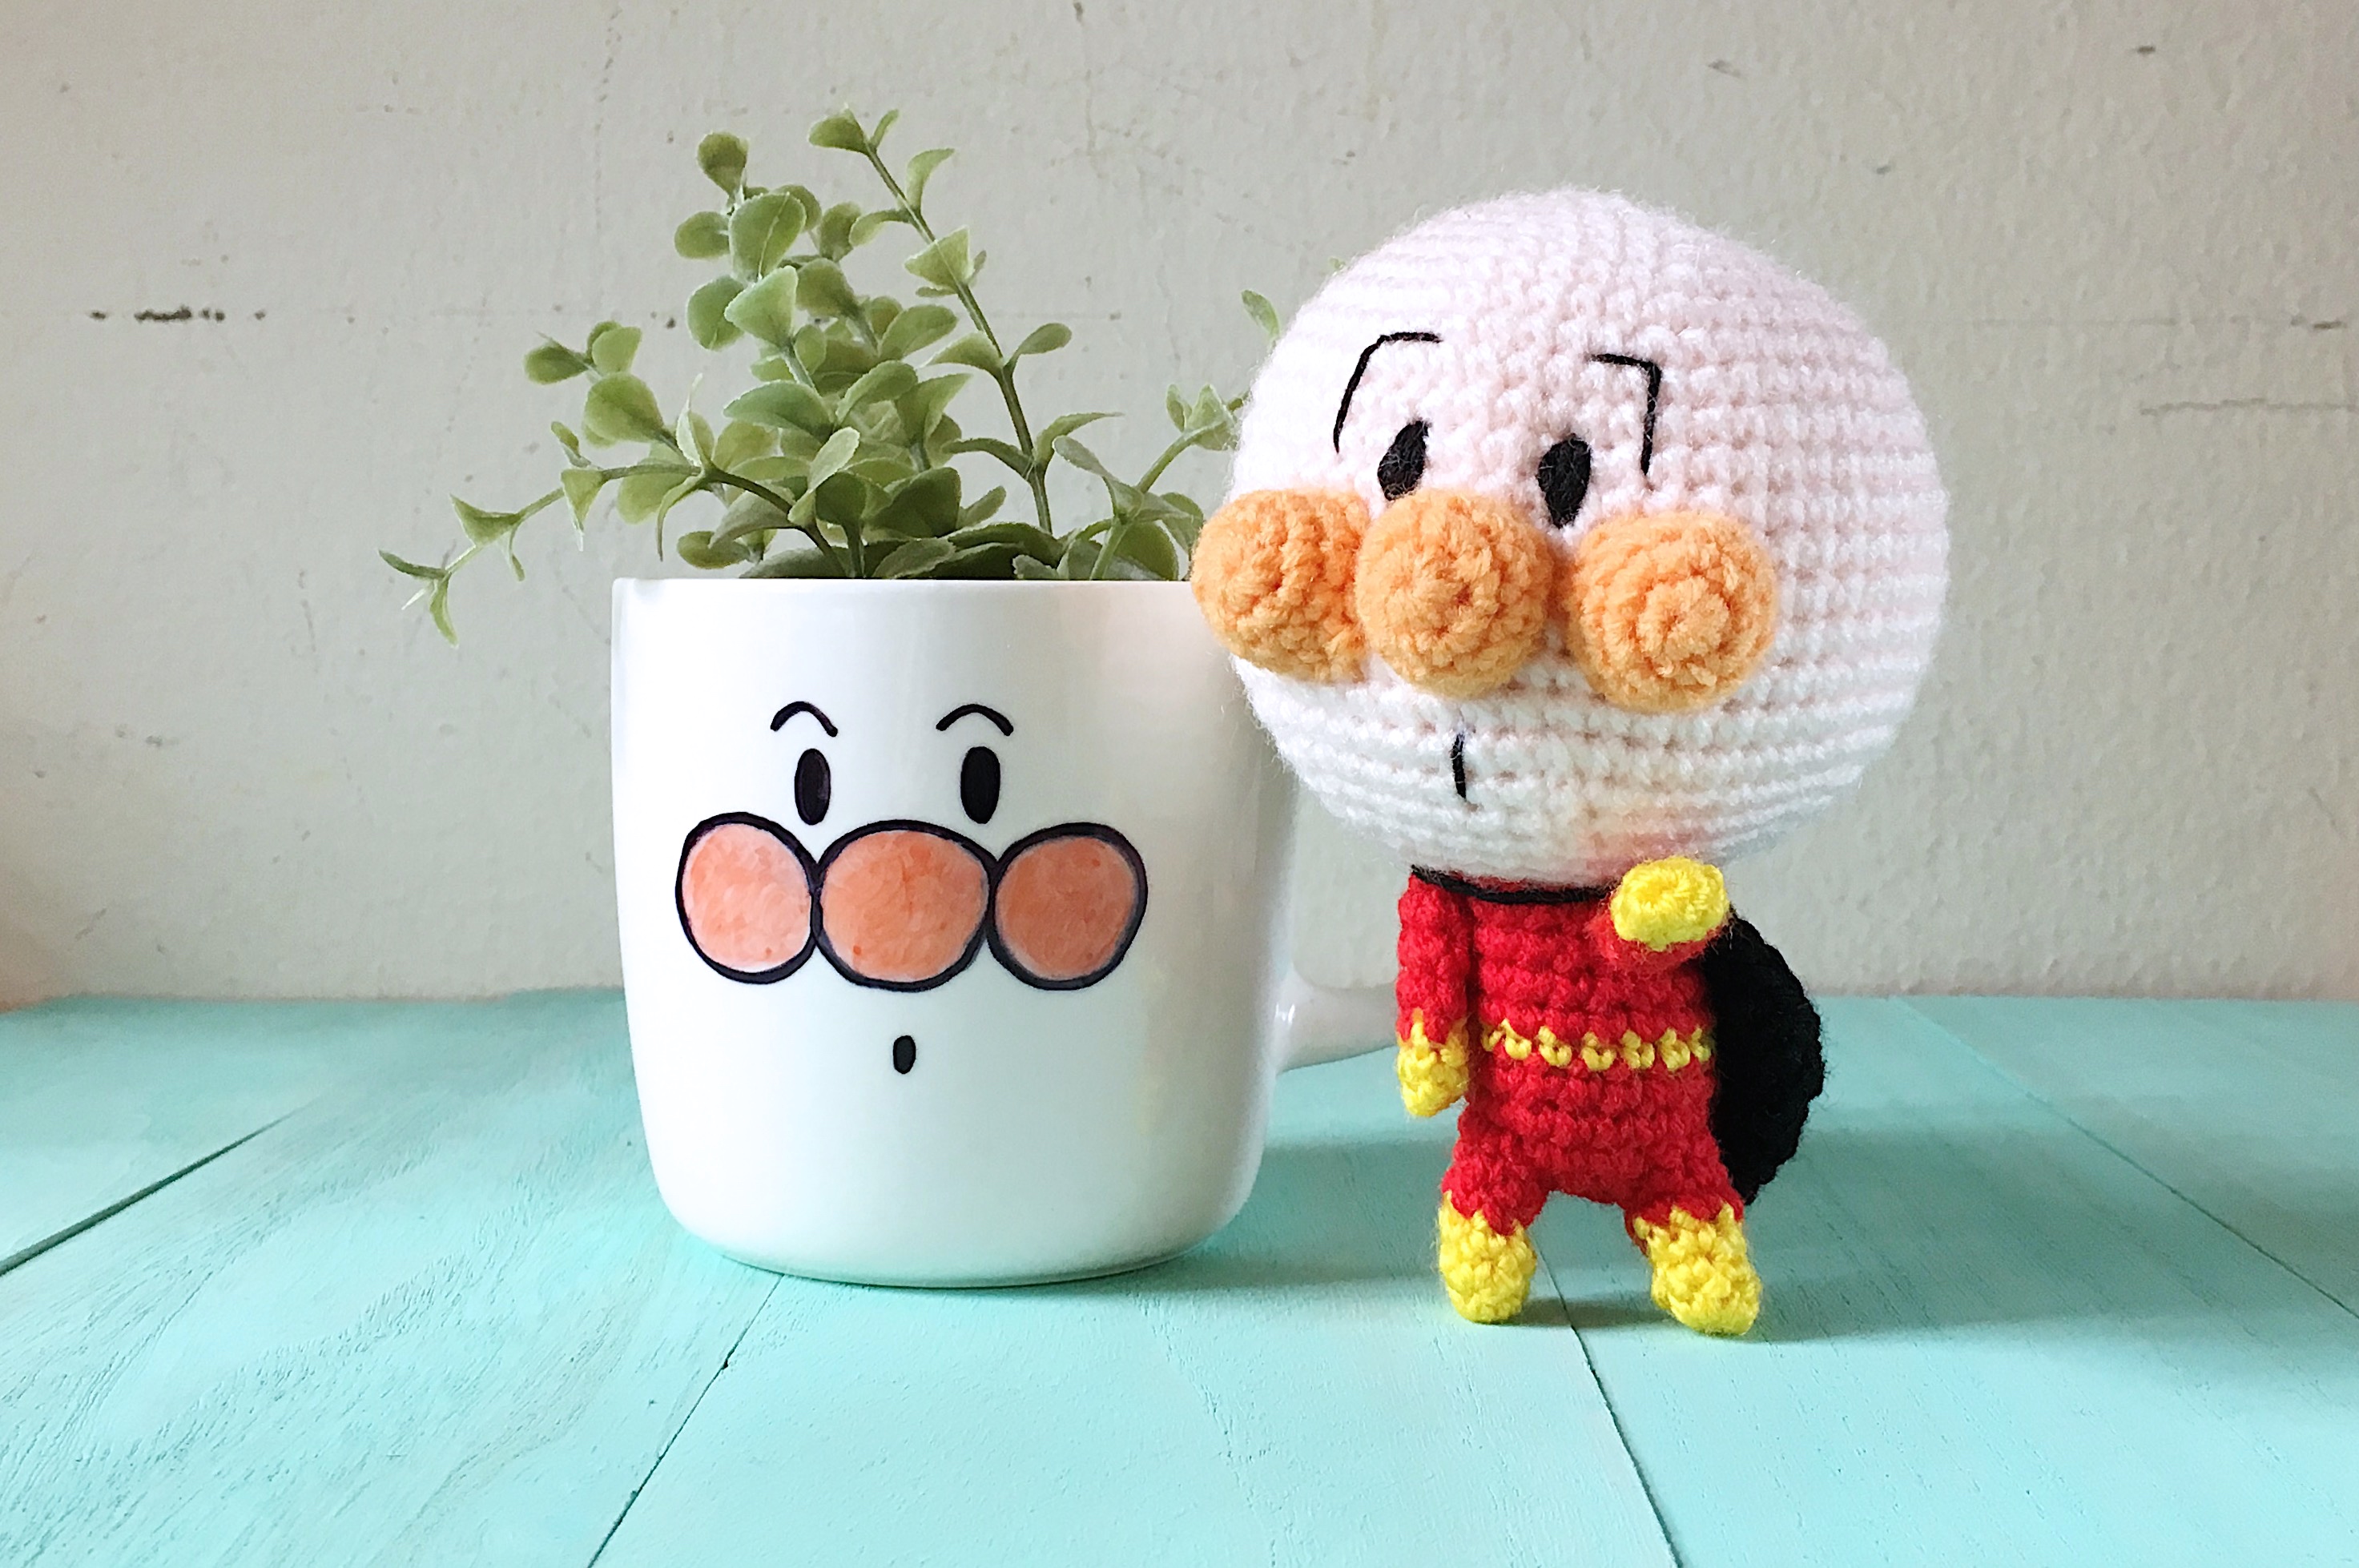
To all Anpanman fans, thank you for being patient with me. You can now make your own Anpanman amigurumi with my free pattern. Yay!
If you don’t already know who Anpanman is, you must, must watch the Sore ike! Anpanman series! I recently watched the Sore Ike! Anpanman: Ruby no Negai movie here, if you’re interested!
Anpanman is a superhero with an anpan (Japanese bean jam-filled pastry) for a head. It’s a strange sight, but Anpanman doesn’t mind sharing a bit of his head with the hungry children that he comes across during his adventures.
I decided to make another cuter version after seeing all the wonderful Anpanman cookies and buns on Instagrammer @sachi ina’s feed! Her makes are incredibly awesome! I’ve been trying my hand at making cute chigiripan and illust pan (bread rolls with cute prints in them) but I am yet to be satisfied with the results. As I type this, I have a loaf of panda illust pan that I baked this evening, waiting to be sliced and discovered. If you see a picture of it on my Instagram, it means it was a success!
But for now, onto the free Anpanman amigurumi pattern! Sore ike!
Anpanman amigurumi pattern by amiguruMEI
アンパンマンのあみぐるみ Skill level: Intermediate Duration: About 6 hours Description: Anpanman is a popular Japanese character from a picture book series written by Takashi Yanase. I first fell in love with the strangely-cute superhero when I chanced upon its anime series and saw Anpanman pull off a piece of anpan from his head (which is literally an anpan, or bean jam-filled pastry) to feed a hungry child! The series comes with its host of colourful characters and I hope to be able to crochet the rest of them soon! Abbreviations • Ch: chain
• Sc: single crochet
• Dc: double crochet
• Inv dec: invisible decrease
Materials & Tools
2.5mm hook
Acrylic yarn in skin colour, orange, red, yellow and black
Black crochet thread
Darning needle
Polyester fiberfill
Head
With skin colour yarn:
Round 1: Sc 6 in magic ring {6}.
Round 2: [Inc] around {12}.
Round 3: [Inc, sc 1] around {18}.
Round 4: [Inc, sc 2] around {24}.
Round 5: [Inc, sc 3] around {30}.
Round 6: [Inc, sc 4] around {36}.
Round 7: [Inc, sc 5] around {42}.
Round 8: [Inc, sc 6] around {48}.
Round 9: [Inc, sc 7] around {54}.
Rounds 10-19 (10 rounds altogether): Sc around {54}.
Round 20: [Inv dec, sc 7] around {48}.
Round 21: [Inv dec, sc 6] around {42}.
Round 22: [Inv dec, sc 5] around {36}.
Round 23: [Inv dec, sc 4] around {30}.
Round 24: [Inv dec, sc 3] around {24}.
Round 25: [Inv dec, sc 2] around {18}.
Fill with stuffing. The shape of the head should be spherical.
Round 26: [Inv dec, sc 1] around {12}.
Round 27: [Inv dec] around {6}.
Fasten off and weave in ends.
Nose and cheeks (Make 3)
With orange yarn:
Round 1: Sc 6 in magic ring {6}.
Round 2: [Inc] around {12}.
Rounds 3-4: Sc around {12}.
Fasten off and leave a long end for sewing.
Fill with a tiny bit of stuffing.
Body
With red yarn:
Round 1: Sc 6 in magic ring {6}.
Round 2: [Inc] around {12}.
Round 3: [Inc, sc 1] around {18}.
Rounds 4-5: Sc around {18}.
Change to yellow yarn.
Round 6: Sc around {18}.
Switch back to red yarn.
Round 7-10 (4 rounds altogether): Sc around {18}.
Fasten off and leave a long end for sewing.
Fill with stuffing. Cape
With black yarn:
Row 1: Ch 10. Turn work.
Rows 2-14 (13 rows altogether): Sc 9, Ch 1. Turn work.
Fasten off and leave a long end for sewing.
Arms (Make 2)
With yellow yarn:
Round 1: Sc 6 in magic ring {6}.
Round 2: Sc around {6}.
Change to red yarn.
Rounds 3-6 (4 rounds altogether): Sc around {6}.
Fasten off and leave a long end for sewing.
Legs (Make 2)
With yellow yarn:
Round 1: Sc 7 in magic ring {7}.
Rounds 2-3: Sc around {7}.
Change to red yarn.
Rounds 4-5: Sc around {7}.
Fasten off and leave a long end for sewing.
Assembly
1. Sew nose and cheeks onto the head. They should fall below Round 13.
2. Sew on the eyes, eyebrows and mouth (please see tips on **Designing the face below)
3. Sew body onto head.
4. Sew on arms. You can position them however you like. I gave mine an “Anpunch!” pose.
5. Sew on the legs.
6. Sew on the cape. I just looped the cape around Anpanman’s neck and weaved in the ends.
**Designing the face Eyes
1. The eyes are sewn below Round 11 of the head, using black crochet thread
2. Each eye is sewn with 12 vertical backstitches that are 2 stitches long.
3. There should be a space of 3 stitches in between each eye.
Eyebrows
1. Instead of rounded eyebrows, I gave my Anpanman “L” shaped ones.
2. I made a loose diagonal stitch that is 3 stitches long and then made a smaller stitch to hold the corners together. Alternatively, you can try making 2 backstitches in the shape of an L (I think the effect would be quite the same!)
Mouth
1. Just one vertical backstitch, 2 stitches long.
As this is an original amiguruMEI pattern, kindly do not claim it as your own. You may place a link to this pattern from your site, but please do not repost it onto your page. Send me a picture or tag me on Instagram @amigurumei when you’ve made your own Anpanman 🙂
I know it’s been forever since I updated…if you’ve been following my Instagram…you’d probably know what I’ve been busy with for the most part of the year…
I’m currently just four days away from delivering my twin baby boys! Things have been hectic what with organising work and my pregnancy symptoms (which was OK, right up until about a month ago!). These past few weeks I’ve barely been able to move because of the extra weight I’ve been lugging around…but all good things come to those who wait!
I was planning to share a Christmas post on all the cute little things I made for my family…but I suddenly had to be hospitalised for preterm labour! I promise I’ll definitely share when everything’s back to normal..which may be a while!
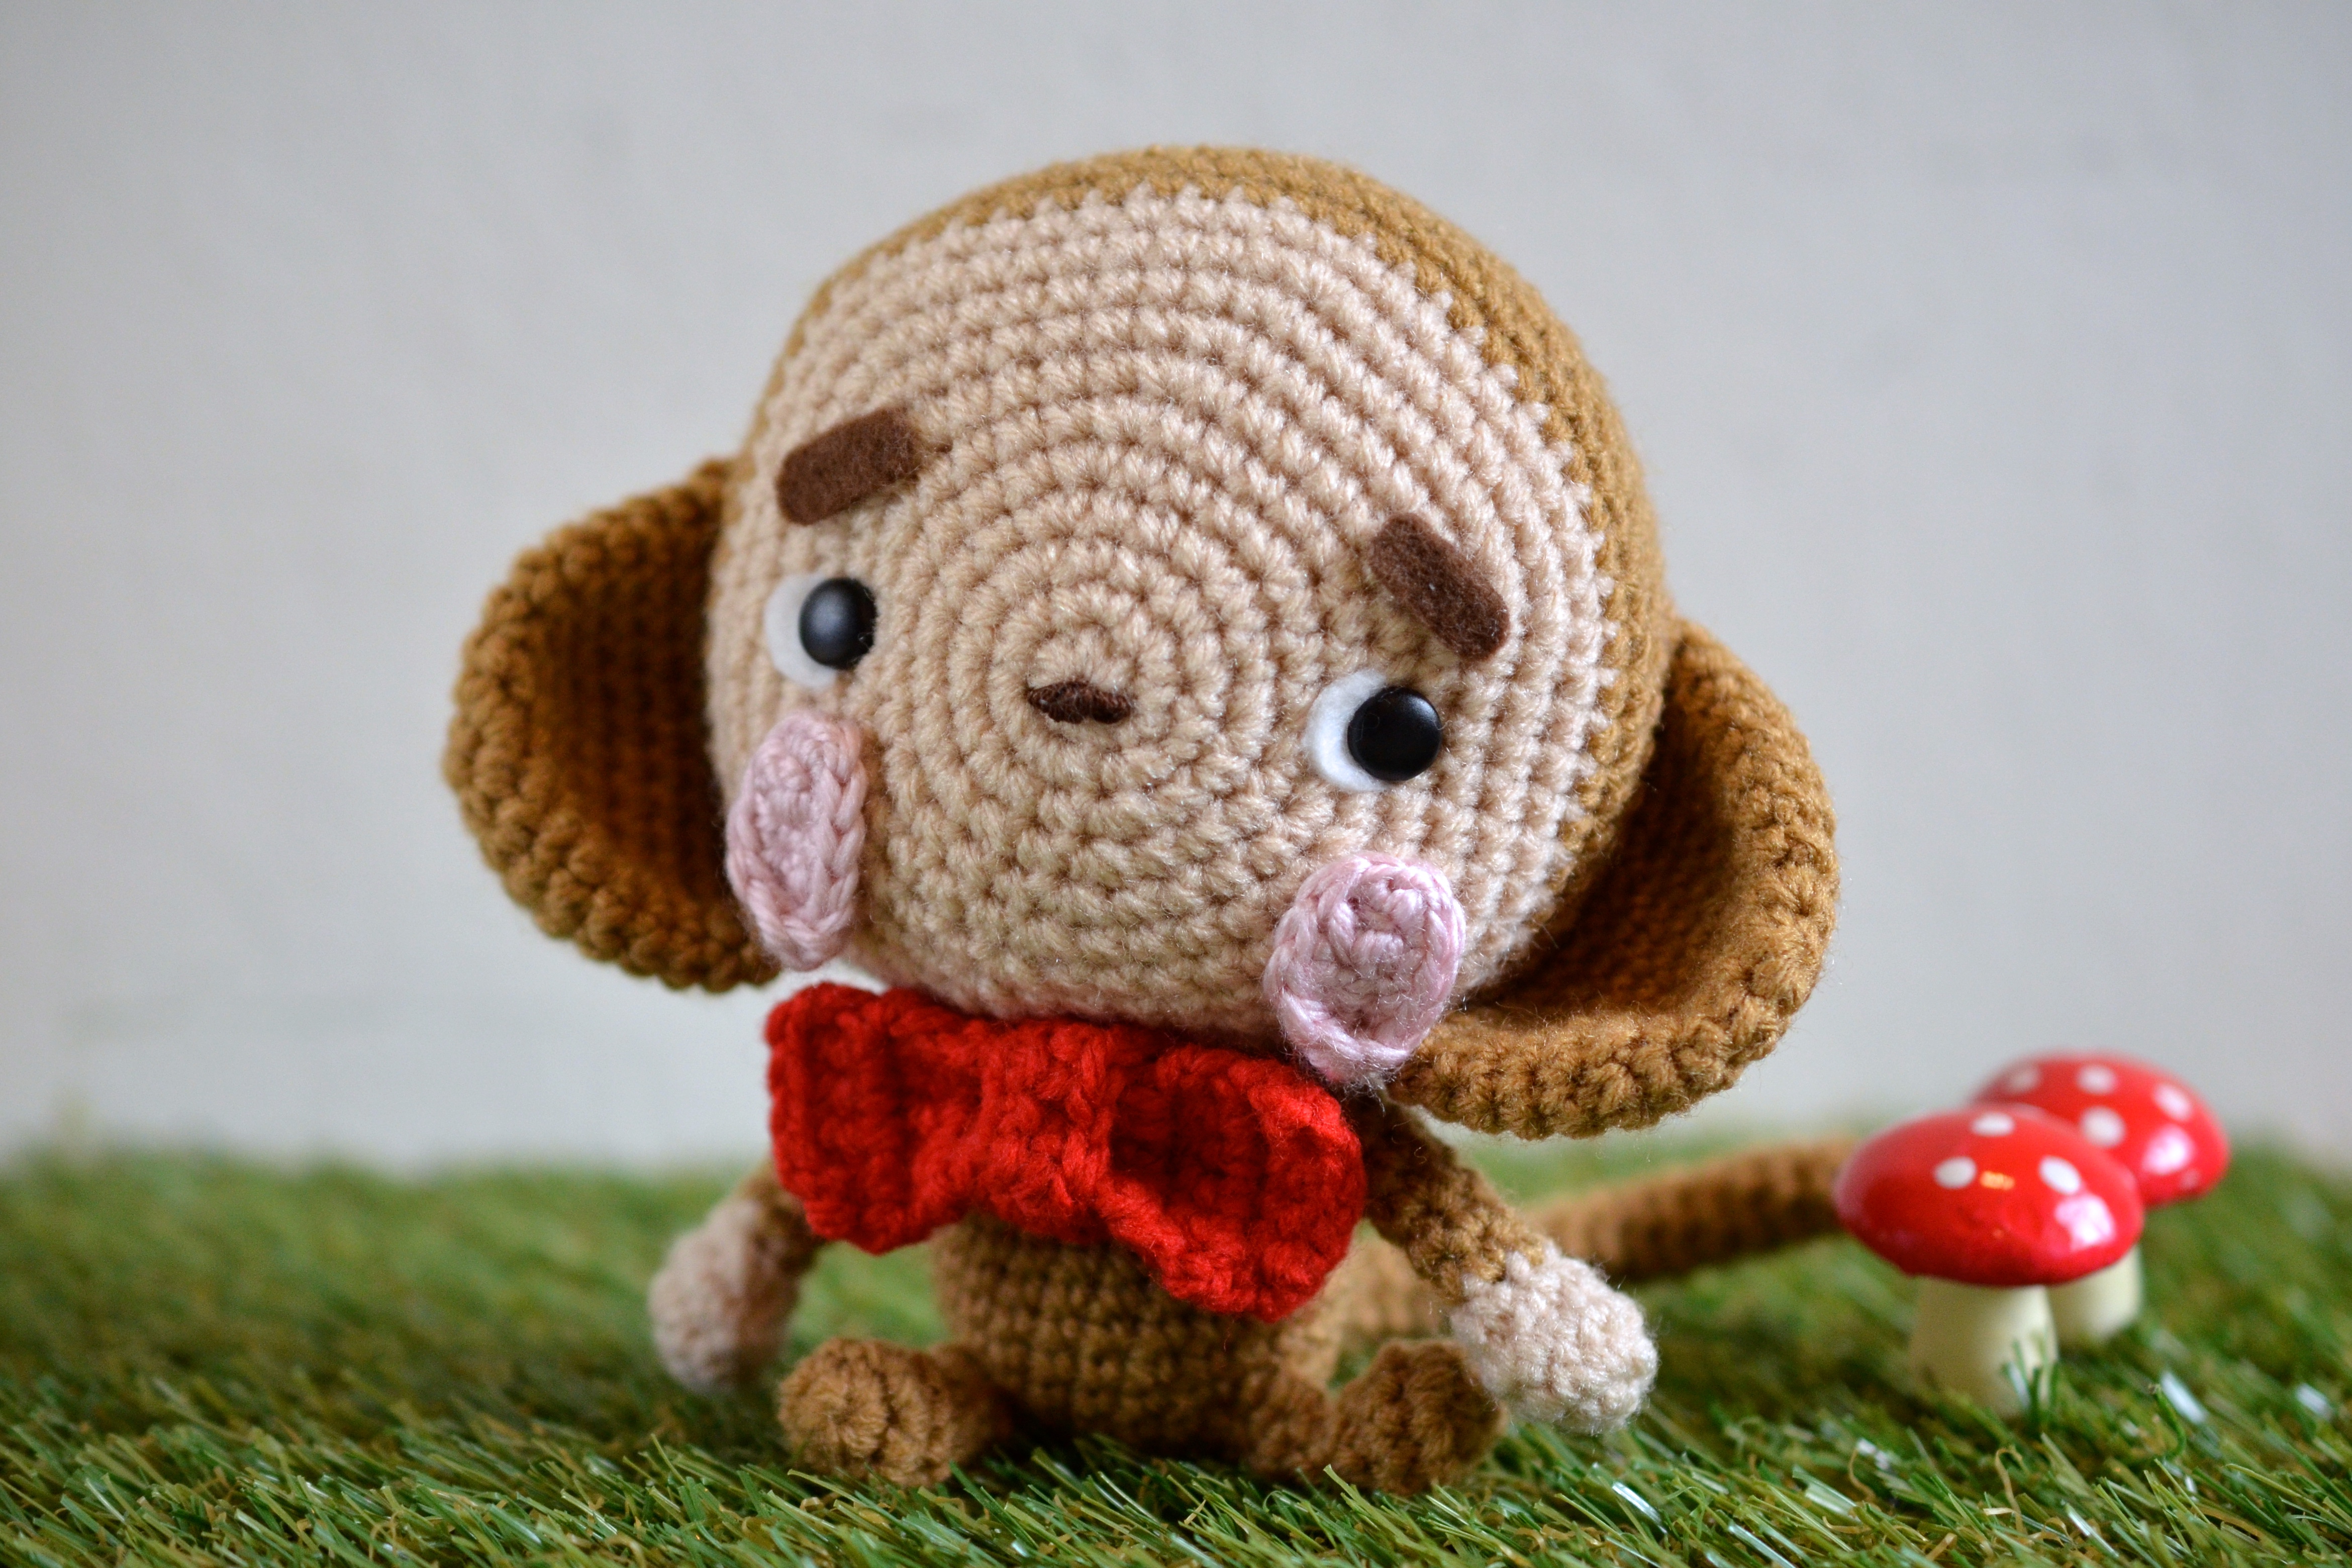
To usher in the brand new year though, I’ve teamed up with Craft Passion once again to share a free amigurumi pattern…and it happens to be a monkey to usher in the Lunar New Year!
Please meet Daikichi the fortune monkey!
A little cheeky…a little innocent…that’s who Daikichi is on most days. His name means “big fortune” in Japanese…and I expect him to bring everyone prosperity and wellbeing in 2016!
I may not be able to update my blog for a while but please do hang in there! Do follow my continued amigurumi adventures on my Instagram @amigurumei as I will surely be updating more through that channel. I’ve made some cute baby rattles and baby hats that I can’t wait to bestow upon my boys!
I’m currently working on a sleeping baby dinosaur amigurumi…I guess it’ll probably be my last amigurumi project before I become a mommy!
Wish me luck! 🙂
I hope you’ll enjoy the free Daikichi monkey amigurumi pattern. May 2016 be a year full of happy monkey businesses and quirkiness for all those who believe in the energy of the cheeky creature! 🙂
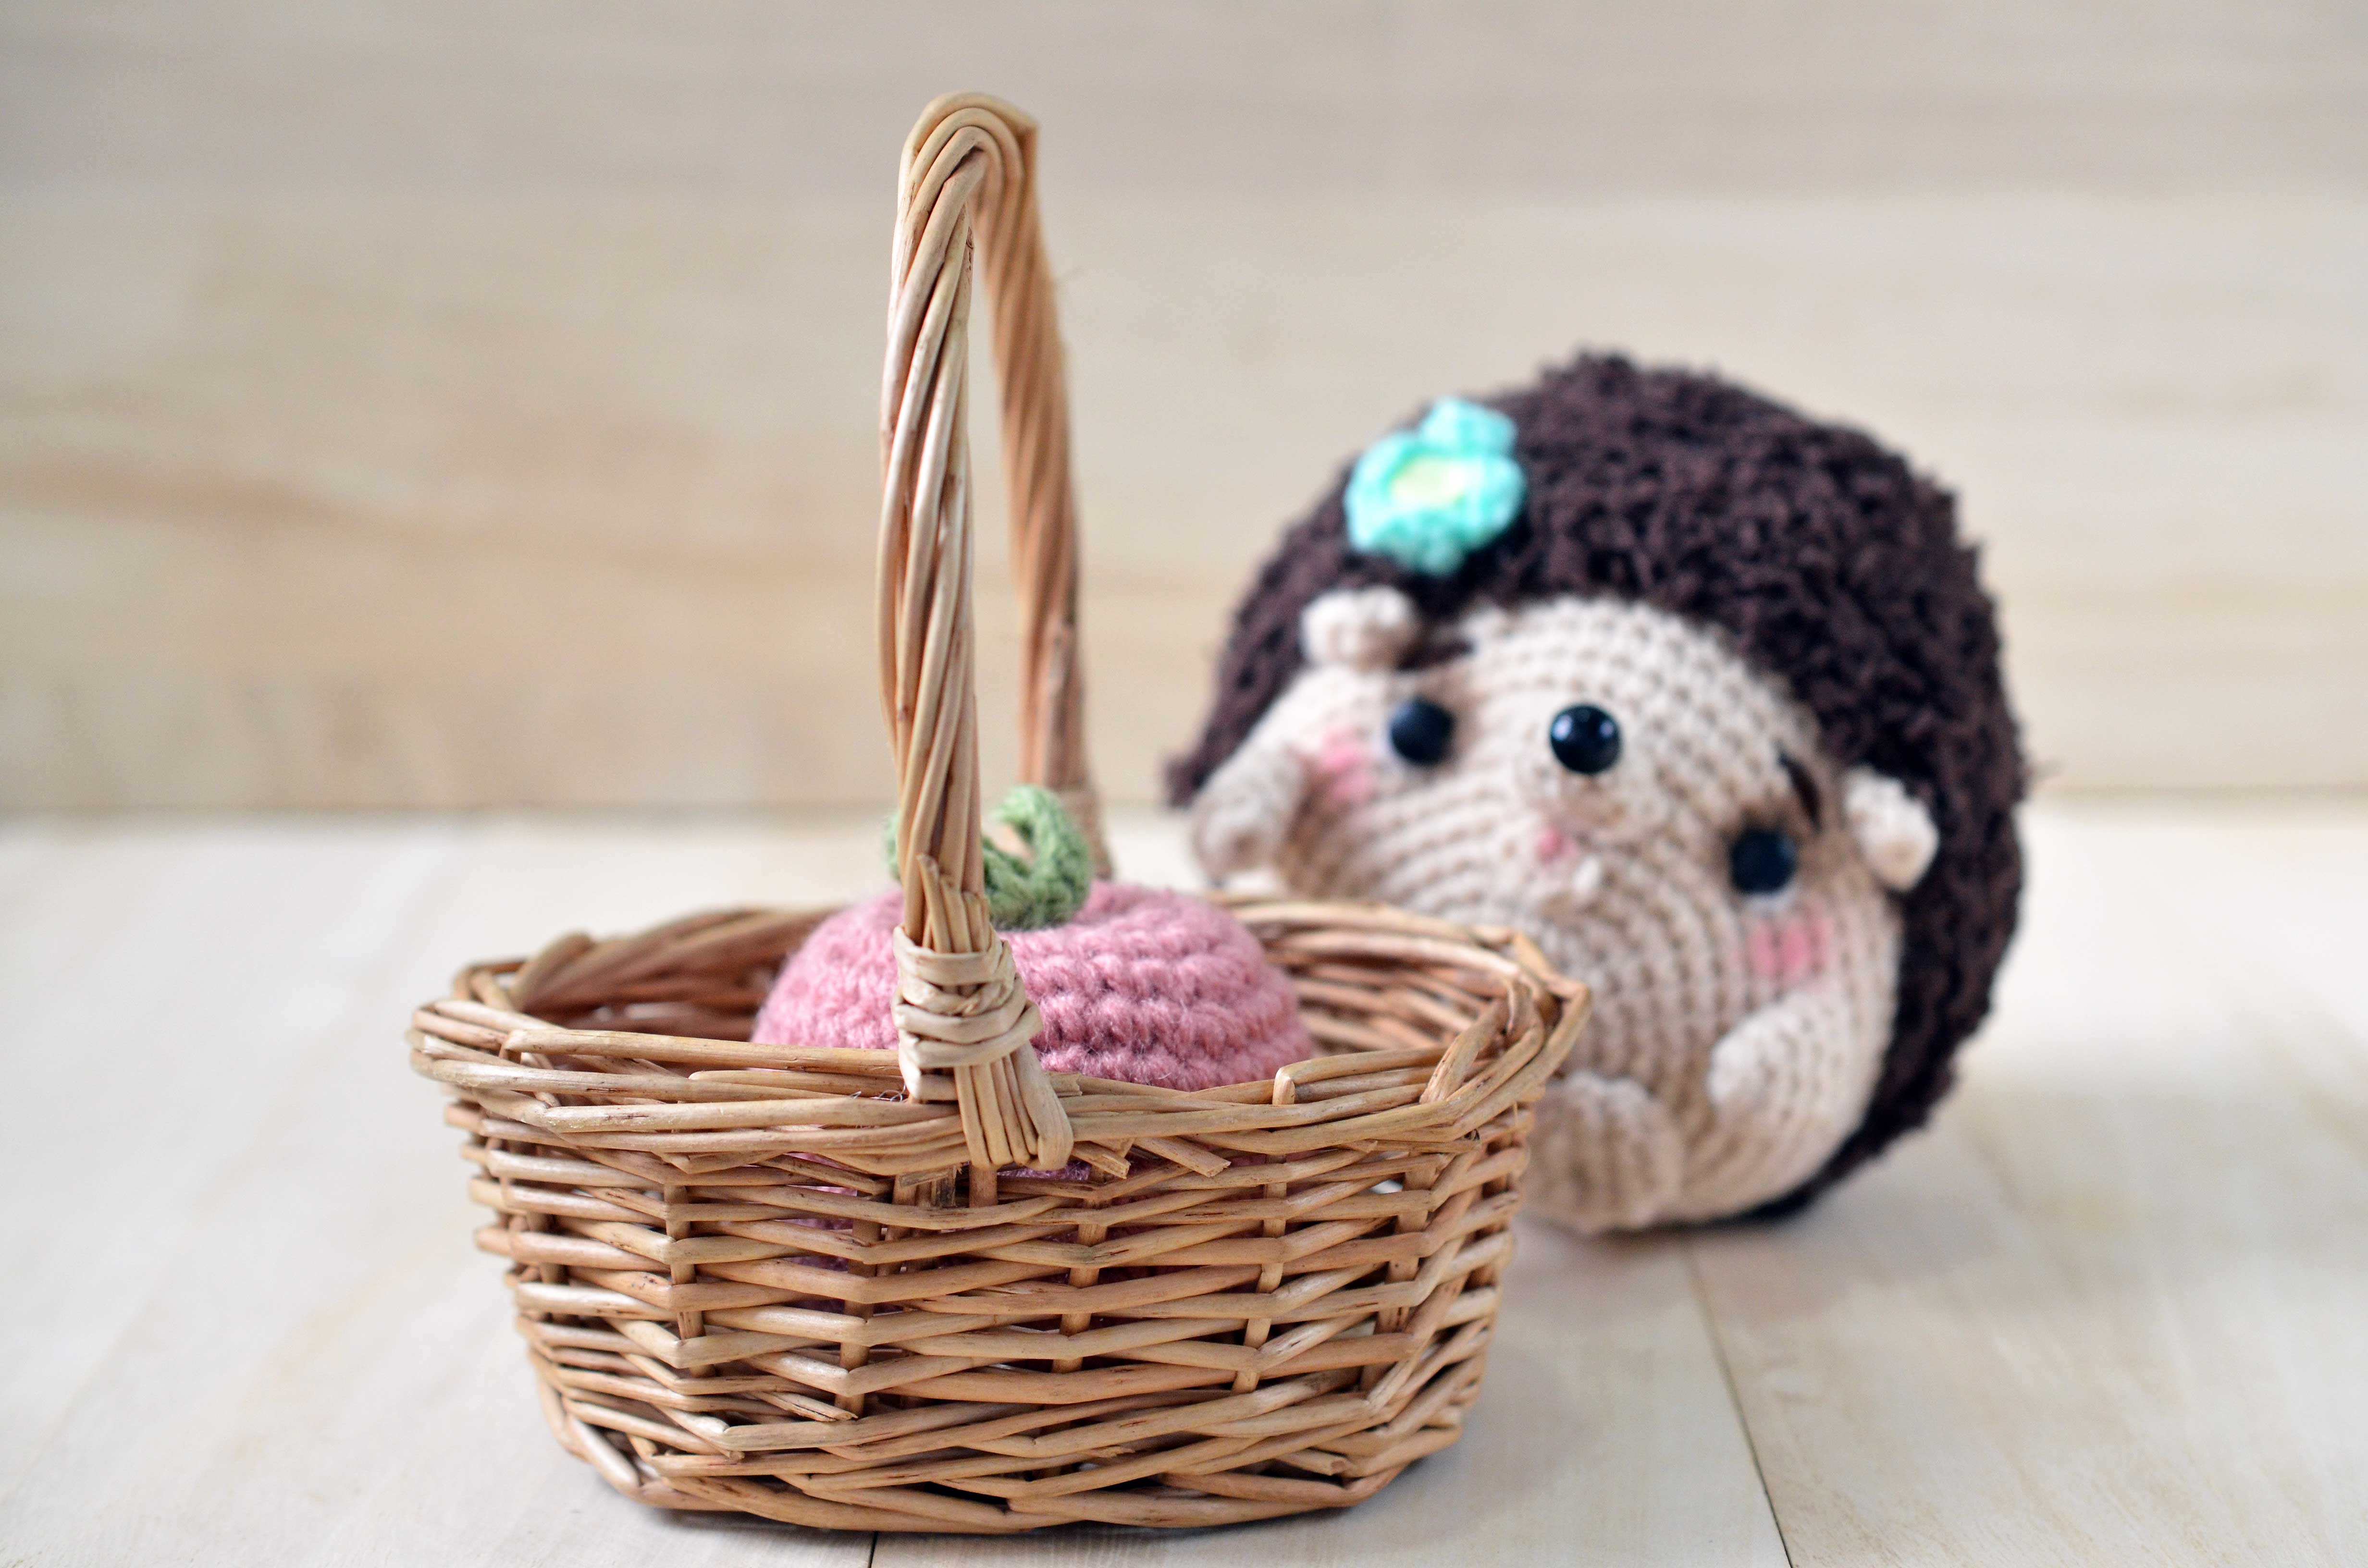
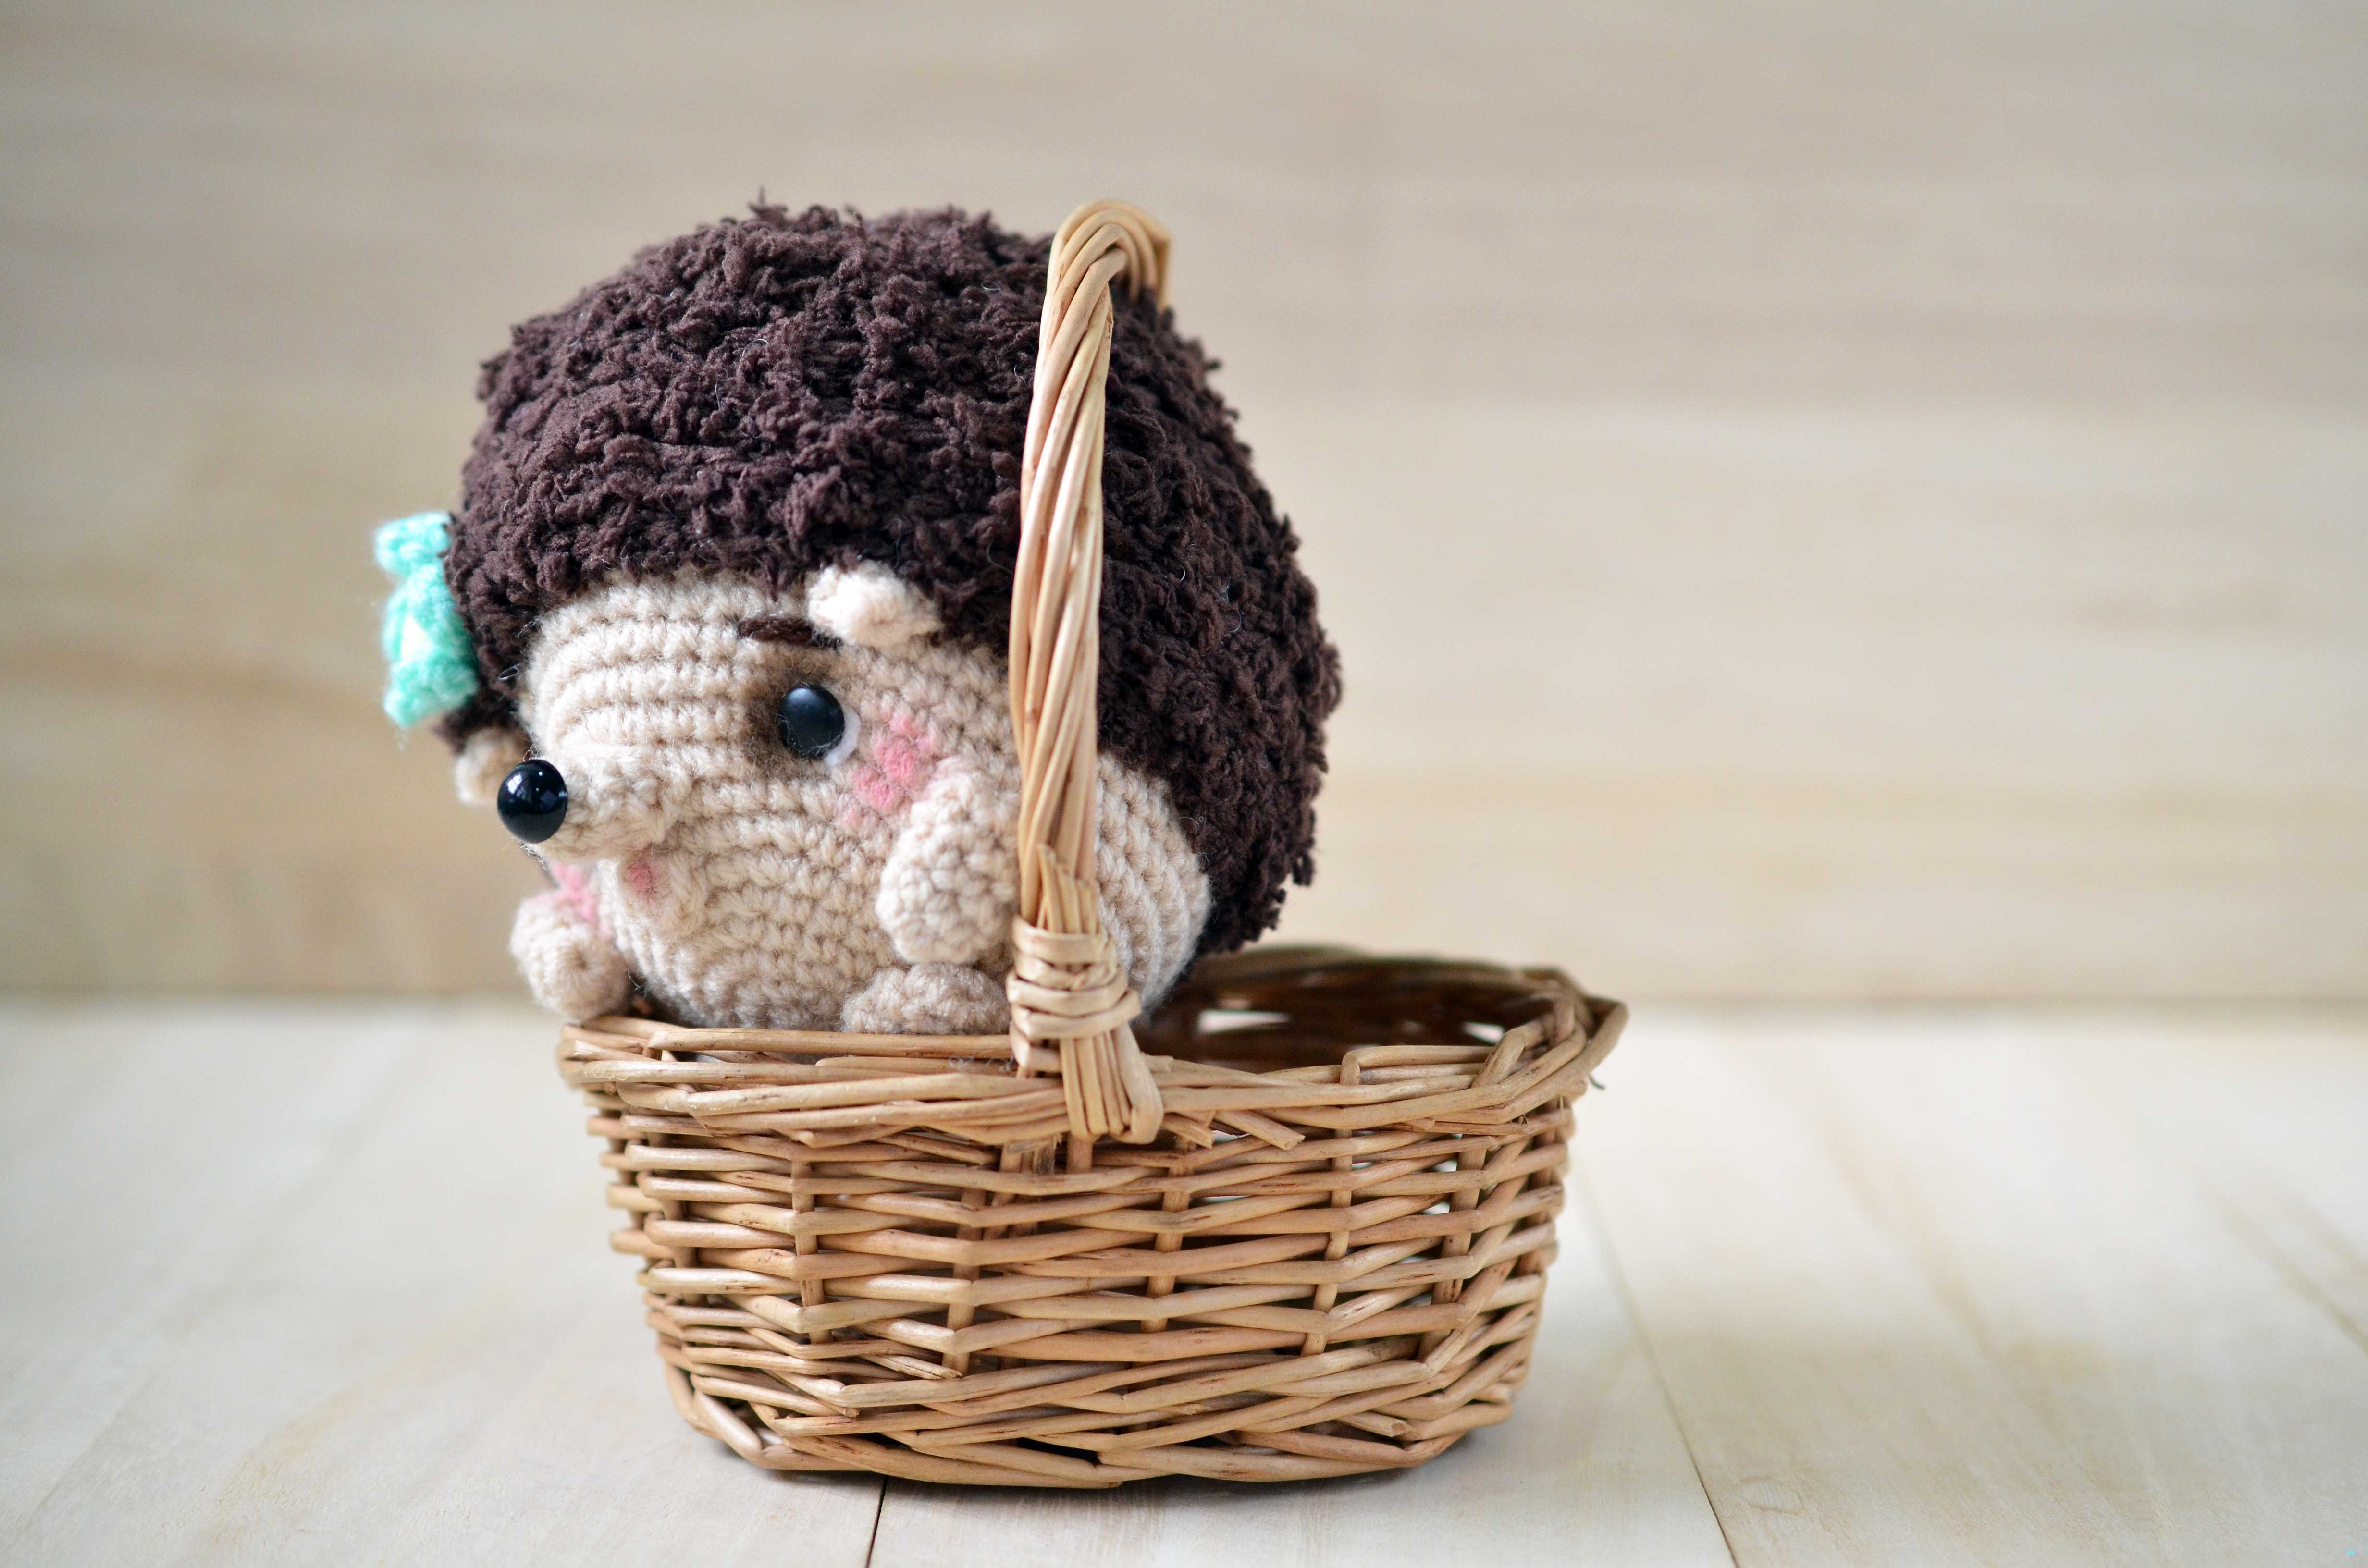
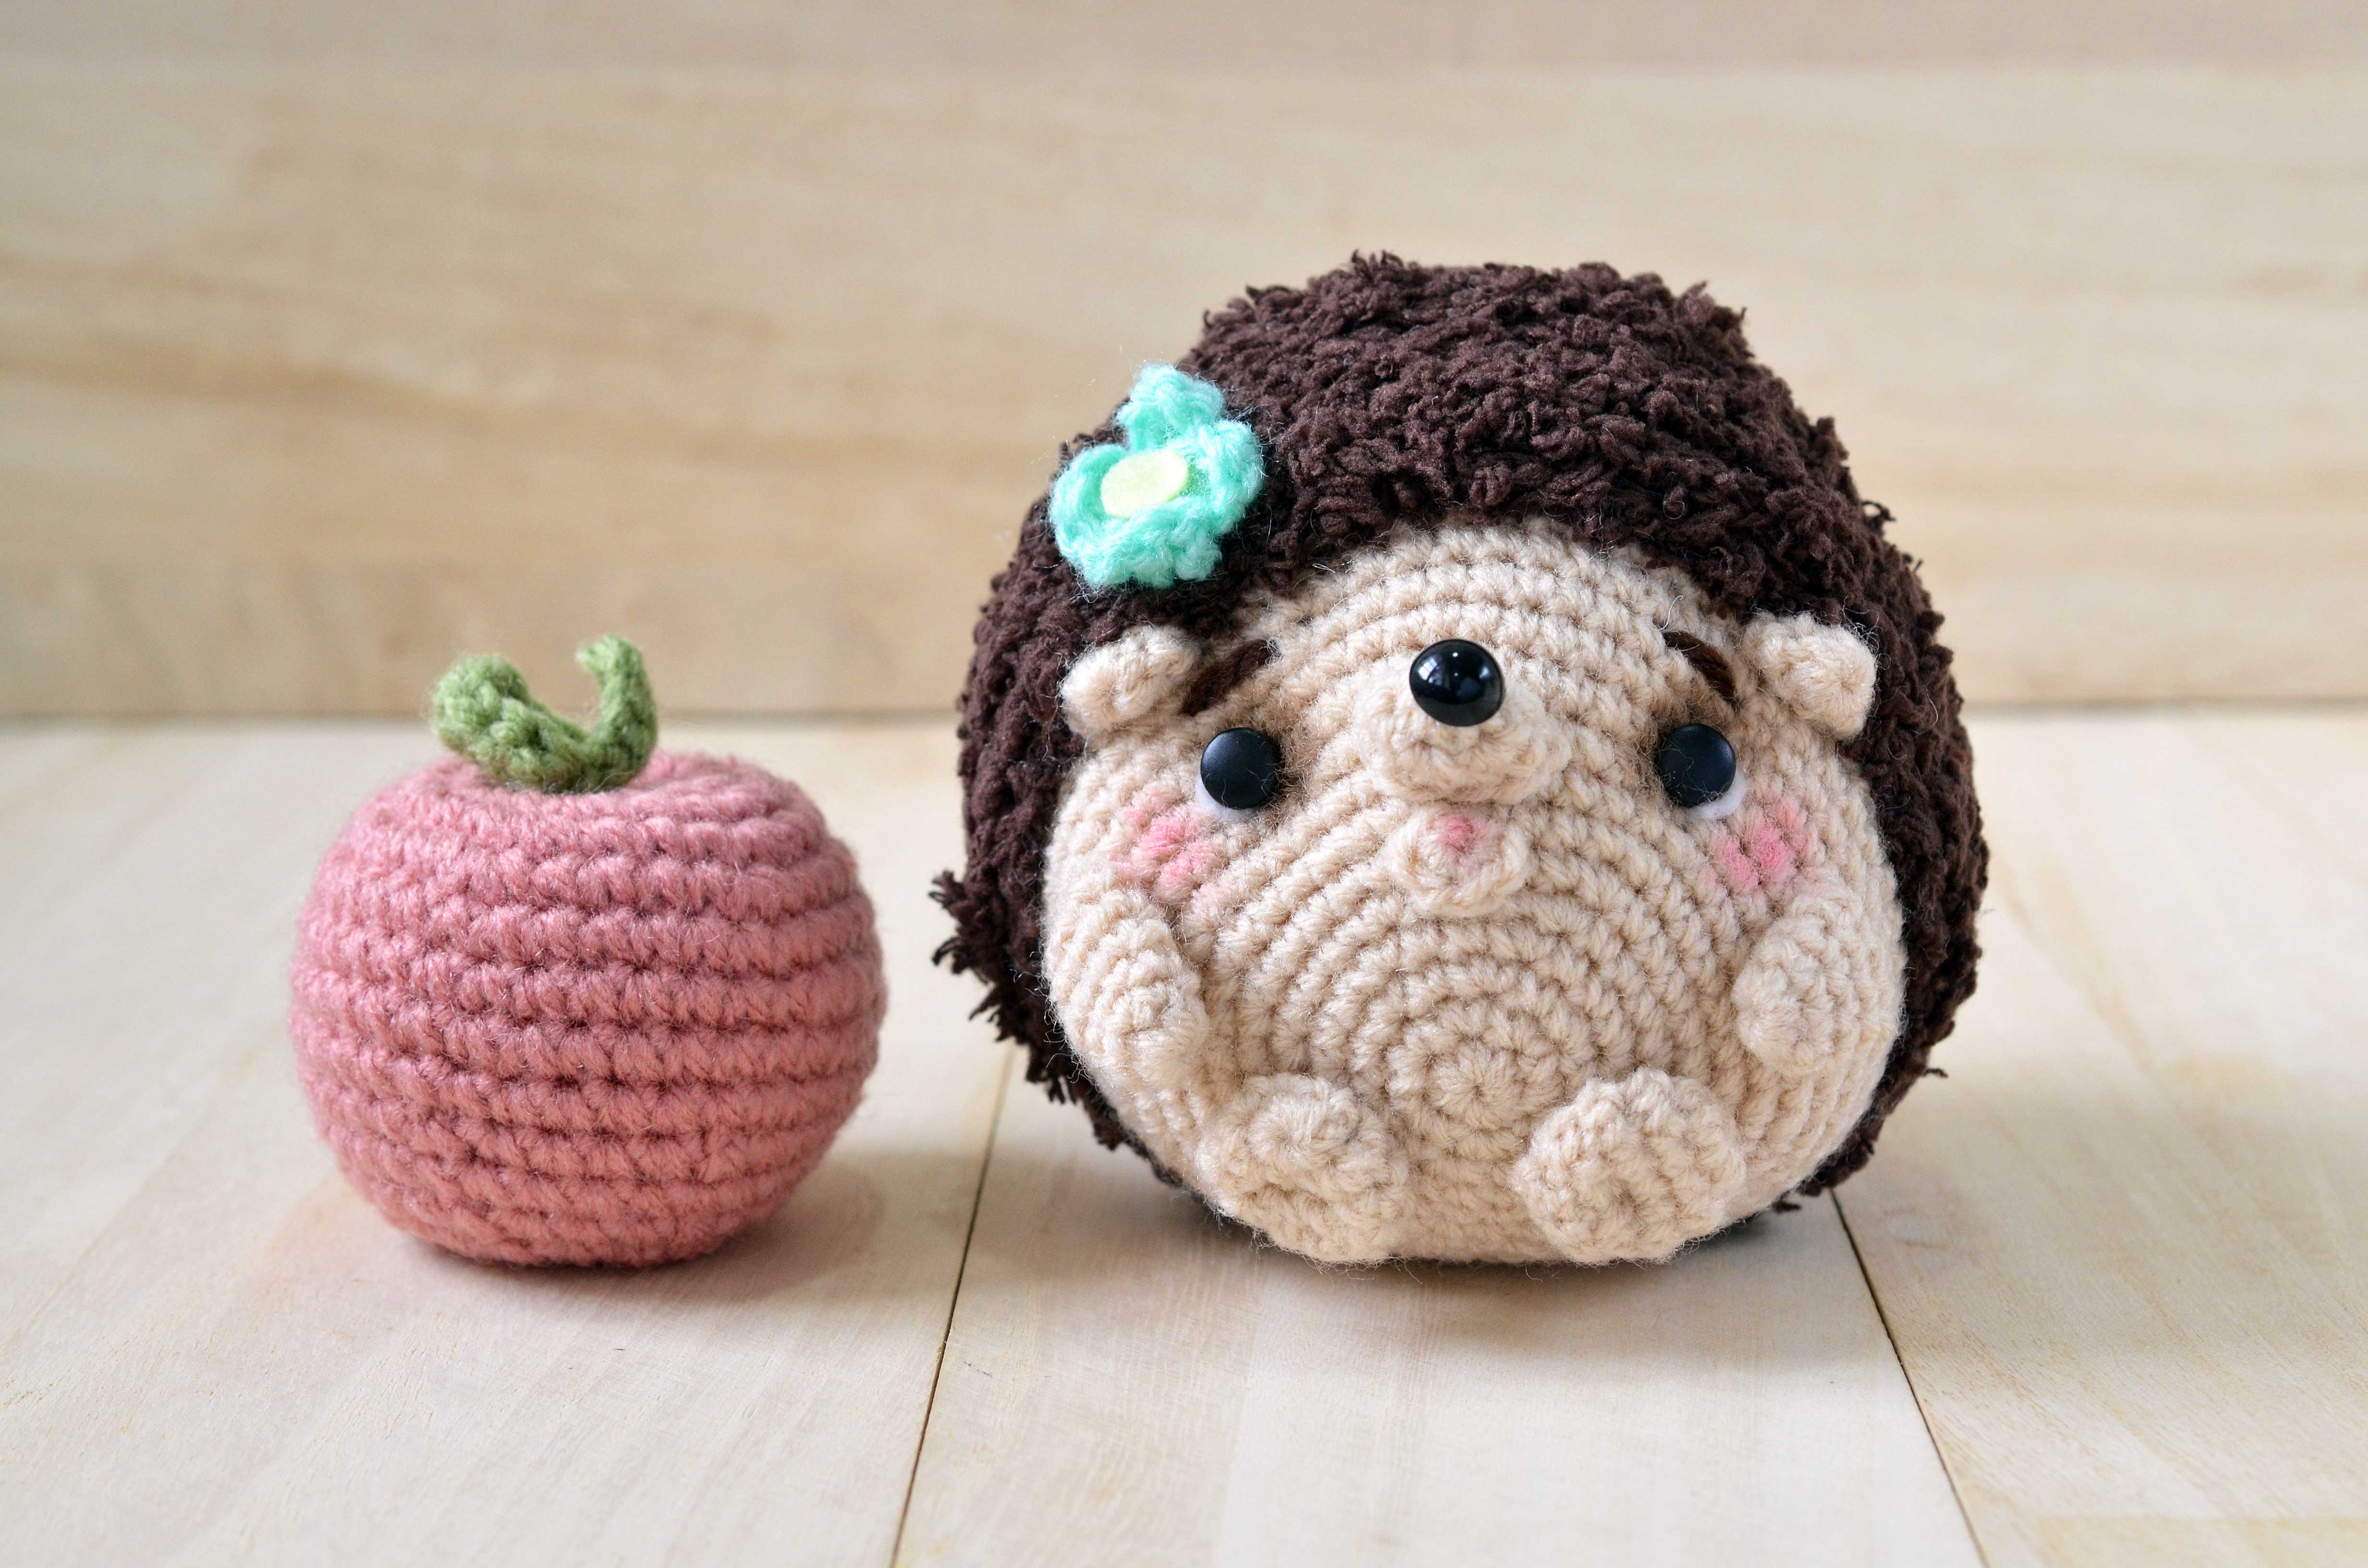
Before Sept 16 comes around though, how about I interest you in something else first, say, a cute little hedgehog named Mimi?
Hi!
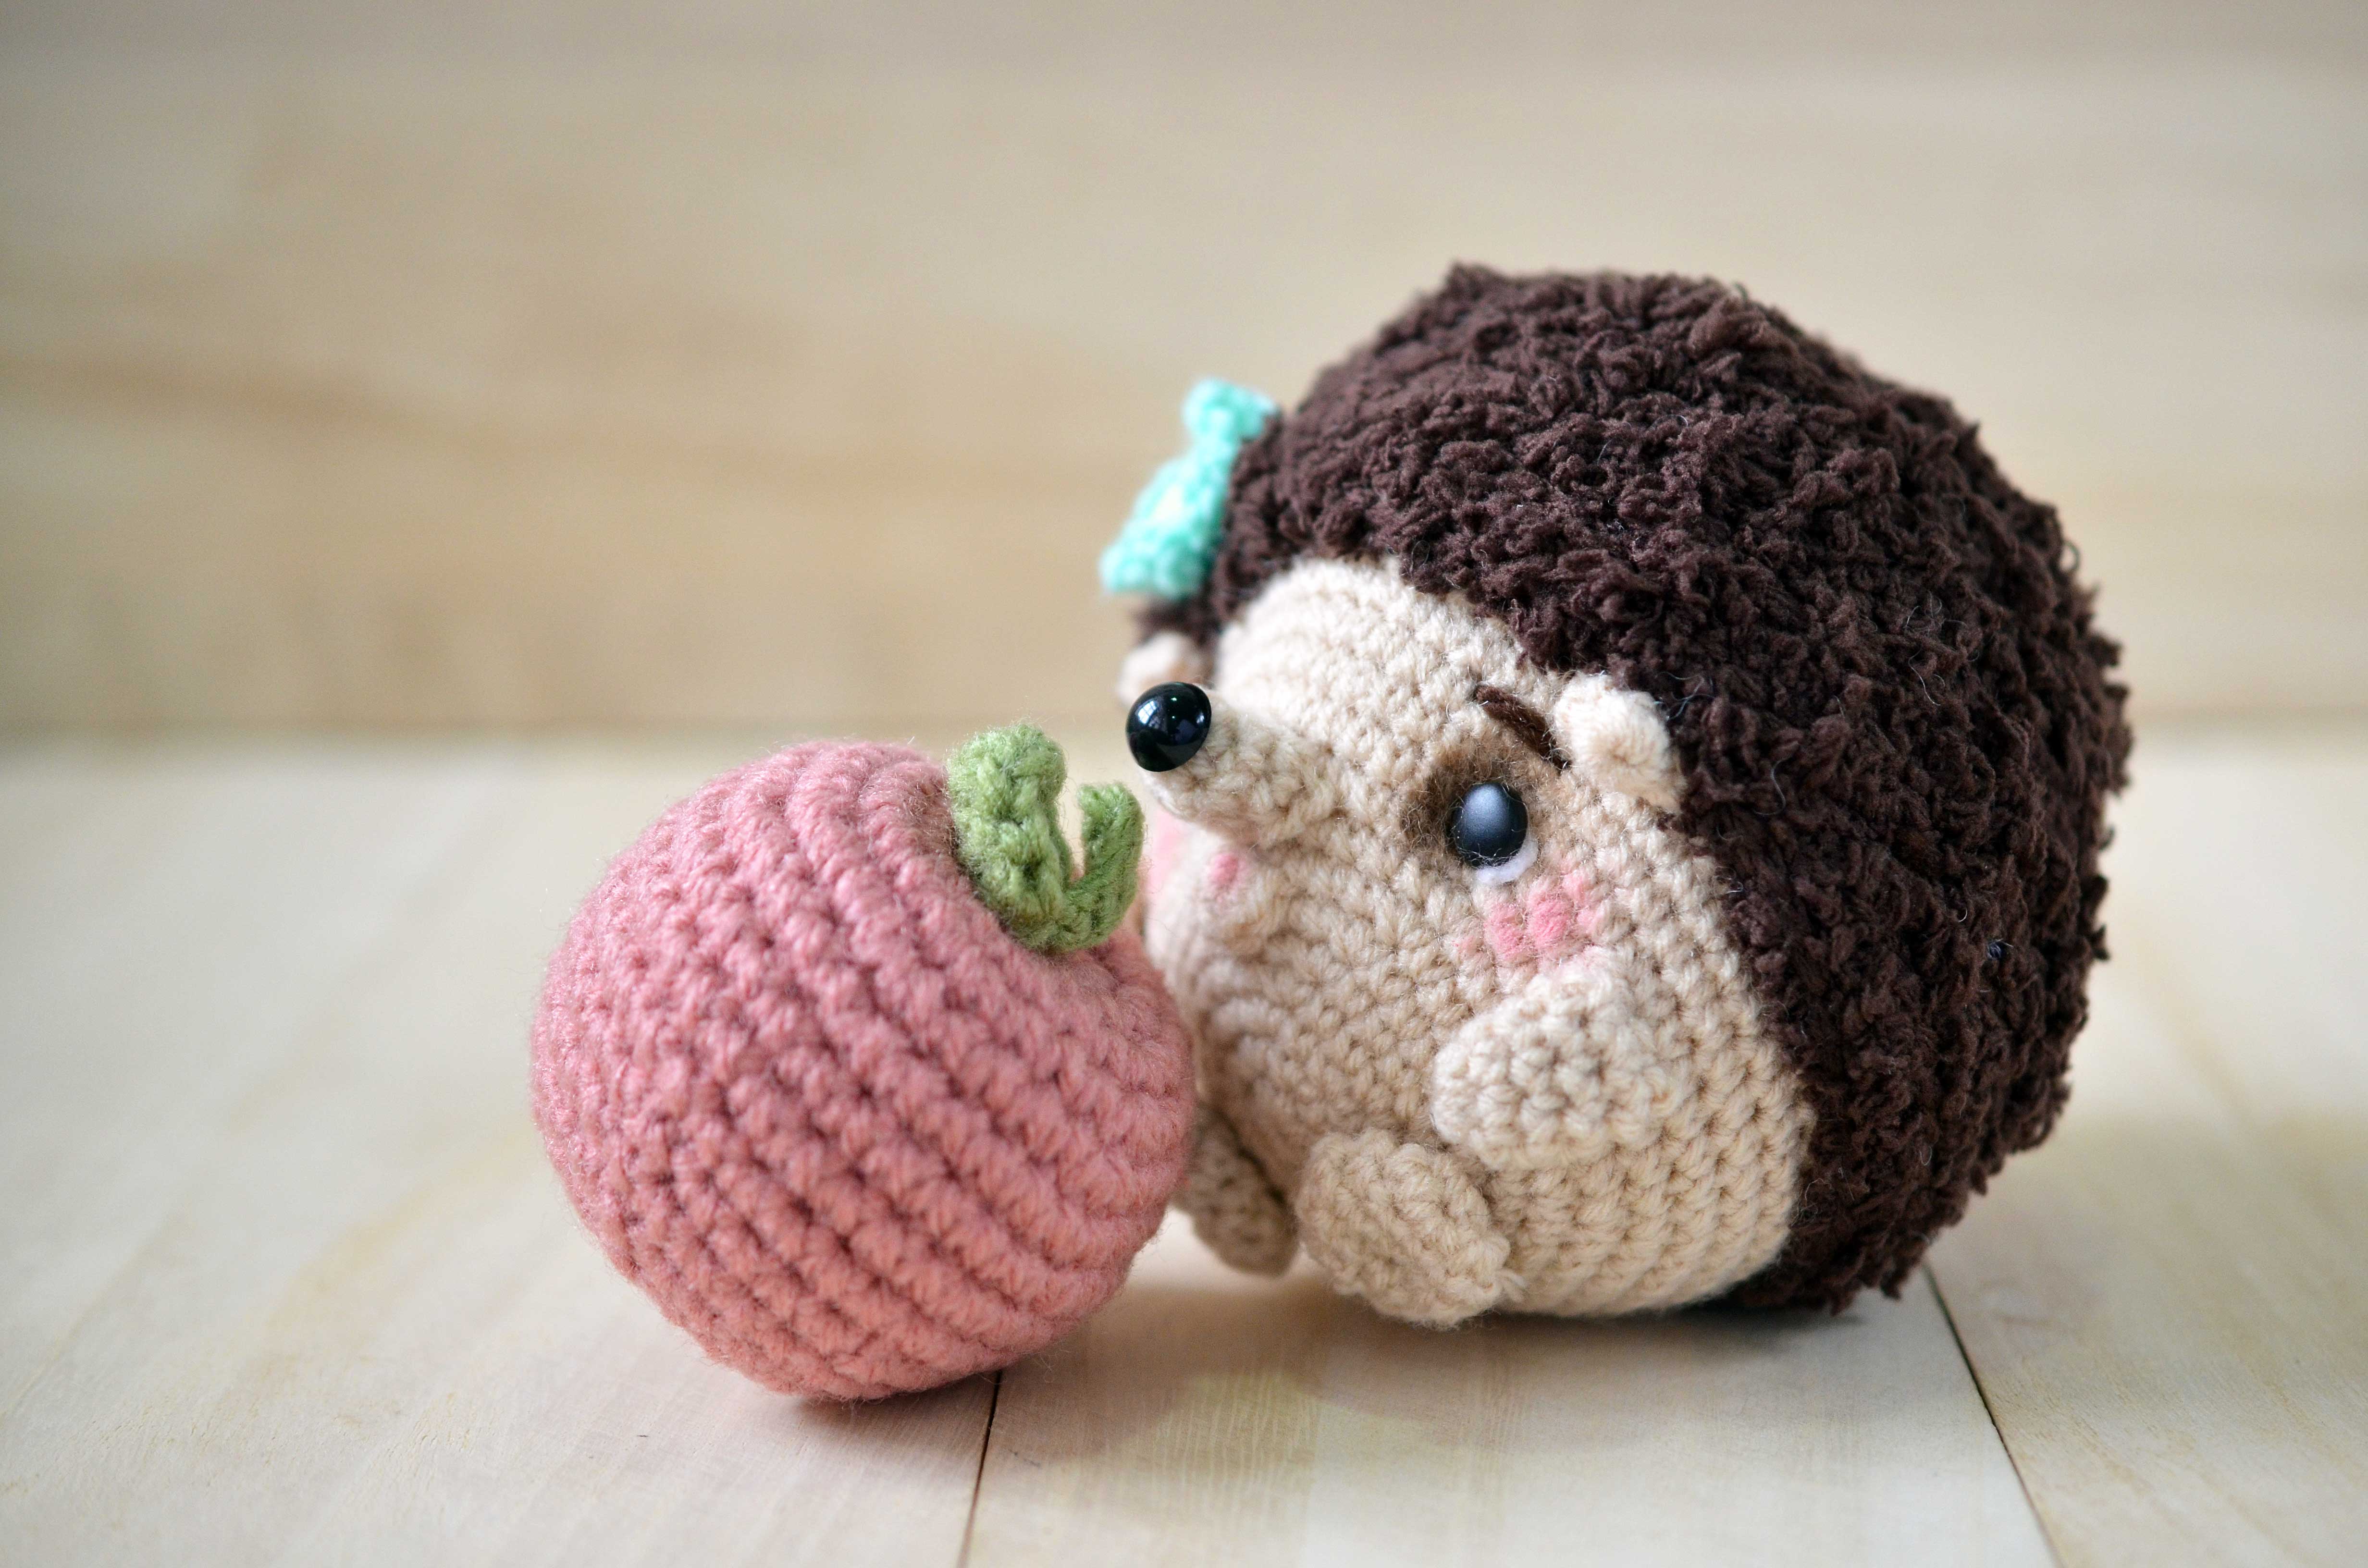
Mimi-chan (short for Ayumi) is a baby hedgehog who loves watching the autumn leaves fall.
Her weakness? Sweet, ripe apples.
Apple!*bari, bari* (the sound of munching in Japanese)
She enjoys clambering from tree to tree (when she’s not too heavy, that is).
Help!
No one has yet dared to tell her this: that her dreams of growing up to become a bushy-tailed squirrel is just that — a dream.
Ja ne! (See you!)
P/S
I had the pleasure of working with Craft Passion again to design this lovely hedgehog amigurumi pattern. (By the way, have you checked out Craft Passion’s hedgehog coin purse pattern? Totally adorable!)
The pattern is a fantabulous way to use up any fuzzy yarn that you have at home. Since you will be surface-crocheting directly onto the body piece that already has all the single crochets laid out for you, you should be able to see where you’re going 🙂
Feel free to give Mimi-chan a splash of colour! And when you do, send me a picture! 🙂