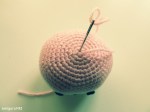
Make your own special edition rainbow Pandapple-chan!
Materials
- 2.50 mm hook
- 1.75mm hook
- Similar sized yarn in rose pink, white, black, apple green, pastel pink, pastel yellow, pastel green, pastel blue
- Embroidery thread in black and white
- Darning needle
- Carpet needle (with large eye and sharp tip)
- Polyester fiberfill
- A small piece of pink felt
Eyes (make two)
With black embroidery floss and a 1.75mm hook:
Chain 4
Round 1: Starting in second chain from hook, sc in the next 2sc, 3sc in the last sc.
Round 2: Rotate the foundation row, don’t turn it. Sc in the next 2sc, 3sc in the last sc.
Fasten off and leave a long end for sewing. Weave in the shorter end of the thread to neaten any gaps.
With white embroidery floss and a darning needle, sew about 8 times over one of the stitches, near the top of each eye.
Head
With rose pink yarn:
Round 1: 6 sc in magic circle (6)
Round 2: 2 sc in each sc around (12)
Round 3: *2 sc, sc in next sc*, repeat 6 times (18)
Round 4: *2sc, sc in next 2 sc*, repeat 6 times (24)
Round 5: *2 sc, sc in next 3 sc*, repeat 6 times (30)
Round 6: *2 sc, sc in next 4 sc*, repeat 6 times (36)
Round 7: *2 sc, sc in next 5 sc*, repeat 6 times (42)
Round 8: *2 sc, sc in next 6 sc*, repeat 6 times (48)
Round 9: *2 sc, sc in next 7 sc*, repeat 6 times (54)
Round 10: *2 sc, sc in next 8 sc*, repeat 6 times (60)
Round 11 – 12: Sc in each sc around (60)
Change colour to white, using the jogless crochet technique via Amigurumi To Go’s video tutorial here.
Round 13 – 20: Sc in each sc around (60)
Round 21: *Inv dec, sc in next 8 sc*, repeat 6 times (54)
Start sewing on the eyes – they should fall below Round 15. There should be 8 stitches between the eyes.
In the centre, sew on the nose and mouth. Use the carpet needle for this so you can go in-between stitches.
Round 22: *Inv dec, sc in next 7 sc*, repeat 6 times (48)
Round 23: * Inv dec, sc in next 6 sc*, repeat 6 times (42)
Round 24: * Inv dec, sc in next 5 sc*, repeat 6 times (36)
Round 25: * Inv dec, sc in next 4 sc*, repeat 6 times (30)
Round 26: *Inv dec, sc in next 3 sc*, repeat 6 times (24)
Round 27: *Inv dec, sc in next 2 sc*, repeat 6 times (18)
Begin stuffing the head.
Round 28: *Inv dec, sc in next 1 sc*, repeat 6 times (12)
Round 29: Inv dec all around (6)
Fasten off and weave in ends.
Body
With white yarn:
Round 1: 6 sc in magic circle (6)
Round 2: 2 sc in each sc around (12)
Round 3: *2 sc, sc in next sc*, repeat 6 times (18)
Round 4: *2sc, sc in next 2 sc*, repeat 6 times (24)
Round 5 – 9: Sc in each sc around (24)
Round 10: * Inv dec, sc in next 2 sc*, repeat 6 times (18)
Fasten off and weave in ends.
Dress
With pastel pink yarn and a 1.75mm hook:
Chain 26. Depending on the type of yarn you’re using, you may have more or less chain stitches. Just remember to measure the length of the chain against Pandapple-chan’s body.
Slip stitch to first chain to form loop.
Round 1 – 2: Sc in each sc around (25).
Change colour to pastel yellow.
Round 3: Sc in each sc around (25).
Round 4: *2 sc, sc in next sc*, repeat all around. (It’s perfectly alright if your last stitch happen to be a 2sc)
Change colour to pastel green.
Round 5 – 6: Sc in each sc around.
Change colour to pastel blue.
Round 7 – 8: Sc in each sc around.
Fasten off and leave a long end for sewing.
Arms (make 2)
With black yarn:
Round 1: 6 sc in magic circle (6)
Round 2 – 6: Sc in each sc around (6)
Fasten off and leave a long end for sewing.
Legs (make 2)
With black yarn:
Round 1: 5 sc in magic circle (5)
Round 2: 2 sc in each sc around (10)
Round 3 – 4: Sc in each sc around (10)
Round 5: Sc2together all around (5)
Fasten off and leave a long end for sewing.
Ears (make two)
With black yarn:
Round 1: 6 sc in magic circle (6)
Round 2: 2 sc in each sc around (12)
Round 3: *2 sc, sc in next sc*, repeat 6 times (18)
Round 4: Sc in each sc around (18)
Round 5: *Inv dec, sc in next sc*, repeat 6 times (12)
Fasten off and leave a long end for sewing.
Leaf
With apple green yarn:
Round 1: 3 sc in magic circle (3)
Round 2: 2 sc in each sc around (6)
Round 3: *2 sc, sc in next sc*, repeat 3 times (9)
Round 4 – 5: Sc in each sc around (9)
Round 6: *Sc2together, sc in next 1 sc*, repeat 3 times (6)
Fasten off and leave a long end for sewing.
Apple stem
With black yarn:
Chain 12.
Fasten off and leave a long end for sewing.
Weave the tail end of the yarn in between each chain to fill up any gaps.
Tail
With black yarn and a 1.75mm hook:
Round 1: 5 sc in magic circle (5)
Round 2: Sc in each sc around (5)
Fasten off and leave a long end for sewing.
Apple indentation
Cut a piece of rose pink yarn, about 6 inches in length.
Thread the yarn through from the bottom part of Pandapple-chan’s head, to the top part of the head, in the centre.
Make one stitch and go back down to the bottom of the head. Gently tug on the yarn to create a slight indentation.
Knot off ends.
Assembly
- Sew the dress on the body.
- Stuff the body and sew it onto the head.
- Sew on the arms.
- Sew on the legs.
- Sew on the leaf.
- Sew on the stem.
- Sew on the ears.
- Sew on the tail.
- Cut two small pieces of pink felt and glue them on Pandapple-chan’s cheeks. Try needle-felting on some pink wool for a different effect.
- Ta da!
As this is an original amiguruMEI pattern, kindly do not claim it as your own. If you plan to sell the amigurumi made from this pattern, I would be delighted to have you mention amiguruMEI as the pattern provider. You may place a link to this pattern from your site, but please do not repost it onto your page. Remember to share a picture of your own kawaii versions of Pandapple-chan with amiguruMEI!


OMG!! Thank you so much!!! I can’t wait to make one, 🙂 I love Pandas!
You’re welcome! Would love to see yours when you’re done!
Hi, this is so cute! I’m going to make one! 🙂
glarery.blogspot.com
Yay! Can’t wait to see it!
So gonna make this for my friends 😀 They are gonna squeal over the cuteness HAHAS ! Thank you for sharing this !!! >v<
You’re most welcome! I hope your friends will love it too!
Awesome, Thank you 🙂
Dying here…!!! Everything here is so cute!!
the panda is cho kawaii..can’t wait to try make it..thanks so much for sharing the pattern ^^
You’re absolutely welcome! 🙂
Your Pandapple-chan is perfect! Love the beautiful yarn you used!
OMO! Finally! I found a panda amigurumi pattern. Thank you so much! I really love this!
Hello ~ Woow it a very beautiful Thank You So much , but I have a question What Does *Inv dec Means in Round 21 ?
I did it again – after “Tuxedo Sam” in June last year, now I made the Pandapple. I love your cute ideas and the patterns are written very good. Thank you very much!
Reblogged this on Stitch Myself Happy and commented:
Too cute!
thank you for sharing this pattern! can’t wait to make this cute little panda
Thank you for pattern! ❤ I love this. 🙂
,,Panda született."
http://horgolmany.blogspot.hu/2014/08/egy-horgolt-panda-szuletese.html
So cute! I have a guestion though. What does ‘inv dec’ mean?