
Hello again!
I hope you found the last post, where we talked about the unique Sanrio head-molding exercise, helpful!
Today, we’ll be bringing out the sewing kit, for we will be learning how to sew, or much rather, embroider on the face of sweet Miss Kitty White!
You will find that this technique is used for some other Sanrio characters as well, like the Little Twin Stars, Tuxedosam, The Sugarbunnies and of course My Melody and her goth but cherry-loving rival, Kuromi.
Let’s get started!
Exclusive Hello Kitty Crochet Tip#2: It’s in the eyes, nose and whiskers

As mentioned in “Basic Body Parts” (pg 93), you simply have to sew on the facial details using embroidery floss and a series of vertical or horizontal backstitches. Some of the patterns include specific instructions on where to sew the nose/eyes, and also how many stitches are needed.
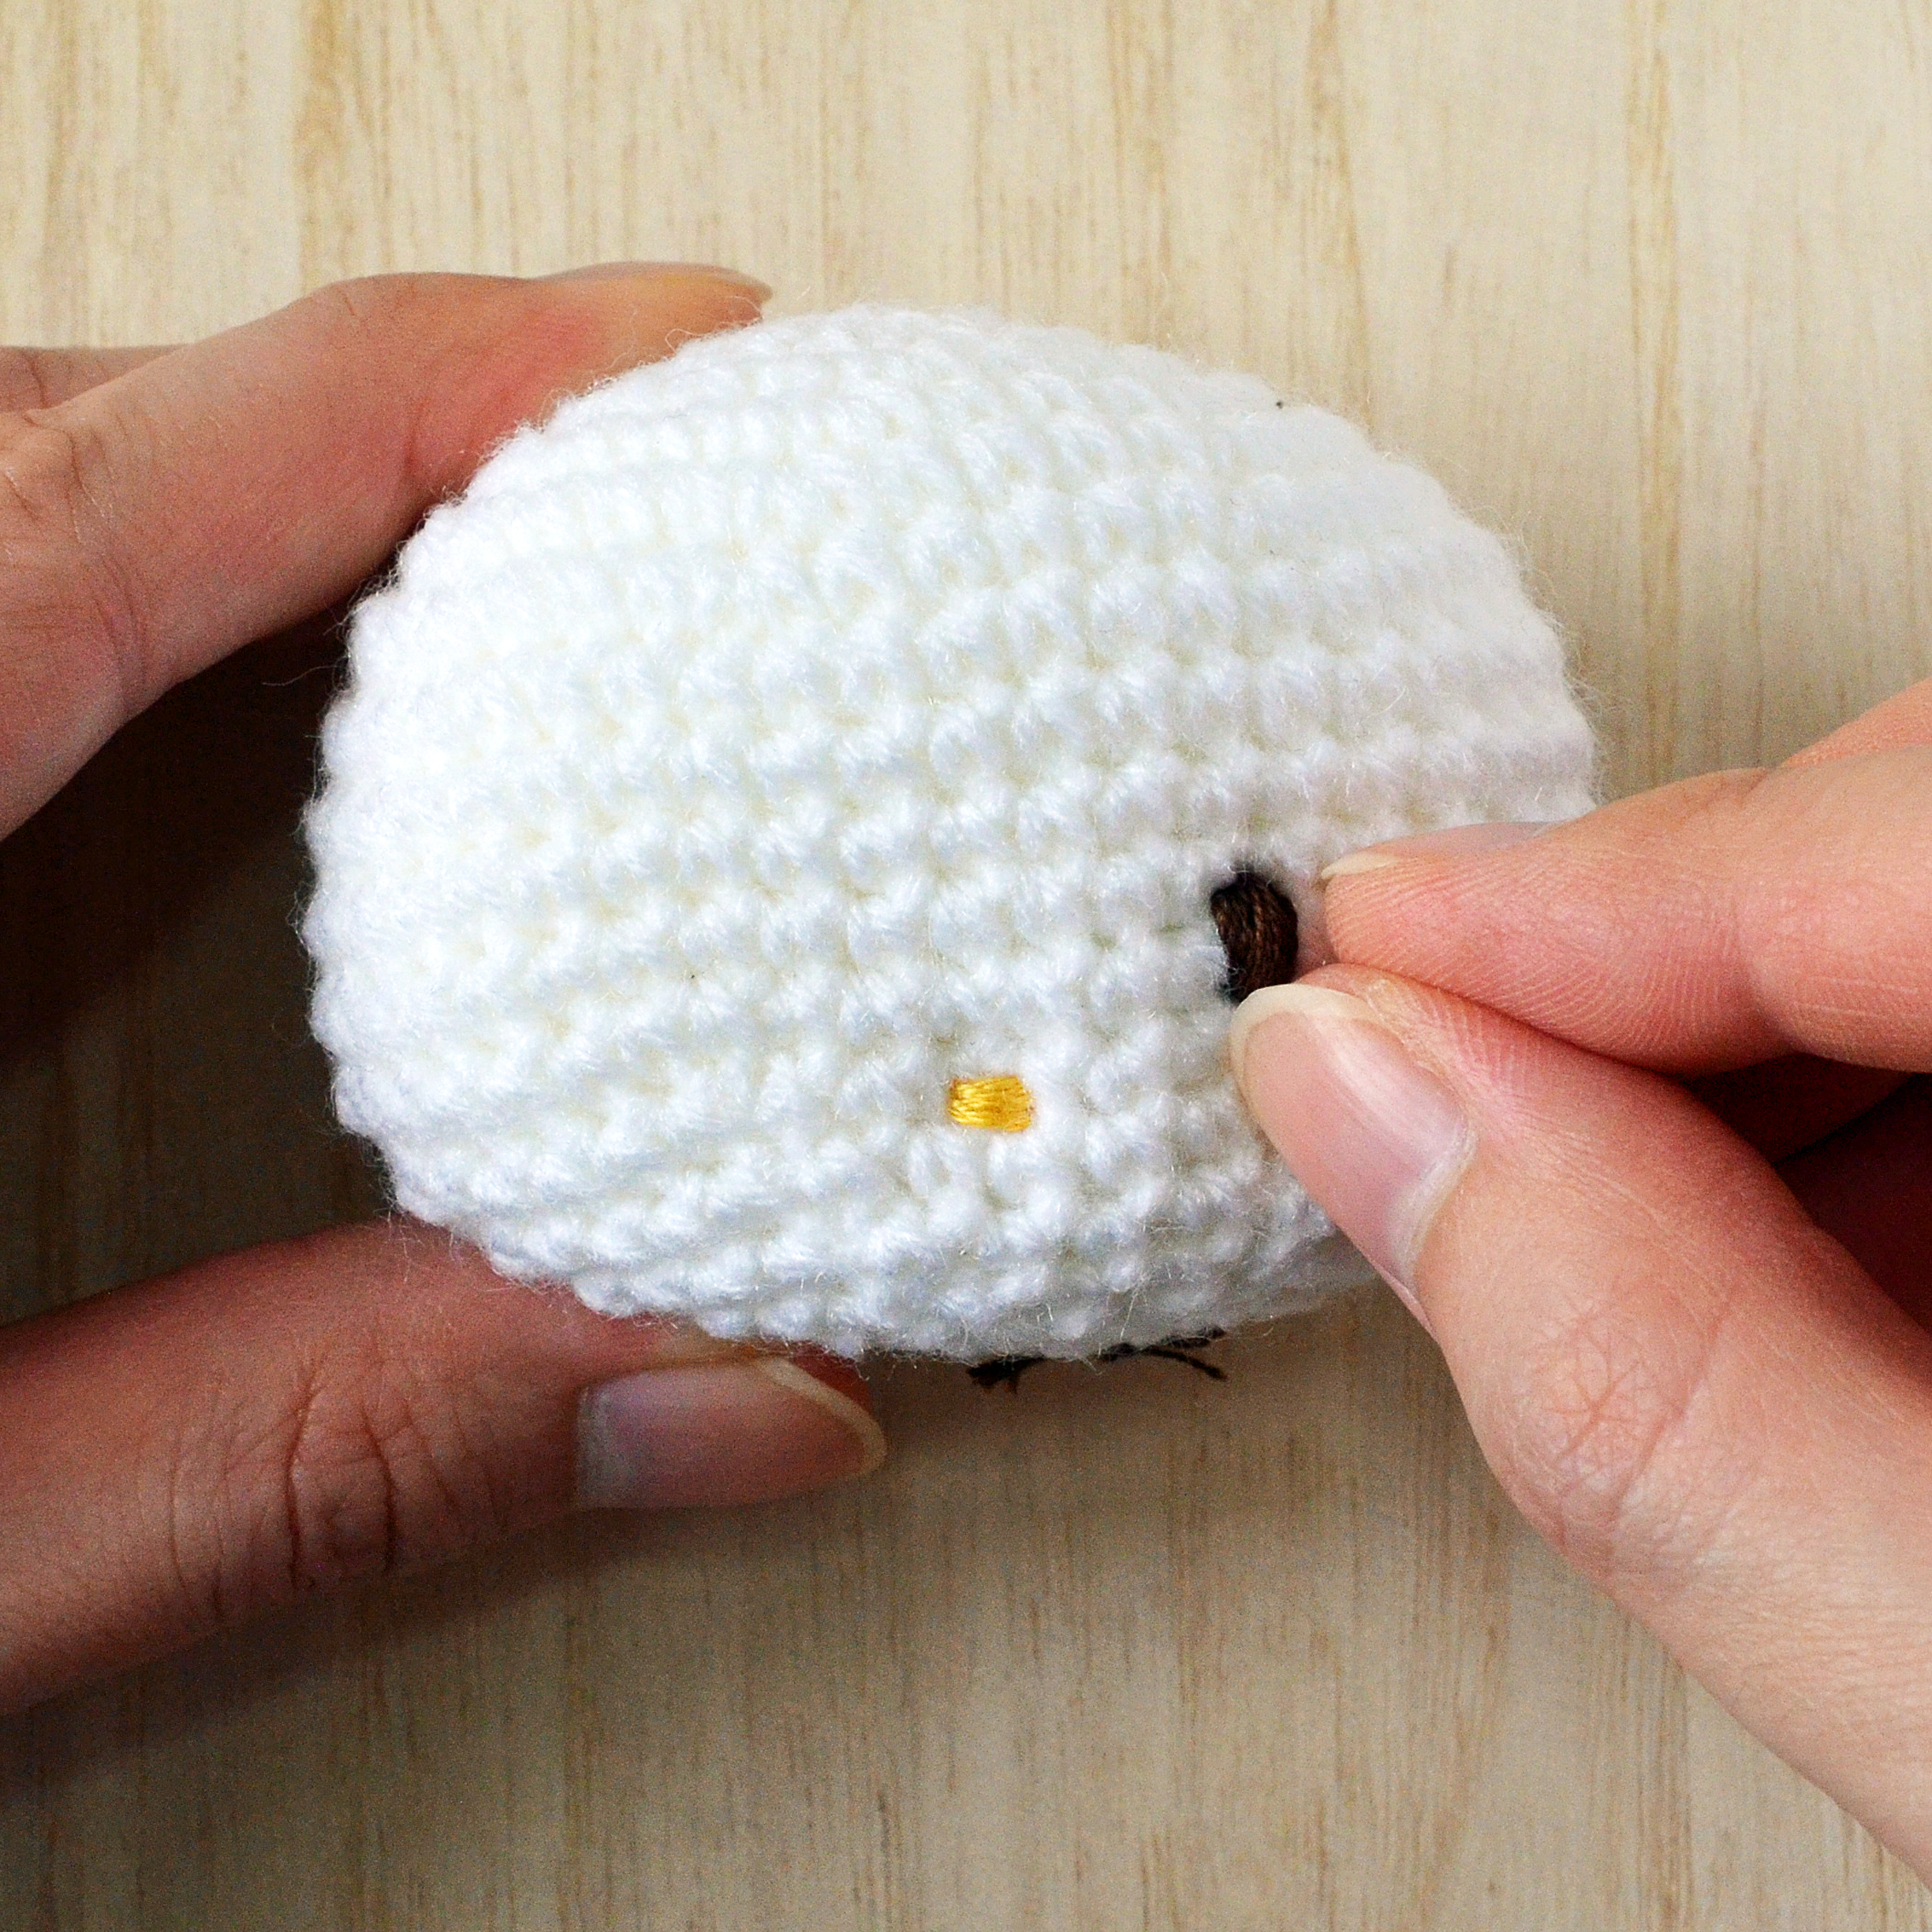
Hello Kitty and her daffodil-coloured nose:
Step 1: Hold the head piece so that the flattened part of the face faces you.
Step 2: Count to Round 12.
Step 3: Start sewing directly below this round. The idea is for the nose to run from the start of Round 13. You can add on more or less stitches — mine usually consists of about six to eight horizontal backstitches.
Psst: You will find that the positioning of the nose/eyes can drastically change the look of your Hello Kitty. The best way to go about it is to ensure that the line of the nose falls directly below the eyes 🙂

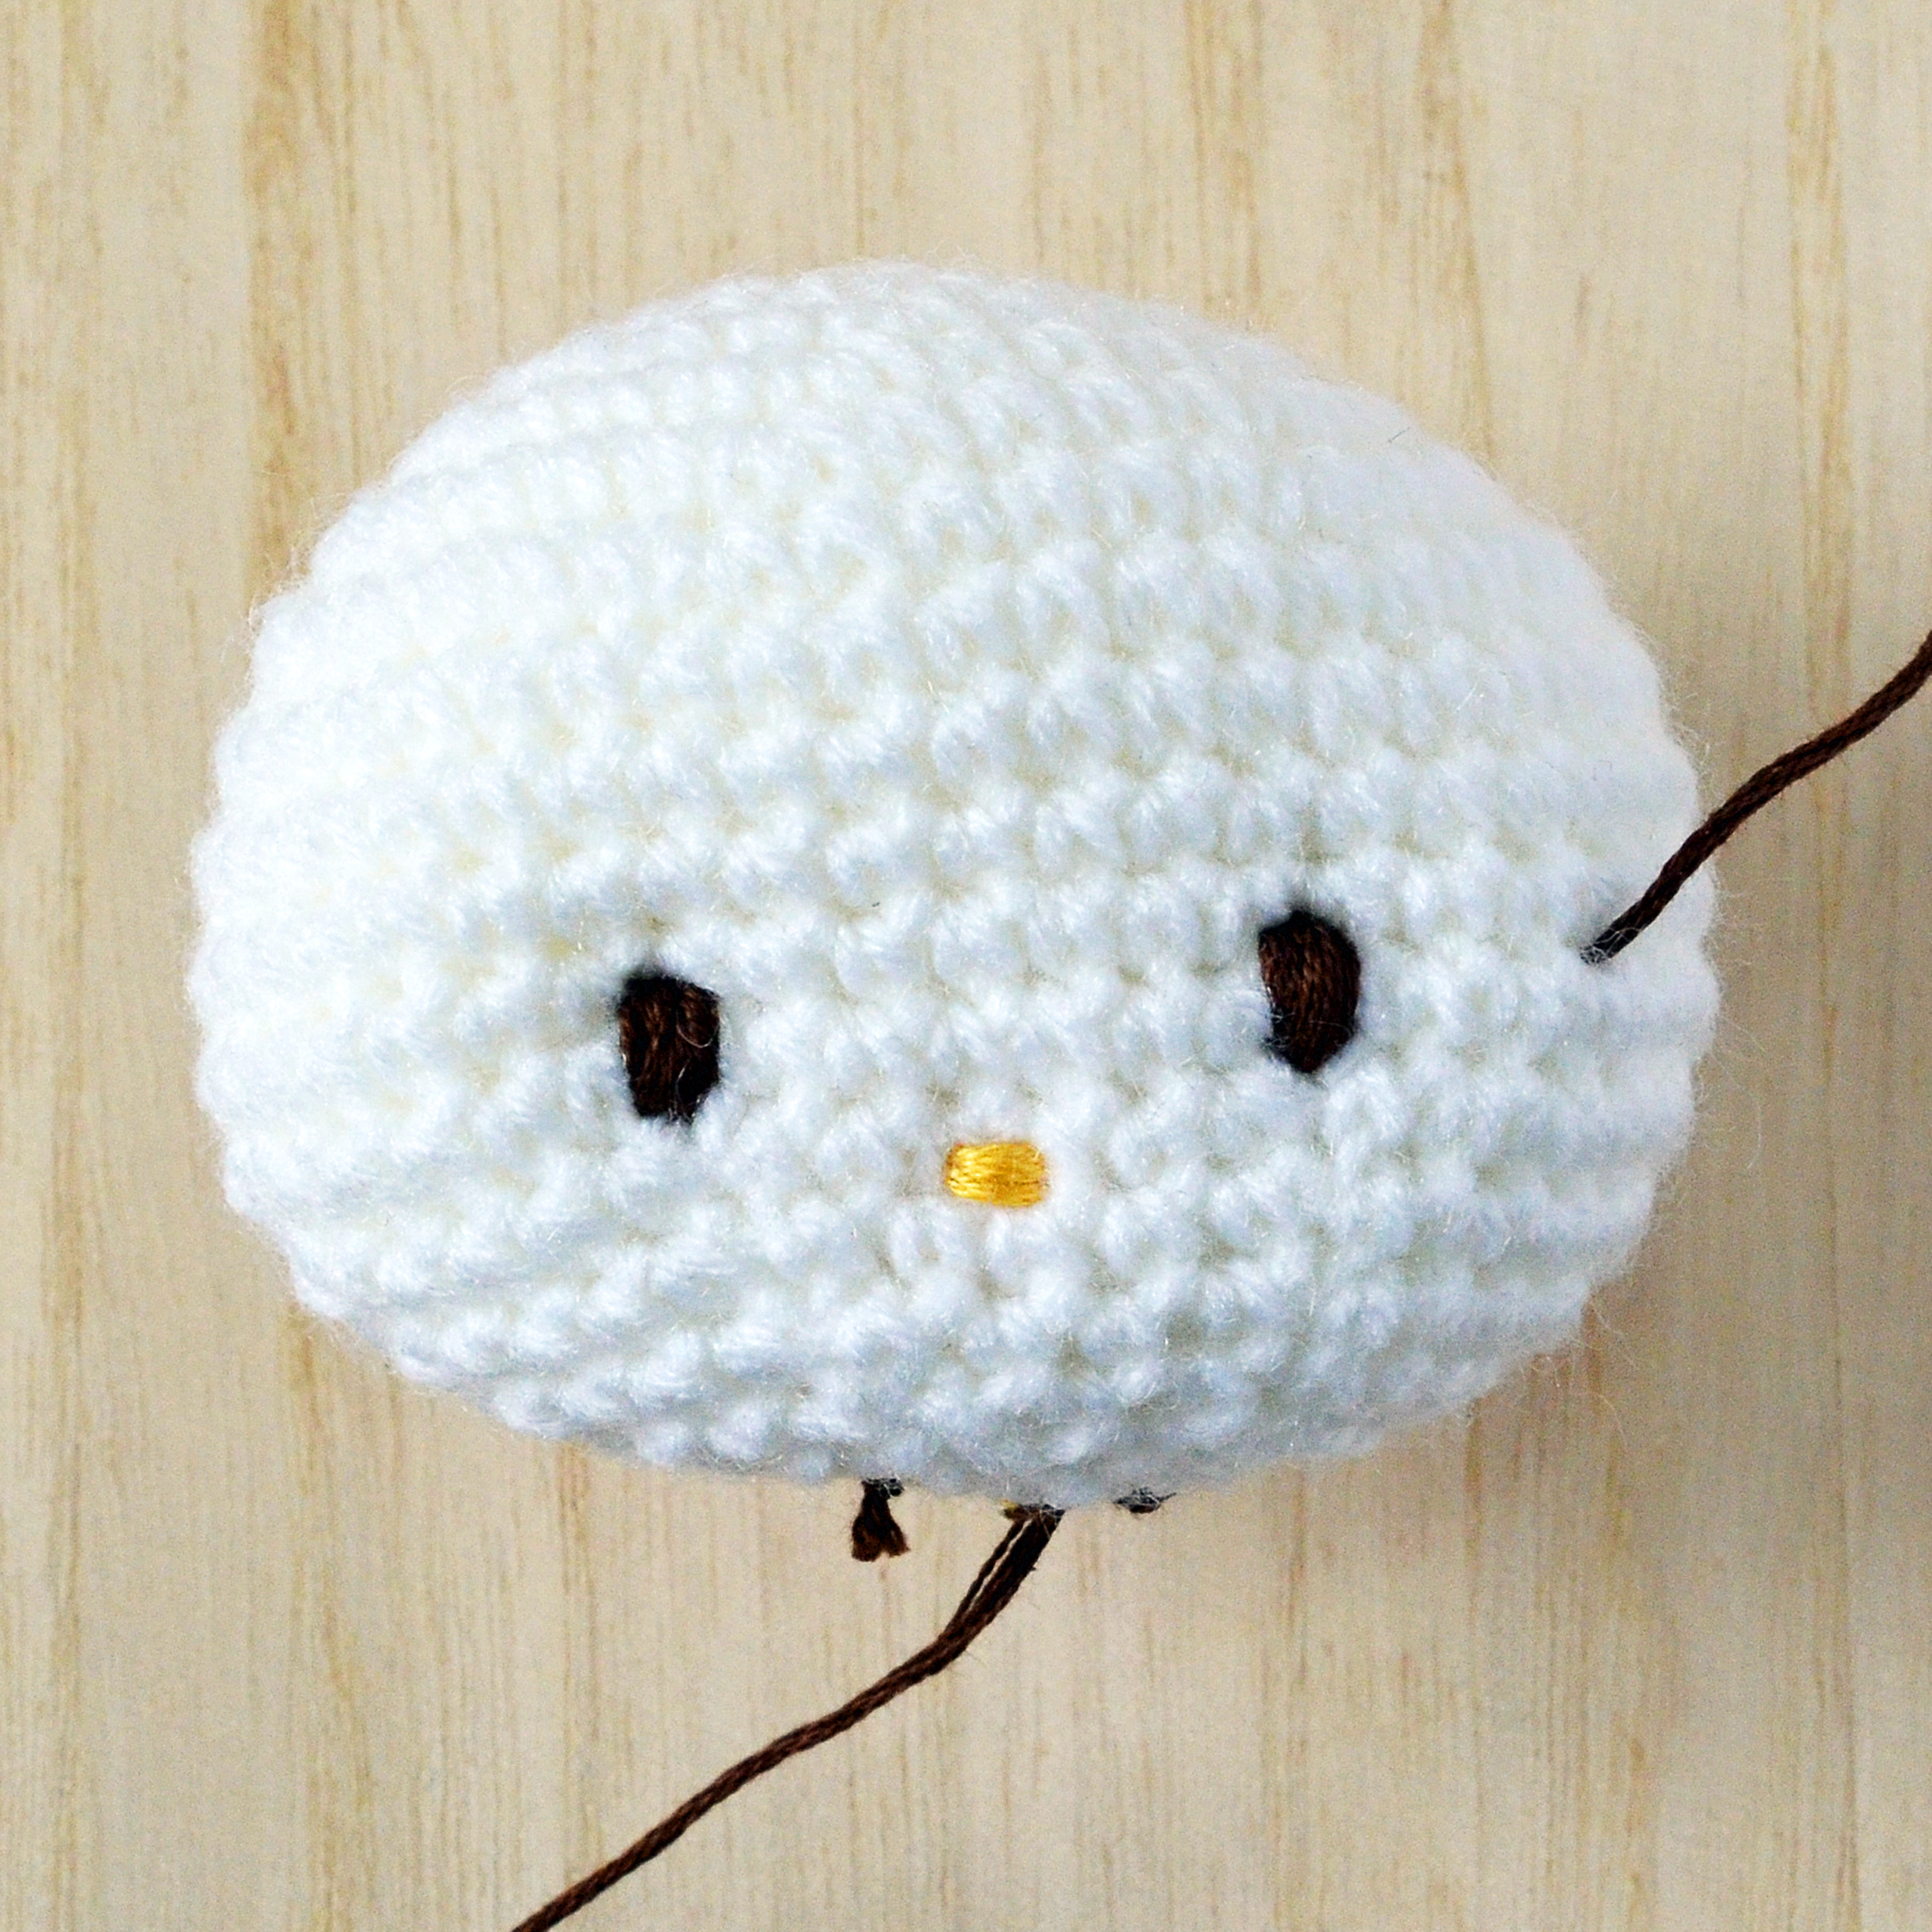
Hello Kitty and her brownie fudge eyes:
Step 1: Visually zone in on the third stitch away from the left/right hand side of the nose.
Step 2: Move this point two rows above to Round 11. This is where you should start sewing on the eyes.
Step 3: Simply embroider from Round 11 to Round 12 using vertical backstitches. I used 12 backstitches for each eye.
Step 4. After knotting off the ends at the bottom of the head, give the embroidered eyes a light pinch to make them slimmer and more oval-shaped.
Step 5: You can also gently press the eyes in to create a 3-dimensional kawaii look.


Do note that My Melody, and also Kuromi, have bigger winks than the rest of the gang 🙂

Hello Kitty and her chocolate-straw whiskers:
Step 1: Zone in on Round 11, on the third stitch away from each eye.
Step 2: Make a horizontal backstitch, which is two-stitches long.
Step 3: Repeat process to make the top and bottom whiskers, which should fall below Round 10 and Round 12.
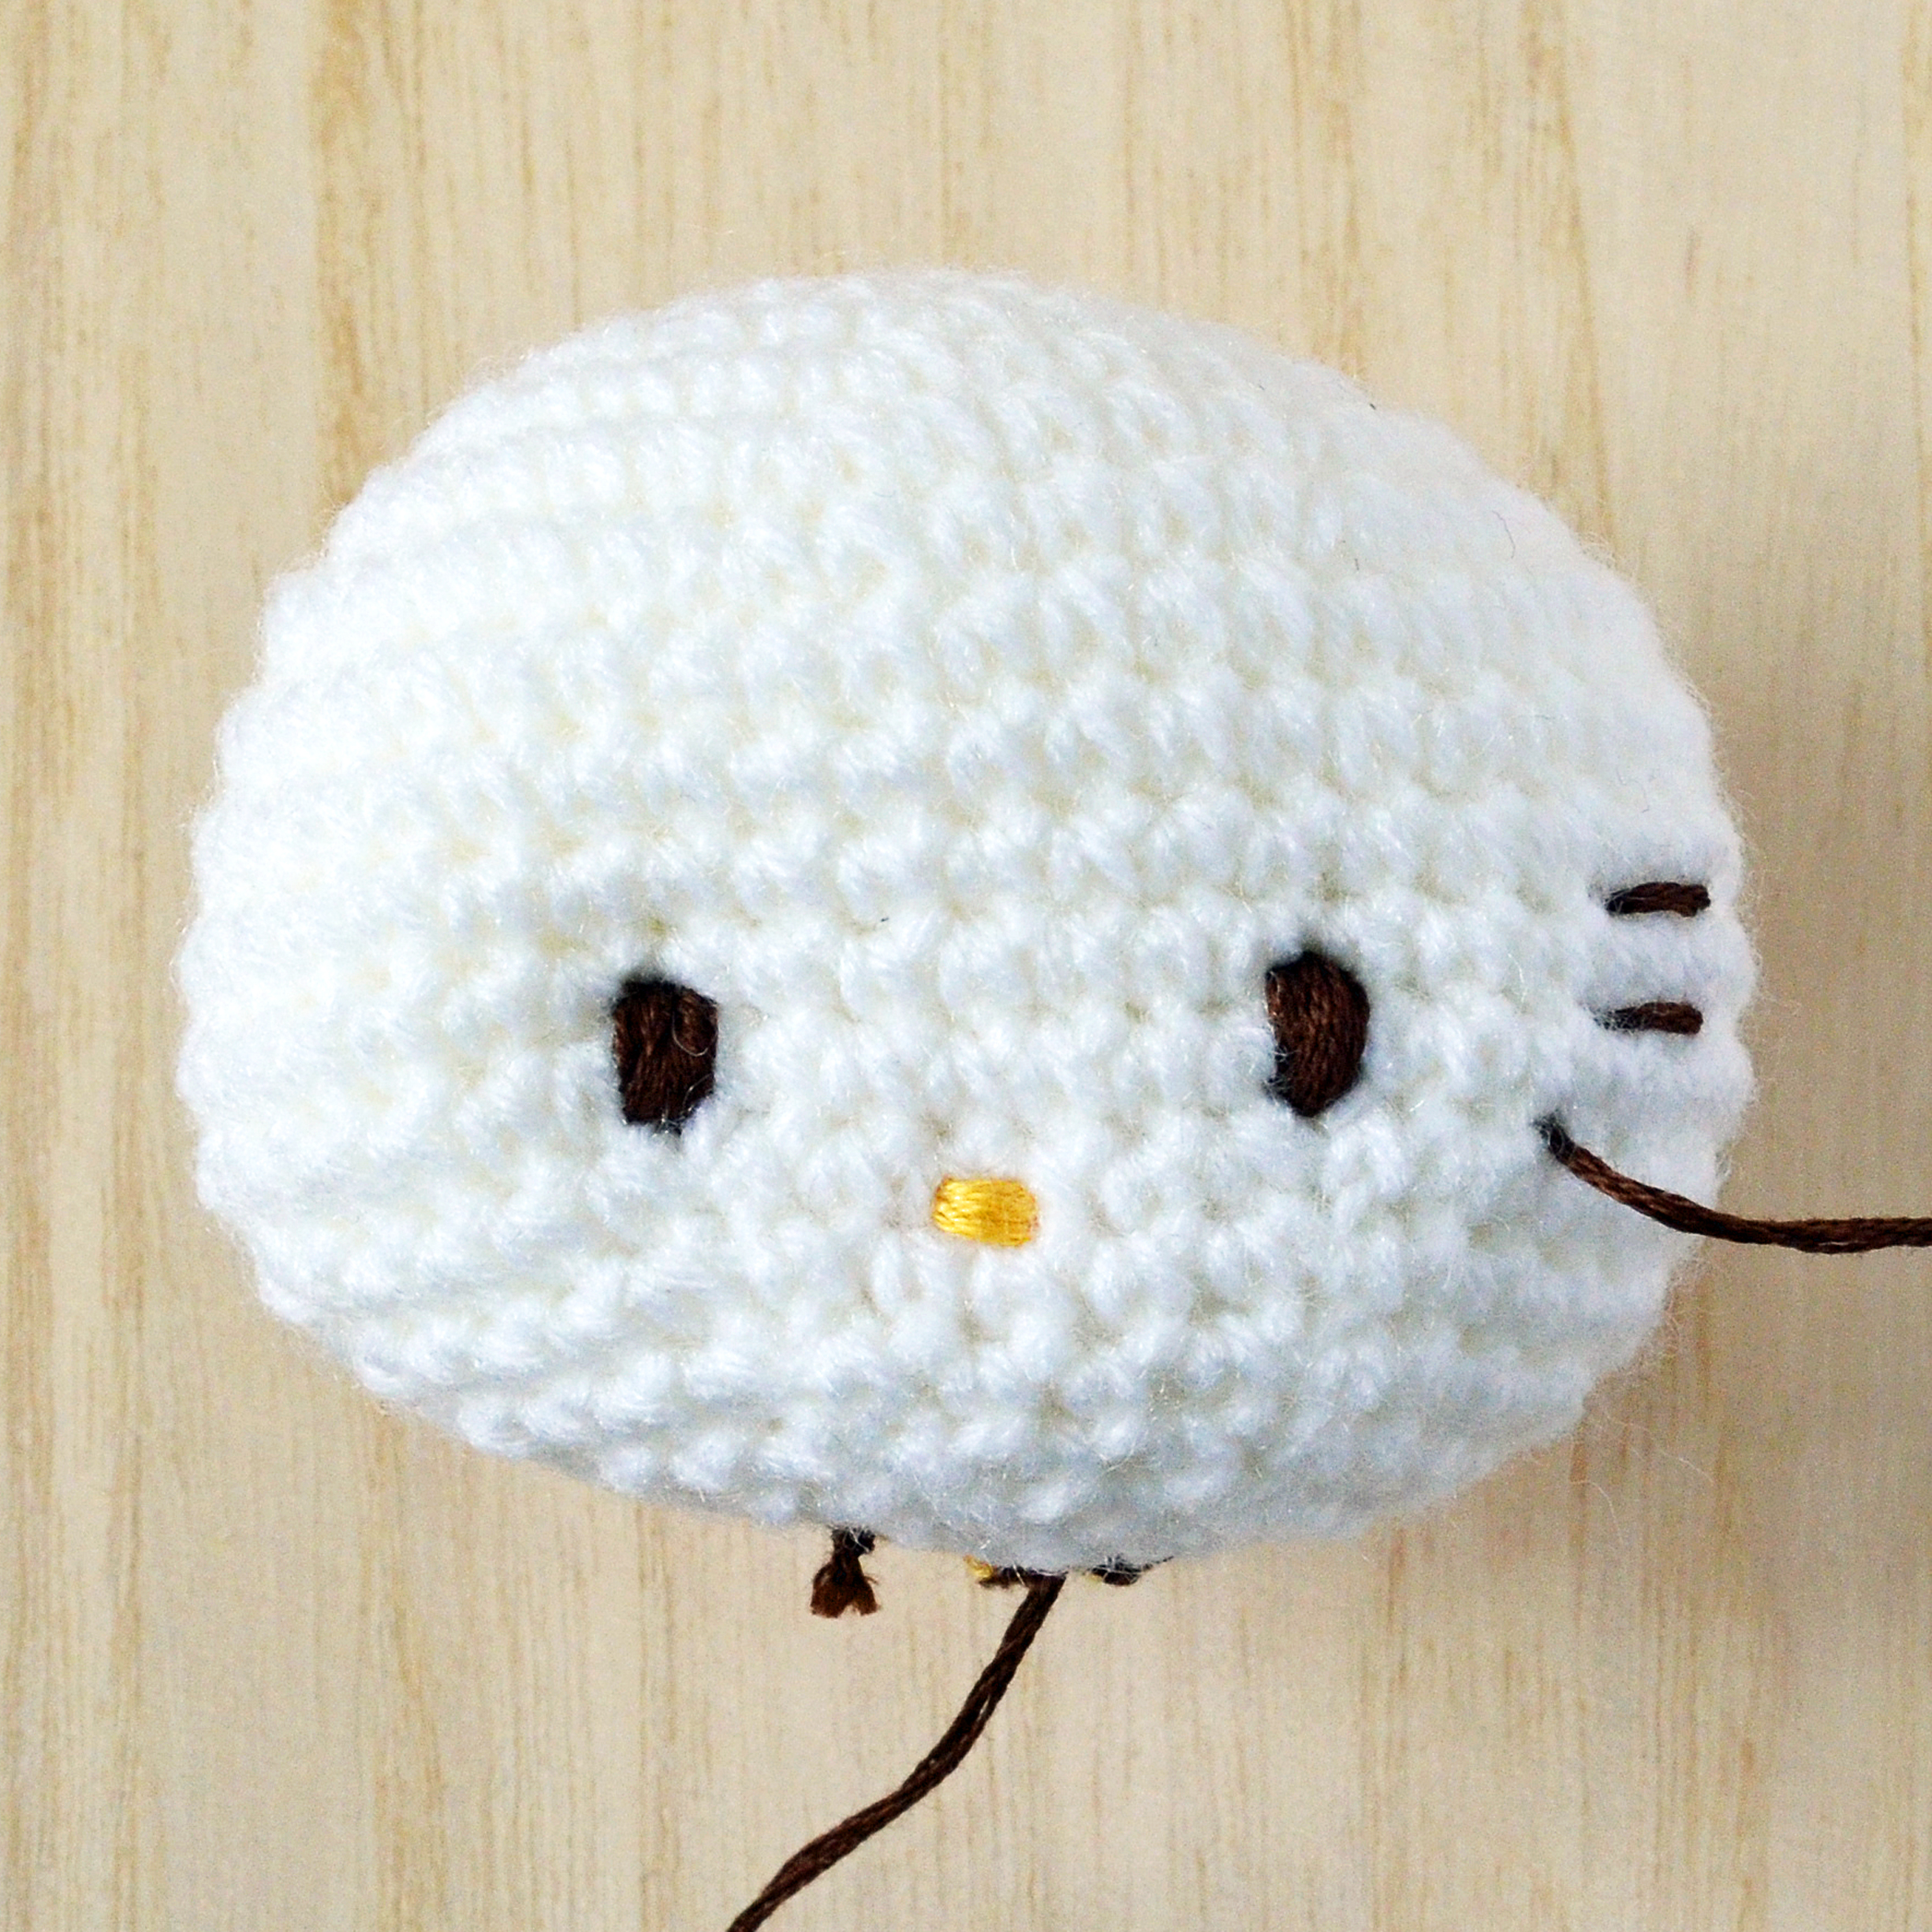
And there you have it. Enjoy!
P/S Up next, we’ll talk about jazzing up the basic hood 🙂

Can you please do the bow? the instructions in the book are a little confusing
yes! I agree! It took me a few tries!
Yes please.i can’t understand the instructions in the book either.been a few tries and still not getting anywhere. Thank you
Hi when will this book be available in Malaysia?
If I can buy your copy I would! xD
Hey there! My book is already available in Kinokuniya KLCC 🙂 i may be having a book signing event in Nov. Do come! You can follow any updates on my instagram or Facebook page @amiguruMEI 🙂
So helpful!
Hi Mei,
where can I buy the pattern for the cute little deer?
Hey Barbara! The deer pattern is in the Hello Kitty Crochet book 🙂
Hello…. I purchased your book but would also like to buy the digital copy as well. Will the digital copy be cheaper since I already have the book?
Thanks for the great blog posts about the book patterns. Might you at some point write a post about the use of safety eyes and brads? I’ve done both embroidered faces as well as safety eyes w/ your patterns & enjoy both. I would love to see what you have to say about safety eyes! 🙂 Thank you!!
Hey Barbie! That’s a good idea! Will definitely look into that!
Can you do a tutorial on how you connect the head to the body? In the book, you cannot see the stitches, but on my finished Pekkle, you can see the blue shirt on the white head. Am I suppose to Slst it together, or sew with a needle? I don’t see it in the book.
Hey there! I hope to do some video tutorials in the future! Oh when attaching parts, you should definitely use a darning needle. I usually attach smaller parts onto larger ones, so that the seems are a little less visible. Try it!
Can you tutorial on how to attach the head to the body?
HI Guys, I’ve finished my first Hello Kitty from the book but she doesn’t have rosy cheeks!!! i can’t find the brads. Where do you guys source your brads from? tried ebay no luck there. any online sellers in Malaysia?
Hi, may I know where can I purchase the ‘brads’ to make hello kitty cheeks? Which stall can I buy it in Malaysia?
Hi, Mei.
thanks for such a good works done.
I truely enjoy crocheting the hello kitty.
but i cant understand the pattern for the basic bow. hope that you can demonstrate it for explain further.
TQ
I also have trouble with the bow. I feel like there must be an error in the book. I have sent her a private message. For the other ones I made (I’m on my 4th), I basically had to make up my own pattern. But I would rather use the one from the book.
Umm.. will your book available in Indonesia..?