Please excuse us for the longest absence ever — something super-exciting is currently in the works, and that’s taking up almost all of our time (I promise to share more when I can).
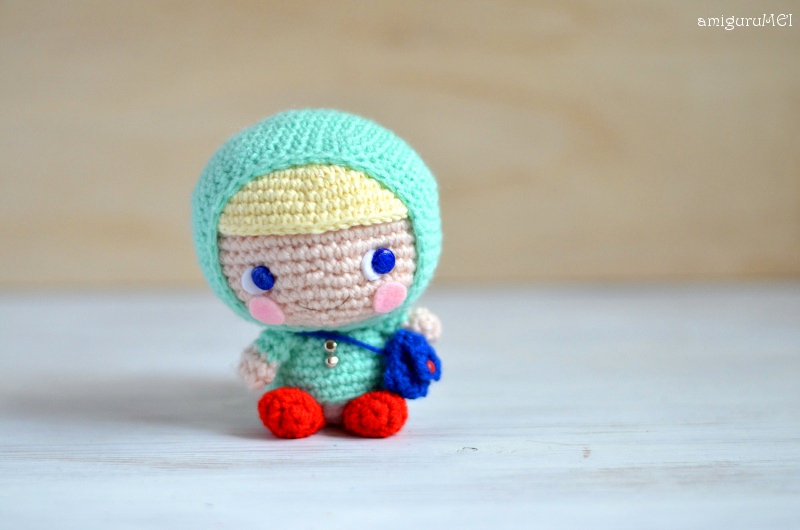
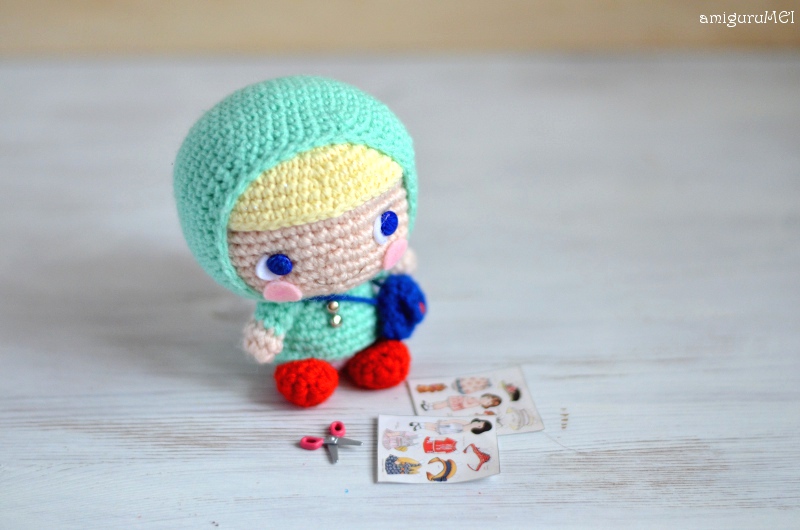
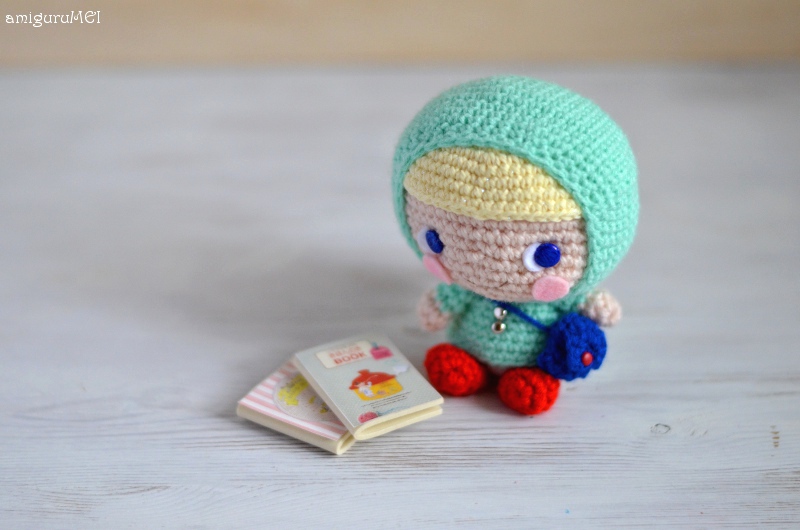
By the way, have you met Satsuki-chan? She shares the same birthday as I do, and is a little darling inspired by a Hersberry illustration.
She is never without her cobalt-blue bag and cool red boots.
Her favourite pastime? Splashing about in rainwater puddles. But if that’s not an option, well, staying indoors is fine too, but ONLY if there’s a Japanese handicraft book or two to be read.
Rain rain come again…Drats. I still don’t heart a drizzle…Maybe it’ll rain tomorrow…
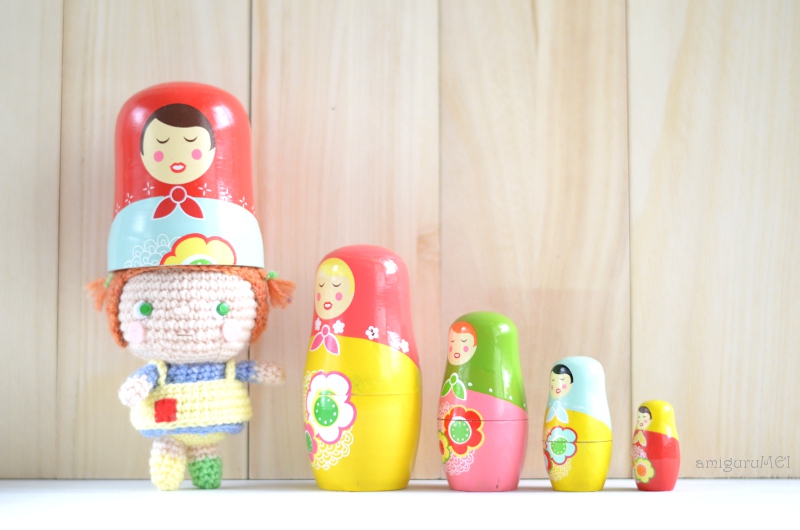
Not too long ago, we were given the fun experience to work with HTC Malaysia on a super-cool project, first for the HTC One X+ and now, the spanking new HTC One.
We were given the chance to combine our amigurumi photo-taking abilities with the advanced photo features of the two phones (do check in on our Instagram to see our almost-daily posts taken with the amazing HTC One).
A video of our interview with the happy team at HTC is still available here.
Check out this cute stop-motion video of the amiguruMEI gang, written and filmed by a bunch of young talents (who were willing to give our fibre-filled friends their 15 minutes’ of fame!)
P/S A set of limited edition Android dolls were designed for HTC Malaysia, and given away as prizes for a slogan-writing competition 🙂
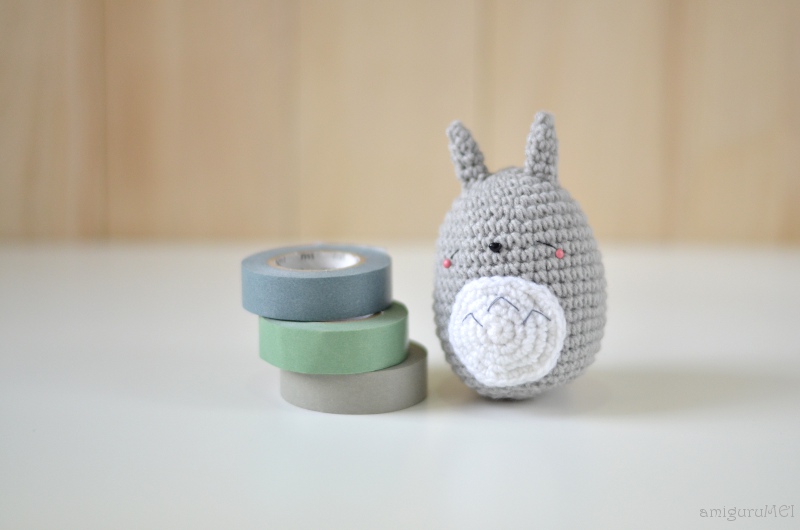
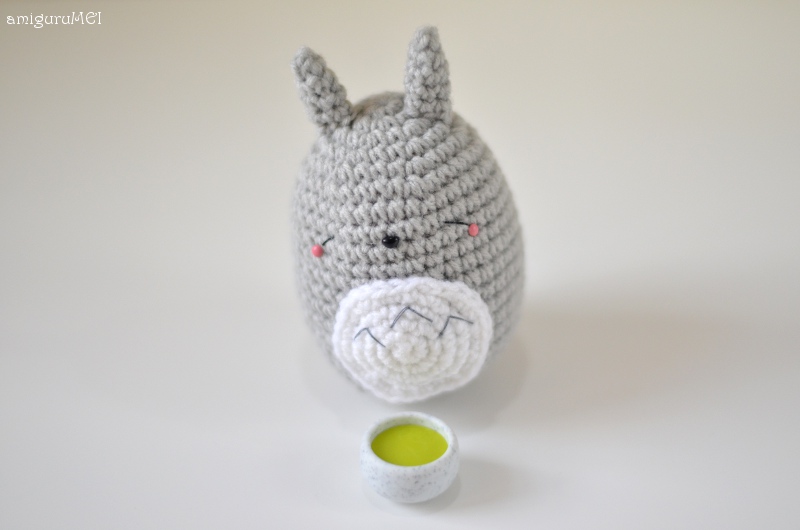
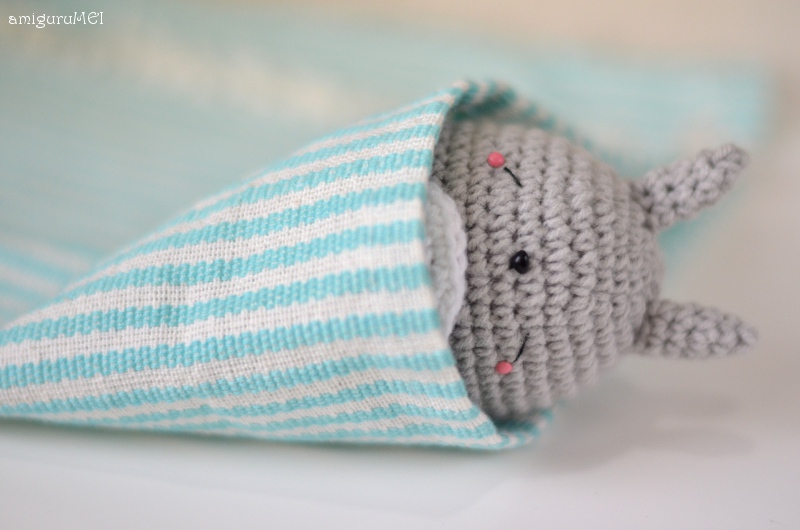
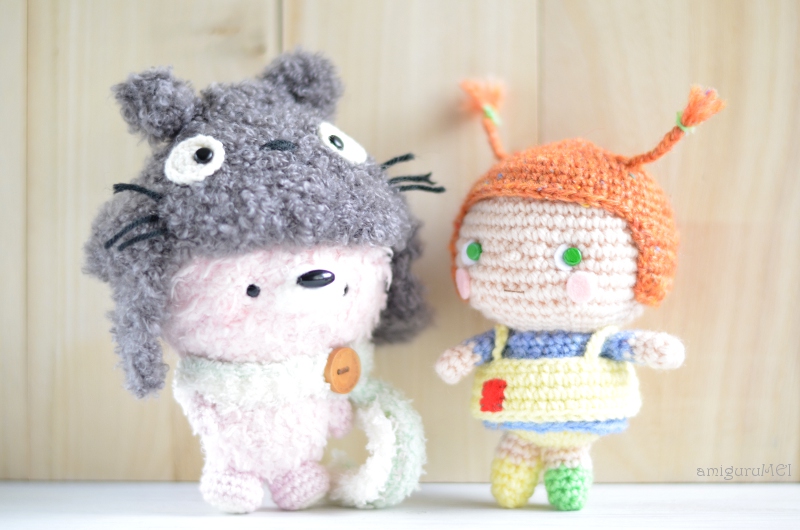
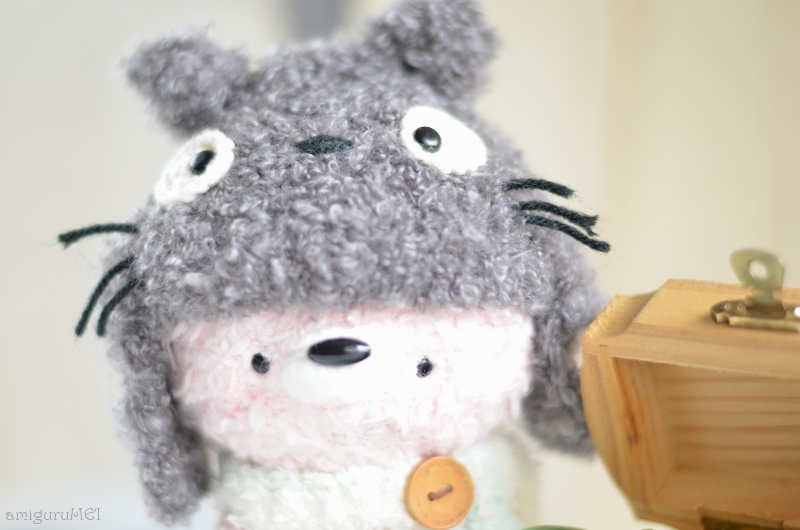
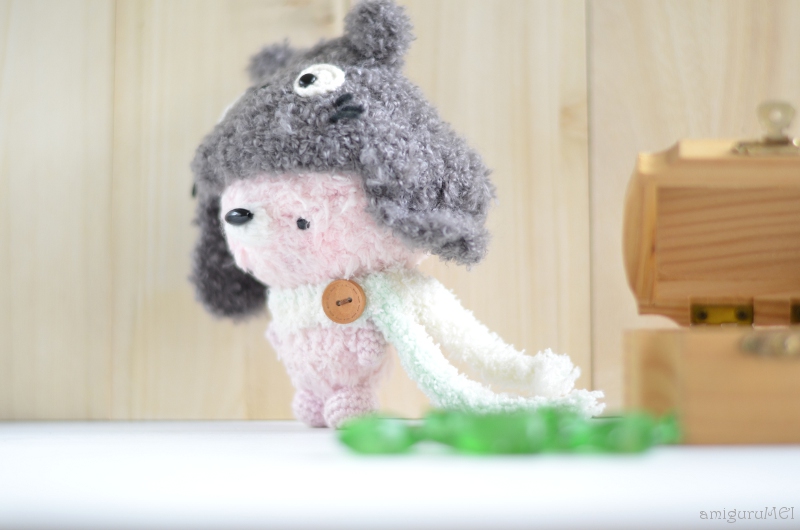
Awhile ago, we organised our very first Sleeping Totoro amiguruMEI giveaway.
Due to the numerous requests from amigurumi and Studio Ghibli lovers around the world, we’d like to share this original pattern with you, so you too can make your own kawaii Sleeping Totoro!
The pattern is easy enough for beginners, and the end result would make any anime fan a happy camper!
Enjoy!
Zzzzz…Zzzzz…
Make your own Sleeping Totoro!
Abbreviations
Ch: chain
Sc: single crochet
Dc: double crochet
Inv dec: invisible decrease
Materials
2.00 mm hook
Similar sized yarn in white and grey
Sewing thread in black and dark grey
4mm triangle plastic nose
Pink brads
Sewing needle
Darning needle
Polyester fiberfill
Zzzzz…
Body
With grey yarn:
Round 1: Sc 6 in magic ring {6}.
Round 2: [Inc] around {12}.
Round 3: [Inc, sc 1] around {18}.
Round 4: [Inc, sc 2] around {24}.
Round 5: [Inc, sc 3] around {30}.
Round 6: [Inc, sc 4] around {36}.
Round 7-18: Sc around {36}.
Round 19: [Inv dec, sc 4] around {30}.
Round 20: [Inv dec, sc 3] around {24}.
Round 21: [Inv dec, sc 2] around {18}.
Stuff head.
Round 22: [Inv dec, sc 1] around {12}.
Round 23: [Inv dec] around {6}.
Fasten off and weave in ends.
Tummy
With white yarn:
Round 1: Sc 6 in magic ring {6}.
Round 2: [Inc] around {12}.
Round 3: [Inc, sc 1] around {18}.
Round 4: [Inc, sc 2] around {24}.
Round 5: [Inc, sc 3] around {30}.
Fasten off by making slip stitches in the next 3 sts. Leave a long tail for sewing.
Ears (make 2)
With grey yarn:
Round 1: Sc 3 in magic ring {3}.
Round 2: [Inc] around {6}.
Round 3-5: Sc around {6}.
Fasten off and leave a long tail for sewing.
Tail
With grey yarn:
Round 1: Sc 6 in magic ring {6}.
Round 2: [Inc] around {12}.
Round 3: Sc around {12}.
Round 4: [Inv dec] around {6}.
Fasten off and leave a long tail for sewing.
Assembly
Glue on the triangle nose below Round 8.
For the eyes, count 3 stitches from the nose. Then make one simple diagonal backstitch (with black sewing thread) from the middle of Round 8 to the middle of Round 9. Repeat on the other side.
Glue pink brads onto the cheeks.
Sew 3 arrow tops (with dark grey sewing thread) onto the white tummy.
Sew the white tummy onto the body using a backstitch (this will give a neater effect as compared to the whipstitch method).
Sew on the ears. They should fall below Round 2 of the body, about one-thumb apart.
Sew on the tail at the back of the body. Tada!
As this is an original amiguruMEI pattern, kindly do not claim it as your own. You may place a link to this pattern from your site, but please do not repost it onto your page. Remember to share a picture of your own kawaii Sleeping Totoro with us!
It’s been a year since we shared our first pattern, Sayo & Nara-chan.
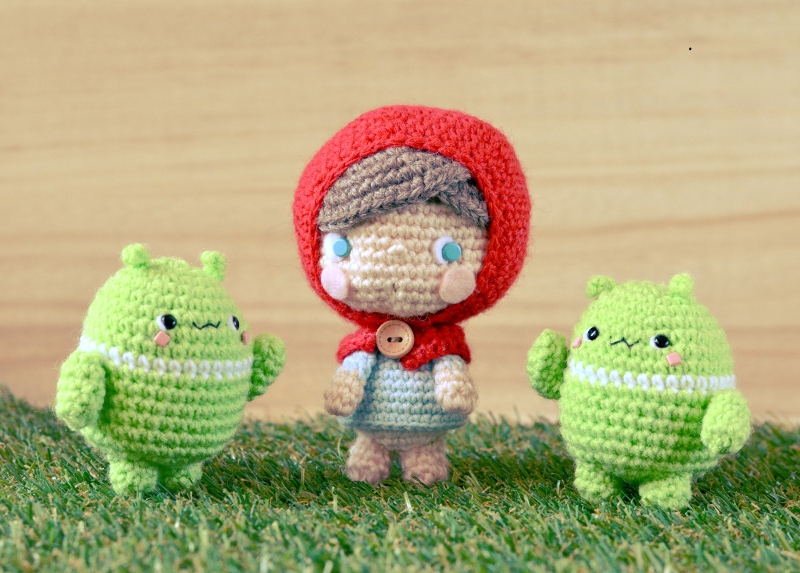
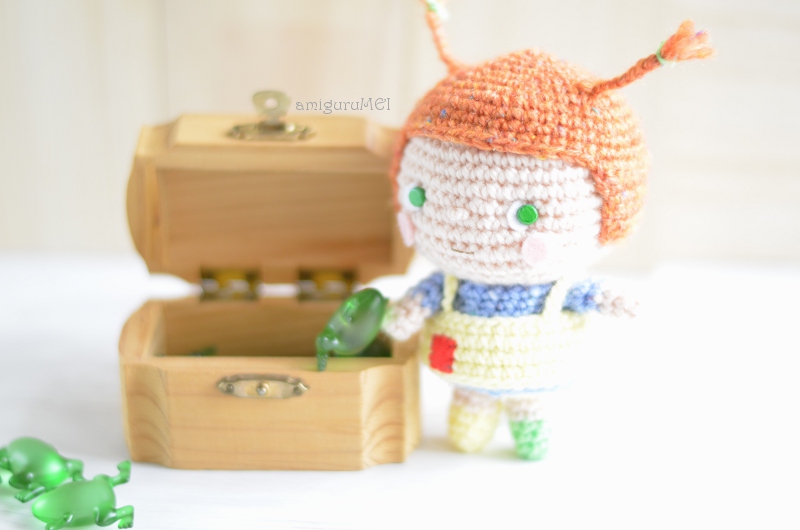
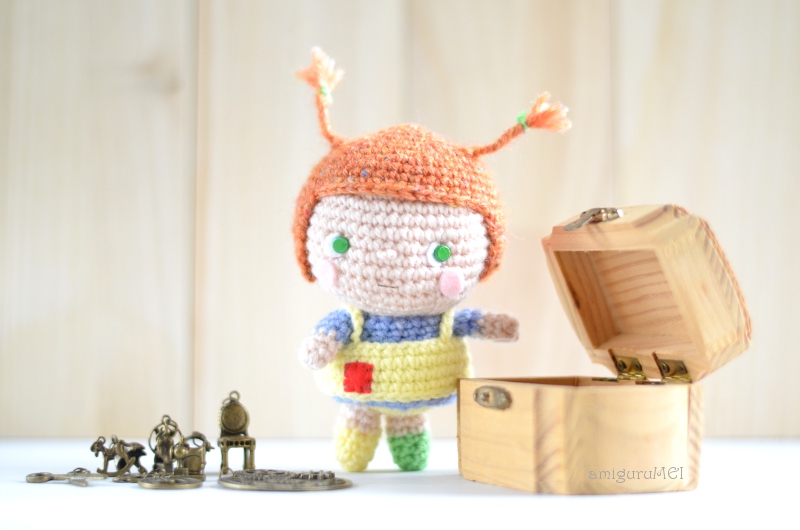
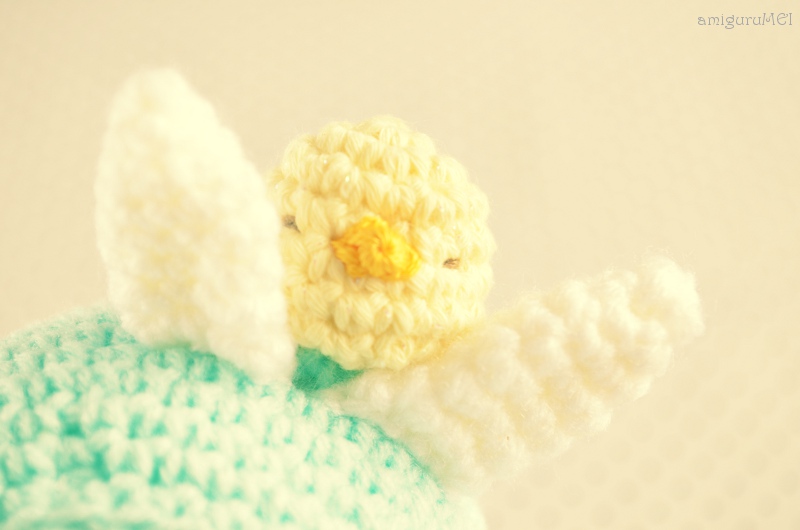
Easter is almost here again and this time, we have Haru-chan and her pet chick, Chioux, to join us for the celebration.
Spring is Haru-chan’s favourite season of the year. She is a big fan of jelly-filled chocolate and cute little animals. Her free time is spent rescuing stray animals – lil’ Chioux being one of them. That happened a long time ago, one cold, rainy day.
Now the two are the best of friends and all ready for some Easter fun!
Say hello, Chioux!Poor eggies…Ahhhh…spring!
Make your own Haru-chan and baby Chioux!
Abbreviations
Ch: chain
Sc: single crochet
Dc: double crochet
Inv dec: invisible decrease
Materials
2.50 mm hook
1.75mm hook
Similar sized yarn in white, cyan and pastel yellow
Embroidery thread in mustard yellow
Sewing thread in dark brown
Blue brads
Pink felt
Sewing needle
Darning needle
Polyester fiberfill
Head
With white yarn:
Round 1: 6 sc in magic circle (6)
Round 2: 2 sc in each sc around (12)
Round 3: *2 sc, sc in next sc*, repeat 6 times (18)
Round 4: *2sc, sc in next 2 sc*, repeat 6 times (24)
Round 5: *2 sc, sc in next 3 sc*, repeat 6 times (30)
Round 6: *2 sc, sc in next 4 sc*, repeat 6 times (36)
Round 7: *2 sc, sc in next 5 sc*, repeat 6 times (42)
Round 8 – 13: Sc in each sc around (42)
Round 14: *Inv dec, sc in next 5 sc*, repeat 6 times (36)
Round 15: *Inv dec, sc in next 4 sc*, repeat 6 times (30)
Round 16: * Inv dec, sc in next 3 sc*, repeat 6 times (24)
Round 17: * Inv dec, sc in next 2 sc*, repeat 6 times (18)
Begin stuffing the head.
Round 18: * Inv dec, sc in next 1 sc*, repeat 6 times (12)
Round 19: Inv dec all around (6)
Fasten off and weave in ends.
Designing the face
Eyes:
Pop in the blue brads below Round 10.
There should be 6 stitches in between each eye.
With your dark brown sewing thread, sew a small diagonal stitch from the side-centre to the top-centre of each eye.
Knot the ends off at the bottom of the head, which will be hidden later on when you place the head in the hood.
Nose & mouth:
With dark brown sewing thread:
Thread your needle through from the bottom of the head to the centre between the eyes on Round 10.
Sew a vertical line to the bottom of Round 11.
Make small backstitches to the left and right of this line to form curves for the mouth.
Knot the ends off at the bottom of the head.
Hood
With cyan yarn:
Round 1: 6 sc in magic circle (6)
Round 2: 2 sc in each sc around (12)
Round 3: *2 sc, sc in next sc*, repeat 6 times (18)
Round 4: *2 sc, sc in next 2 sc*, repeat 6 times (24)
Round 5: *2 sc, sc in next 3 sc*, repeat 6 times (30)
Round 6: *2 sc, sc in next 4 sc*, repeat 6 times (36)
Round 7: *2 sc, sc in next 5 sc*, repeat 6 times (42)
Round 8 – 14: Sc in each sc around (42)
Place the finished head inside the hood then continue with the next round.
Round 15: *Inv dec, sc in next 5 sc*, repeat 6 times (36)
Round 16: Sc in each sc around (36)
Round 17: *Inv dec, sc in next 4 sc*, repeat 6 times (30)
Fasten off and leave a long end for sewing.
Using a backstitch, secure the hood in place and trim excess yarn.
Body
With white yarn:
Round 1: 6 sc in magic circle (6)
Round 2: 2 sc in each sc around (12)
Round 3: *2 sc, sc in next sc*, repeat 6 times (18)
Round 4: *2 sc, sc in next 2 sc*, repeat 6 times (24)
Round 5 – 8: Sc in each sc around (24)
Round 9: * Inv dec, sc in next 2 sc*, repeat 6 times (18)
Fasten off and leave a long end for sewing.
Stuff with polyester fibre.
Ears (make 2)
With white yarn and 1.75mm hook:
Round 1: 3 sc in magic circle (3)
Round 2: 2 sc in each sc around (6)
Round 3: *2 sc, sc in next sc*, repeat 3 times (9)
Round 4 – 9: Sc in each sc around (9)
Fasten off and leave a long end for sewing.
Arms (make 2)
With white yarn and 1.75mm hook:
Round 1: 7 sc in magic circle (7)
Round 2 – 6: Sc in each sc around (7)
Fasten off and leave a long end for sewing.
Legs (make 2)
With white yarn and 1.75mm hook:
Round 1: 5 sc in magic circle (5)
Round 2: 2 sc in each sc around (10)
Round 3: Sc in each sc around (10)
Fasten off and leave a long end for sewing.
Tail
With white yarn and 1.75mm hook:
Round 1: 7 sc in magic circle (7)
Fasten off (ss to first st) and leave a long end for sewing.
Pet chick (body)
With pastel yellow yarn and 1.75mm hook:
Round 1: 6 sc in magic circle (6)
Round 2: 2 sc in each sc around (12)
Round 3: *2 sc, sc in next sc*, repeat 6 times (18)
Round 4 – 6: Sc in each sc around (18)
Round 7: * Inv dec, sc in next sc*, repeat 6 times (12)
Stuff with polyester fibre.
Round 8: Inv dec all around (6)
Fasten off and leave a long end for sewing.
Pet chick (beak)
With mustard yellow embroidery thread and 1.75mm hook:
Round 1: 3 sc in magic circle (3)
Fasten off and leave a long end for sewing.
Flatten the piece and sew it into the body of the pet chick, below Round 4.
Assembly
Sew the body onto the hood (that should now contain the head).
Sew the arms onto the front of the body, right below the hood.
Sew on the legs.
Sew on the tail.
Sew on the ears – give the pieces a slight pinch to mould them into shape.
Give the pet chick a pair of eyes – use the dark brown sewing thread to make a small horizontal line, one stitch away, to the left and right of the beak.
Sew the pet chick onto Haru-chan’s hood. Let it peek out from between her ears.
Cut two small round pieces of pink felt and glue them onto the cheeks.
As this is an original amiguruMEI pattern, kindly do not claim it as your own. You may place a link to this pattern from your site, but please do not repost it onto your page. Remember to share a picture of your own kawaii versions of Haru-chan and tiny Chioux with us!